The Art of Precision: A Comprehensive Guide to CNC Engraving
In the world of precision parts machining and customization, the ability to transform a flat surface into a detailed, functional, or artistic masterpiece is a fundamental capability. Among the various techniques available, CNC engraving stands out as a versatile, reliable, and highly precise method for adding text, logos, intricate patterns, and functional markings to a vast array of materials. For clients seeking to understand and leverage this technology, this guide delves deep into the how, why, and when of using a CNC machine for engraving.
At its core, CNC engraving is a subtractive manufacturing process where a computer-controlled rotating cutting tool removes material from a workpiece to create designs at varying depths. Unlike simple marking, engraving physically cuts into the material, creating durable, tactile, and often visually striking features. This process is integral to industries ranging from aerospace (for part identification) to medical devices (for measurement scales) and high-end consumer electronics (for brand logos).
CNC Engraving vs. Other Marking Methods
Understanding where CNC engraving fits in the landscape of part marking is crucial for specifying the right process for your project.

CNC Engraving: Uses an end mill or specialized engraving tool to carve material. It produces chips, creates depth, and offers excellent durability and legibility. Ideal for permanent identifiers, deep logos, and parts subject to wear or harsh environments.
Laser Engraving/Marking: Uses a high-power laser to burn, melt, or discolor the material surface. It is a non-contact, high-speed process excellent for fine details on metals, plastics, and wood. However, it may not provide the same tactile depth or be suitable for all materials (e.g., it can leave a heat-affected zone on some metals).
Dot Peen Marking: Uses a stylus to create a series of dots to form characters. It is a fast, low-cost method for serial numbers and basic data matrix codes but lacks the fine detail and aesthetic finish of CNC or laser engraving.
For projects demanding uncompromising depth, material integrity without thermal distortion, and the ability to machine and engrave in a single setup, CNC engraving is frequently the superior choice.
The CNC Engraving Process: From Digital Design to Physical Part
The journey of how to engrave using a CNC machine follows a systematic, digital workflow:
Design Creation (CAD): The process begins with a vector-based 2D design or a 3D model containing the engraving features. Software like AutoCAD, SolidWorks, or Fusion 360 is used to create precise geometries for text (using single-line or TrueType fonts), logos, or patterns.
Toolpath Generation (CAM): The CAD file is imported into Computer-Aided Manufacturing (CAM) software. Here, the machinist defines:
Tool Selection: Choosing the correct engraving tool (e.g., a V-bit with a 60° or 90° included angle for sharp lines, or a ball-nose end mill for 3D relief engraving).
Cutting Parameters: Setting the spindle speed (RPM), feed rate, and depth of cut. These are critical for achieving clean lines without tool breakage or material tearing.
Toolpaths: Generating the precise routes the tool will follow, including depth passes and finishing passes.
Machine Setup: The prepared toolpath code (typically G-code) is loaded into the CNC machine (mill, router, or specialized engraving machine). The workpiece is securely fixtured to the machine bed, and the selected engraving tool is loaded into the spindle.
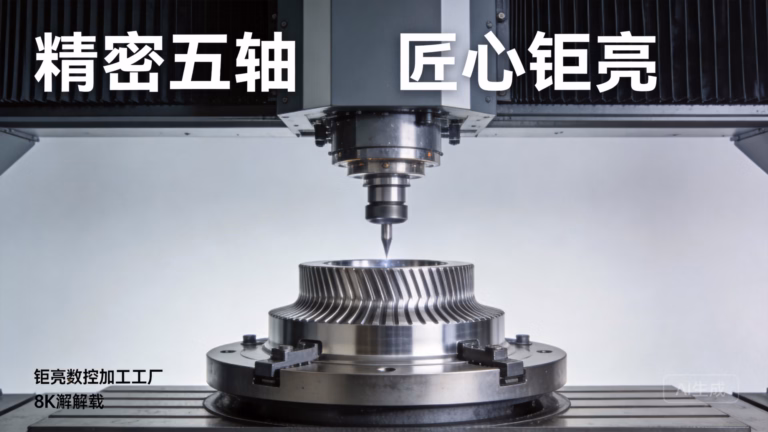
The Engraving Operation: The CNC controller executes the G-code, moving the spindle and tool along the X, Y, and Z axes with micron-level precision. The rotating tool plunges and moves to cut the design into the material. For complex parts, advanced 5-axis CNC machining capabilities allow the tool to approach the surface at optimal angles, enabling engraving on complex contours and sidewalls in a single clamping—a significant advantage over 3-axis machines.
Post-Processing & Inspection: After machining, the part may be cleaned to remove chips and coolant. The engraving is then inspected for depth, clarity, and dimensional accuracy using tools like optical comparators or vision measurement systems.
Key Techniques and Tooling for Optimal Results
The quality of CNC engraving hinges on technique and tooling:
Tool Geometry: V-Bit Engravers are the standard for sharp, clean lines and text. The angle of the V determines line width and depth relationship. Ball Nose End Mills are used for 3D engraving and creating smooth, rounded grooves. Tapered End Mills provide strength for deeper engraving in metals.
Climb vs. Conventional Milling: In engraving, climb milling (where the tool rotates in the same direction as its feed) generally produces a better surface finish on the edge of the cut, crucial for clean lettering.
Depth Control: Achieving consistent depth, especially on uneven or pre-machined surfaces, may require probe-assisted tool setting or software compensation.
Material Considerations: Strategies differ vastly by material. Softer materials like aluminum and brass allow for higher speeds and finer details. Stainless steel and titanium require rigid setups, slower speeds, and specialized tool coatings to prevent work hardening and tool wear.
Applications Across Industries: Where CNC Engraving Excels
The robustness and precision of CNC engraving make it indispensable for:

Aerospace & Defense: Permanent part numbers, serial numbers, compliance marks, and weight-saving lattices directly engraved into components.
Medical & Surgical Instruments: Precise measurement scales, lot numbers, and logos on implants and surgical tools, where sterility and permanence are paramount.
Automotive & Motorsport: Engine component identification, branding on custom parts, and decorative elements on interiors.
Mold & Tool Making: Engraving cavity numbers, logos, and texture patterns (like leather grain) directly into mold steels.
Electronics: Engraving branding, port identifiers, and regulatory information onto device enclosures.
Promotional & Luxury Goods: Creating high-end, tactile logos and decorative patterns on awards, signage, and custom hardware.
Partnering with Expertise: Why It Matters for Critical Engraving
While the fundamental process of how to engrave using a CNC machine may seem straightforward, achieving flawless, production-ready results on critical components demands deep expertise. This is where partnering with a specialized manufacturer like GreatLight Metal provides distinct advantages. Beyond operating advanced 5-axis CNC machining centers capable of complex multi-surface engraving, a partner like this brings:
Integrated Process Chain: The ability to perform precision machining, milling, turning, and engraving in a single setup reduces handling errors, improves positional accuracy, and accelerates lead times.
Material Mastery: Experienced engineers understand the specific feeds, speeds, and toolpaths required for everything from delicate anodized aluminum to superalloys like Inconel.
Quality Assurance: With certifications like ISO 9001:2015 underpinning their processes, every engraved character is verified against the original design intent, ensuring traceability and compliance for regulated industries.
Design for Manufacturing (DFM) Support: Experts can advise on optimal font sizes, line widths, and depths for your chosen material and application, preventing design flaws that lead to poor readability or tool breakage.
Conclusion
CNC engraving is far more than just writing on a part; it is a critical manufacturing operation that adds functional value, traceability, and brand identity to precision components. Mastering it requires the right blend of advanced equipment, sharp tooling, meticulous programming, and practical experience. Whether your project calls for microscopic data matrix codes on a medical implant or a deep, polished logo on a luxury automotive trim, understanding the capabilities and nuances of CNC engraving is the first step. For mission-critical applications where precision, durability, and aesthetics cannot be compromised, collaborating with a certified and capable manufacturing partner is not just an option—it is a strategic necessity to ensure your vision is etched into reality with perfect fidelity.
Frequently Asked Questions (FAQ) on CNC Engraving
Q1: What is the smallest text or detail you can realistically engrave with a CNC machine?
A: The limit is primarily dictated by tool size and material. With micro-tools (down to 0.1mm diameter or smaller) on a stable, high-precision machine, features and character heights as small as 0.5mm are possible. However, legibility and tool life must be balanced. A professional partner like GreatLight Metal can advise on the optimal size for your specific material and application.

Q2: Can you engrave on curved or irregular surfaces?
A: Yes, but this requires advanced multi-axis CNC capabilities. A standard 3-axis machine can only engrave on a flat plane parallel to the machine bed. A 5-axis CNC machining center can dynamically orient the tool perpendicular to complex contours, allowing for seamless engraving on curved surfaces, cylinders, and angled faces in one operation.
Q3: What materials are best suited for CNC engraving?
A: Virtually all machinable materials can be engraved. Metals like aluminum, brass, stainless steel, and titanium are common. Plastics such as ABS, Delrin, and PEEK also engrave well. The “best” material depends on the required appearance, durability, and post-processing (e.g., anodizing aluminum after engraving creates excellent contrast).
Q4: How deep can you engrave, and does it weaken the part?
A: Depth can range from a few thousandths of a millimeter (a light etch) to several millimeters for deep relief. Engineers must consider the structural impact. Engraving a serial number into a thick component wall is negligible, but deep engraving on a thin structural member requires stress analysis. DFM reviews with your manufacturer are essential for such cases.
Q5: How do I prepare my design files for CNC engraving?
A: Provide clean, vector-based 2D drawings (DXF or DWG formats are ideal) specifying the exact geometry of the engraving. For 3D engraving, a 3D model (STEP or IGES) with the raised or recessed features modeled is required. Clearly indicate desired depth, line width, and any critical tolerances on your technical drawing.
Q6: Is CNC engraving more expensive than laser engraving?
A: For simple, flat-surface marking on large batches, laser engraving is often faster and more cost-effective. CNC engraving becomes competitive and often superior when you require tactile depth, are working with challenging materials (e.g., reflective metals), need to engrave complex 3D surfaces, or can combine the engraving operation with other machining steps in a single setup, reducing overall production time and cost.


