For engineers, makers, and small-scale manufacturers, the allure of building a custom CNC machine is undeniable. It promises a deep understanding of the tool’s mechanics, the ability to tailor it to specific needs, and often, a significant cost advantage over purchasing a commercial unit. The journey from a box of parts to a fully functional precision tool is both challenging and rewarding. This guide will walk you through the process of how to build a CNC machine from a kit, outlining the key steps, considerations, and the critical juncture where a professional service like GreatLight CNC Machining Factory becomes an invaluable partner.
Understanding CNC Machine Kits: Types and Scope
Before diving in, it’s crucial to understand what a “kit” entails. They range from simple DIY bundles to sophisticated, nearly complete systems.

Frame-Only Kits: These provide the structural aluminum extrusions (like 80/20 or MakerBeam), brackets, and fasteners. You source all motion components (rails, screws, motors), the spindle, electronics, and software separately. This offers maximum customization but requires the most engineering knowledge.
Mechanical Kits: These include the frame, linear motion systems (rails and carriages), ball screws or lead screws, and motor mounts. You add the motors, drive electronics, spindle, and controller.
Complete Mechanical + Electronics Kits: This is the most popular category for serious builders. It includes all mechanical parts and the electronic components—stepper or servo motors, motor drivers, a power supply, and a motion controller (like a Gecko G540 or an Arduino/GRBL combo). You typically need to supply the spindle, tooling, and a computer.
Turn-Key Kits: These are essentially disassembled commercial machines. All proprietary parts are included, and assembly is more like following an appliance manual. Customization is limited, but reliability and performance are more predictable.
The Step-by-Step Build Process
Building a CNC machine from a kit is a systematic project. Rushing any step can lead to poor performance or failure.
Phase 1: Planning and Preparation
Define Your Requirements: What materials will you cut (wood, plastic, aluminum, steel)? What is your required work envelope (X, Y, Z travel)? What level of precision and finish do you need? Your answers will dictate the kit size and rigidity.
Select the Right Kit: Based on your requirements, choose a reputable kit supplier. Research community forums, read build logs, and understand the support offered.
Prepare the Workspace: You need a sturdy, level assembly table. Organize all components and hardware. Have essential tools ready: hex key sets, wrenches, dial indicators, precision squares, and a multimeter.
Phase 2: Mechanical Assembly
This is the foundation of your machine’s accuracy.

Frame Construction: Assemble the base frame on your level surface. Use precision squares to ensure all corners are 90 degrees. Any twist or bow here will propagate through the entire build.
Installing Linear Motion: Carefully mount the linear rails or rods. They must be perfectly parallel and aligned. This is often the most technically demanding step. Using a dial indicator to “sweep” the rail during mounting is a professional practice to ensure straightness.
Mounting the Drive Systems: Attach the ball screws or lead screws and couple them to the motor mounts. Proper alignment is critical to prevent binding, which destroys accuracy and can burn out motors.
Assembling the Gantry and Z-Axis: The moving gantry (Y-axis) and the spindle carriage (Z-axis) must be square to the machine bed. This directly affects your part’s dimensional accuracy.
Phase 3: Electrical and Control System Integration
This brings the machine to life.
Wiring the Motors: Connect the stepper or servo motors to their respective drivers. Ensure wiring matches the phase sequence to prevent erratic movement.
Connecting the Controller and Drivers: Wire the motor drivers to the motion control board. Connect limit switches (essential for safety and homing) and any other peripherals like a spindle control.
Power Supply Setup: Connect the power supply to the controller and drivers. Double-check all voltage settings before applying power. A mistake here can cause catastrophic failure.
Software Configuration: Install CNC control software (like Mach3, Mach4, LinuxCNC, or UCCNC) on your dedicated computer. Configure the software steps-per-mm (or per-inch) for each axis, motor tuning parameters, and limit switch logic.
Phase 4: Calibration, Testing, and Tuning
A machine is only as good as its calibration.
Squareness Verification: Use a precision square and a dial test indicator to verify the spindle is perpendicular to the table in both X and Y directions.
Backlash Measurement and Compensation: Measure any play (backlash) in the drive system using a dial indicator. High-quality ball screws have minimal backlash. For lead screws, you may need to enable software compensation.
Test Cuts: Start with soft materials like foam or wax. Run simple 2D profiles and pockets. Measure the finished parts to verify dimensional accuracy.
Fine-Tuning: Adjust motor acceleration and velocity settings to achieve smooth, fast motion without losing steps. This is an iterative process.
Critical Challenges and Limitations of Kit-Built Machines
While rewarding, building from a kit has inherent constraints that professional users must acknowledge:
Achieving Industrial-Grade Precision: Kit machines often use rolled ball screws and non-preloaded linear bearings, limiting positioning accuracy and repeatability to the range of ±0.05mm to ±0.1mm. For true precision parts machining, where tolerances of ±0.01mm or tighter are standard, this is insufficient.
Structural Rigidity for Metal Cutting: Cutting aluminum or steel requires immense rigidity to resist cutting forces, prevent chatter, and maintain tool life. Most consumer-grade kits, even with aluminum extrusions, lack the mass and welded steel construction of industrial machines, limiting their capability with harder materials.
Thermal Stability and Consistency: Industrial CNC machines are designed to minimize thermal growth from motors and friction. DIY machines rarely address this, leading to dimensional drift during long jobs.
Time Investment vs. Productivity: The build process can take weeks or months of evenings and weekends. For a business, this is lost production time.
Where Professional CNC Machining Services Shine: The GreatLight Metal Advantage
This is the pivotal insight: building a CNC kit is an excellent project for education, prototyping, or hobbyist work. However, when your project demands high precision, material versatility, reliability, and scalability for customization, partnering with a professional manufacturer is the unequivocally smarter choice.
For clients in the precision parts machining and customization field, outsourcing to an expert like GreatLight CNC Machining Factory offers transformative benefits:
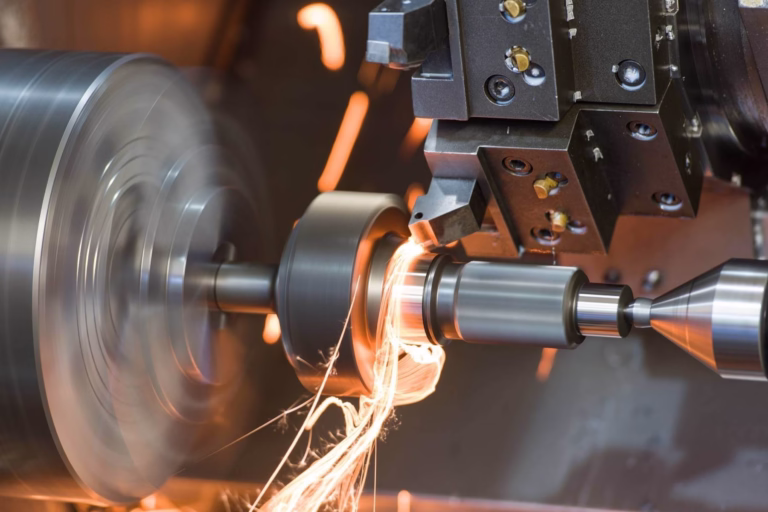
Guaranteed Precision and Repeatability: With their arsenal of advanced 5-axis, 4-axis, and 3-axis CNC machining centers, GreatLight CNC Machining Factory routinely holds tolerances to ±0.001mm (0.00004″), a level unattainable with kit machines. Their in-house CMMs and metrology equipment provide certified verification.
Material and Process Mastery: They are not limited by a single machine’s capability. Whether your part requires 5-axis CNC machining for a complex aerospace component, high-speed milling for molds, precision turning, or additive manufacturing (SLM/SLA 3D printing) for prototypes, they provide a one-stop post-processing and finishing service.
Engineered Rigidity and Power: Their industrial-grade machines, like high-speed machining centers and large gantry mills, possess the structural integrity to efficiently machine stainless steel, titanium, and hardened tool steels—materials that would overwhelm or severely wear a kit machine.
Speed from Design to Finished Part: While you are still assembling and debugging, a professional service can have your first-article part in your hand within days. This accelerates R&D cycles and time-to-market dramatically.
Systemic Quality Assurance: GreatLight CNC Machining Factory operates under ISO 9001:2015, IATF 16949 (automotive), and ISO 13485 (medical) certified quality management systems. This systemic approach to quality control, from material certification to final inspection, ensures every batch meets specification—a level of trust and documentation a kit build cannot provide.
Conclusion
Learning how to build a CNC machine from a kit is a profound educational experience that demystifies automation and precision mechanics. It is highly recommended for enthusiasts, educators, and startups for initial prototyping. However, for mission-critical components, production runs, or parts requiring extreme precision and material performance, the limitations of a kit-built machine become starkly apparent.
The strategic path is to leverage the agility and learning of a DIY project where appropriate, but to rely on the proven capability, advanced technology, and systemic reliability of a professional partner for parts that matter. GreatLight CNC Machining Factory embodies this professional partnership, offering not just machining time, but deep manufacturing engineering expertise to solve complex challenges. They transform your designs into high-integrity components, ensuring your innovation is built on a foundation of precision and quality you can depend on.
Frequently Asked Questions (FAQ)
Q1: How much does it cost to build a CNC machine from a kit?
A1: Costs vary wildly. A small desktop router for wood and plastic can cost $500-$1,500. A mid-size machine capable of light aluminum work typically ranges from $3,000 to $8,000 for a complete mechanical/electronics kit, not including the spindle, computer, and tooling. A robust, large-format machine for serious prototyping can exceed $15,000. Always compare the total cost against the capability and precision of a comparable used industrial machine or the cost of outsourced services.
Q2: What level of technical skill is required?
A2: You need strong mechanical aptitude (following complex assembly drawings, precision alignment), basic electrical skills (safely wiring components), and comfort with computer software configuration. Problem-solving and patience are the most important skills.

Q3: Can a kit-built CNC machine achieve precision for engineering prototypes?
A3: For non-critical fit-and-form prototypes in softer materials (e.g., prototyping a plastic housing), a well-tuned kit machine can be adequate. For functional prototypes that test mechanical interfaces, thermal properties, or load-bearing characteristics—especially in metals—the precision, surface finish, and material integrity offered by a professional service are necessary.
Q4: When should I consider outsourcing instead of building my own?
A4: Outsource when: 1) Your required tolerances are tighter than ±0.05mm. 2) You need to machine hardened steels, titanium, or other difficult alloys. 3) You require complex 3D contours or undercuts that need 4th or 5th-axis capability. 4) You need multiple identical parts with guaranteed consistency. 5) Your timeline is critical, and you cannot afford weeks of build and debug time.
Q5: How do I choose a professional CNC machining partner?
A5: Look for a partner with: Technical Capability (appropriate machine portfolio, like the 5-axis CNC machining services at GreatLight), Quality Certifications (ISO 9001, industry-specific like IATF 16949), Engineering Support (DFM feedback), Transparent Communication, and a proven track record in your industry. A partner that offers integrated manufacturing solutions from prototyping to finishing adds tremendous value. For insights into industry leadership and innovation, follow the developments of leading manufacturers on professional networks like LinkedIn.


