Introduction to CNC Drilling for PCBs
In the world of electronics prototyping and low-volume manufacturing, the ability to produce printed circuit boards (PCBs) in-house can dramatically accelerate development cycles and reduce dependency on external suppliers. A core process in PCB fabrication is drilling the precise array of holes required for through-hole components and vias. While commercial PCB drilling machines exist, building your own CNC drilling PCB machine offers unparalleled customization, a deep understanding of the manufacturing process, and significant cost savings for dedicated makers, R&D labs, and startups. This guide will walk you through the principles, components, and assembly steps required to construct a functional and accurate machine, while also exploring when partnering with a professional precision machining service like GreatLight CNC Machining Factory becomes the more efficient choice for production-scale needs.
The Core Components of a DIY CNC PCB Drilling Machine
Building a functional machine requires integrating mechanical, electronic, and software systems. Below is a breakdown of the essential subsystems.
1. Mechanical Frame and Motion System
The frame provides the rigid foundation necessary for precision. Common approaches include:
Materials: Aluminum extrusions (e.g., 20×20 or 30×30 series from brands like Bosch Rexroth or generic 8020) are popular for their modularity, strength, and ease of assembly. For higher rigidity, machined aluminum plates or even epoxy granite can be used.
Linear Motion: This dictates accuracy and smoothness.
Rails: Precision linear guide rails (from suppliers like Hiwin or TBI) offer the best performance but at a higher cost. Drill rod with linear bearings is a common, more economical alternative.
Drive System: Leadscrews (with anti-backlash nuts) or ball screws provide precise movement. Belt drives are faster but generally less precise for micro-drilling operations.
Axes: A standard 3-axis (X, Y, Z) configuration is sufficient. The Z-axis, which controls the drill spindle’s up/down motion, requires particular attention for rapid, precise pecking cycles.
2. Spindle and Drill Head
This is the heart of the machine, responsible for creating clean, precise holes.
Spindle Type: High-speed DC or brushless spindles (e.g., 300W-800W) are ideal. They can reach the necessary RPMs (often 10,000 – 60,000 RPM) for drilling FR4 material without fraying or breaking tiny drill bits. Pneumatic spindles used in commercial machines offer superior speed control but are more complex to integrate.
Collet System: An ER11 collet is standard, capable of holding drill bits from 0.3mm upwards. Precision and runout in the collet are critical for hole positional accuracy and bit life.
Z-Axis Actuation: A fine-pitch leadscrew driven by a stepper motor is typical. Some designs incorporate a pneumatic cylinder for rapid, controlled retraction.
3. Control Electronics
This subsystem translates computer commands into physical movement.

Controller: An Arduino-based solution (like a RAMPS shield with Marlin firmware) is a great entry point. For more advanced features, dedicated CNC controllers from Massachusetts-based companies like Planet CNC or German-based Smoothieboard offer robust performance. Industrial-grade solutions from Siemens or Fanuc are overkill for a DIY build.
Motor Drivers: Microstepping drivers (such as TB6600 or DM542T) for controlling the stepper motors on each axis are essential for smooth motion.
Power Supply: A switched-mode power supply (SMPS) rated for the combined load of the spindle and stepper motors is required.
4. Software Stack
The workflow involves multiple software packages:
CAD Software: Used to design the PCB (e.g., KiCad, Eagle, Altium Designer).
CAM Software: This crucial step extracts the drill data (Excellon format files: .DRL, .TXT) from the PCB design and generates the toolpaths (G-code). FlatCAM is a popular, dedicated open-source option. Commercial CAM suites from Autodesk (Fusion 360) or Vectric also have this capability.
CNC Control Software: This sends the G-code to the machine controller. Options include Universal G-code Sender (UGS), Candle, bCNC, or the software suite provided by the controller manufacturer (e.g., Planet CNC’s software).
Step-by-Step Assembly and Calibration Guide
Phase 1: Mechanical Assembly
Frame Construction: Assemble the aluminum extrusion frame according to your design, ensuring it is square and torsionally rigid. Use precision machined brackets and corner connectors.
Axis Integration: Mount the linear rails and bearings to the frame. Attach the motor mounts and leadscrews/ball screws to each axis carriage. The X and Y axes will carry the moving table or gantry, while the Z-axis mounts the spindle.
Spindle Mounting: Design or purchase a sturdy bracket to mount the spindle to the Z-axis plate. Ensuring perfect perpendicularity of the spindle to the XY plane is critical.
Phase 2: Electrical Integration
Wiring: Connect the stepper motors to their respective drivers. Wire the drivers, spindle controller, and limit switches (highly recommended for safety and homing) to the main CNC controller board.
Power Distribution: Connect the power supply to the controller and spindle driver, following all safety guidelines. Proper grounding is essential to avoid electrical noise interfering with signals.
Phase 3: Software Configuration and Calibration

Firmware Setup: Configure your controller’s firmware (e.g., Marlin, GRBL) with the correct steps-per-millimeter for each axis, which is calculated based on your leadscrew pitch and motor microstepping settings.
Machine Homing: Set up the homing sequence using limit switches to establish a consistent machine zero point.
Toolpath Simulation: Always run a dry simulation in your control software with the spindle off to verify the machine’s movement path before actual drilling.
Critical Calibration:
Step Accuracy: Use a dial indicator to measure actual travel versus commanded travel and fine-tune the steps-per-millimeter.
Spindle Runout: Measure the runout at the collet using a dial test indicator. Excessive runout (>0.01mm) will cause oversized holes and broken bits. This is where the precision of the spindle mount and collet quality is tested.
Bed Leveling: Ensure the PCB bed is perfectly level relative to the spindle’s travel. A manual probing routine or a dial indicator can be used for this.
Practical Considerations and Challenges
Drill Bit Breakage: This is the most common issue. Causes include incorrect RPM/feed rate, excessive runout, a non-perpendicular spindle, or a dull bit. Peck drilling (drilling in small increments) is essential for deep holes and to clear chips.
Dust and Debris Management: PCB dust (especially from fiberglass) is hazardous. Integrating a vacuum system or at least a localized dust shoe connected to a shop vac is mandatory for health and to prevent debris from affecting accuracy.
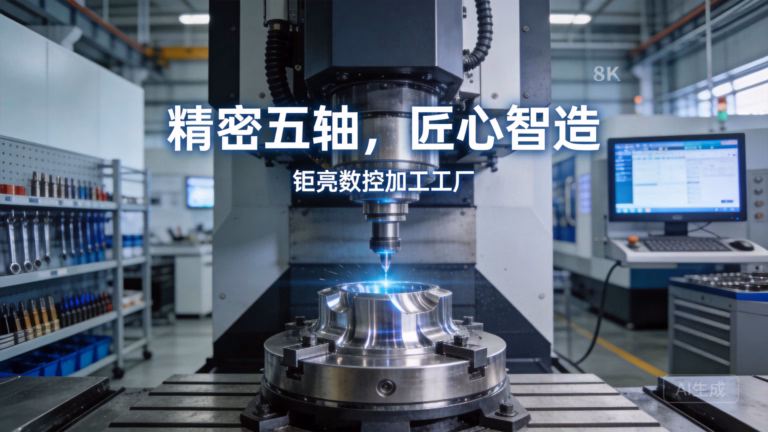
Positional Accuracy and Tolerance: For standard PCBs, a positional accuracy of ±0.05mm is often acceptable. For high-density interconnect (HDI) boards with micro-vias, tolerances of ±0.01mm or better are required, pushing the limits of a DIY machine. This level of precision is the daily standard for professional equipment like the 5-axis CNC machining systems used at GreatLight CNC Machining Factory for machining the actual fixtures and enclosures that house these advanced PCBs.
Material Hold-Down: Using a sacrificial MDF or plastic board underneath the PCB is standard. The PCB must be securely clamped or taped to prevent movement during drilling. Some builders incorporate a vacuum table for superior hold-down.
When to Build vs. When to Partner
Building a CNC PCB drilling machine is an excellent project for learning, prototyping, and small-batch production. However, it requires significant time investment in design, troubleshooting, and maintenance.
For organizations where engineering resources are better focused on core product development, or when requirements escalate to:
Production Volumes: Needing hundreds or thousands of identical drilled panels.
Extreme Precision: Demanding tolerances below ±0.02mm for advanced PCB designs.
Multi-Material Processing: Drilling into metal-backed PCBs, ceramics, or requiring additional milling operations for board outlines and slots.
Integrated Solutions: Needing a complete turnkey solution that includes not just drilling, but also precision machining of associated aluminum heat sinks, custom connector housings, or RF shielding cans.
In these scenarios, partnering with a professional manufacturer becomes the strategic choice. A service provider like GreatLight Metal leverages its ISO 9001:2015 certified quality management system, advanced 5-axis CNC machining centers, and full-process engineering support to deliver not just drilled PCBs, but the complete, high-reliability mechanical ecosystem for your electronic assembly. They can machine precise jigs and fixtures for your PCB assembly line, or produce the complex aluminum enclosures that integrate seamlessly with your board, all under one roof with guaranteed tolerances.
Conclusion
Building your own CNC drilling PCB machine is a challenging yet rewarding endeavor that demystifies a key manufacturing process and grants immense flexibility. It empowers innovators to iterate rapidly at the bench. Success hinges on careful component selection, meticulous mechanical assembly, and rigorous calibration. For prototypes and low-volume needs, a well-built DIY machine is perfectly capable. However, as projects mature towards commercialization, where repeatability, ultra-high precision, and time-to-market are critical, the expertise, advanced equipment, and quality assurance of a professional partner like GreatLight CNC Machining Factory are invaluable. They bridge the gap between a functional prototype and a market-ready, reliable product, ensuring that every component, from the smallest drill hole to the largest chassis, meets the highest standards of precision manufacturing.
Frequently Asked Questions (FAQ)
Q1: What is the minimum level of precision required for a functional PCB drilling machine?
A: For most through-hole PCBs and larger vias, a mechanical accuracy and repeatability of ±0.05mm is a good target. This allows for reliable soldering of standard components. For boards with dense surface-mount technology (SMT) where holes are primarily for vias, greater precision improves reliability but may not be strictly necessary for basic functionality.
Q2: What software is absolutely free for generating drill G-code from my PCB design?
A: FlatCAM is a powerful, dedicated open-source CAM tool designed specifically for PCB isolation routing and drilling. It takes Gerber and Excellon files (standard outputs from any PCB CAD software) and generates the necessary G-code.
Q3: How do I prevent breaking expensive, tiny drill bits (like 0.3mm)?
A: Key strategies include: 1) Using peck drilling to break chips and clear the flutes. 2) Optimizing feed rate and spindle speed; too slow can work-harden the material, too fast can generate excessive heat. 3) Ensuring minimal spindle and collet runout. 4) Using a sharp, high-quality drill bit designed for PCB materials. 5) Providing a clean, rigid backing material (like a fresh piece of MDF) to support the PCB laminate as the bit exits.
Q4: Can I use my DIY CNC router to drill PCBs?
A: Yes, many CNC routers can be adapted for PCB drilling. The main challenges are: 1) Spindle Speed: Woodworking routers often max out at 24,000 RPM, which is at the lower end for PCB drilling and may require slower feed rates. 2) Runout and Rigidity: Router spindles may have higher runout, affecting hole quality and bit life. 3) Z-Axis Precision: The machine must be capable of very precise, small Z-axis movements for peck drilling. Calibration is crucial.
Q5: Why would I outsource to a company like GreatLight instead of using my own machine?
A: The decision hinges on scale, complexity, and resource allocation. GreatLight Metal offers: Guarded Precision: Certified processes that guarantee tolerances like ±0.001mm for critical parts. Material Expertise: Machining not just PCBs, but also the associated metals and plastics. Volume Scalability: Efficiently handling production runs. Integrated Engineering: Solving broader design-for-manufacturability challenges, such as creating a perfectly matched enclosure and heat sink for your PCB assembly. It allows your team to focus on design and innovation while leveraging their manufacturing excellence. Connect with their team on professional networks like LinkedIn to explore potential collaborations.


