Part 1:
Technical concept of the high-speed micro-transformation machine from the Lobo Roku-Roku industry:
Lugu Roku-Roku in Japan in the manufacturers of Japanese machine tools, its high-speed micro-transformation machines manufactured, focusing on the treatment of micro-grooves (minimal diameter diameter of 0.01 mm, depth of treatment Maximum d / l = 80 times), micro-contour or treatment part treatment, clean root cleaning mold treatment treatment (minimum diameter r0.01mm), treatment of mirror effects (RA0.003um, 3nm), cut and cut of super hard materials (Like tungsten steel, caliber steel, ceramic material, etc.), high treatment of the hardness material and other fields.
Consultation Tel: 135 2207 9385
Part 2: Analysis of the history of treatment cases:
With these two or three years, the United States has launched a trade war against China, and the stuck neck situation of Chinese industry is becoming more and more serious. chain is so popular;
At the same time, due to the influence of upgrades to foreign technologies, the technical requirements of the probe card test luminaire increase and more, and the diameter of microporus is developing in a small direction.
Currently, the minimum diameter of the micropores of the LALU machine-tool test is 0.018 mm, and the treatment depth has always been 10 times (the treatment depth is 10 times the diameter of the treatment), and The thickness of the walls between the walls between the walls between the walls between the walls between the walls between the walls between the walls between the walls between the walls between the walls between the walls between the walls between the walls between the walls between the walls Between the walls between the walls between the walls between the walls between the walls between the walls between the walls between the walls between the walls between the walls between the walls between the walls between the walls between the two holes are 0.007 mm (C ‘ is currently the thinnest for the thinnest that has currently disputed the size of the wall thickness);
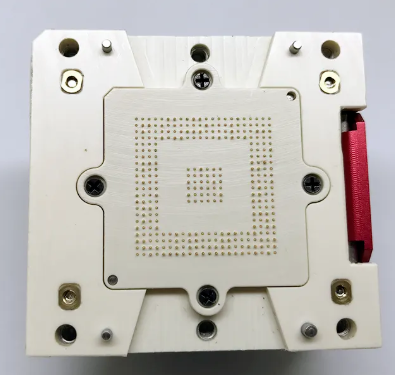
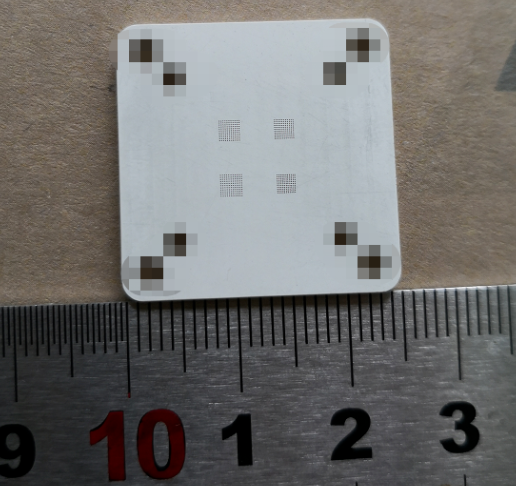
Due to the requirements of a Japanese client in the flea industry, ING Shinjin has carried out microporous treatment of the tests of the following test luminaire:
Machine-tools brand: Roku-Roku
Machine-tool model: KR-400 High speed micro-transfert
Motet Subdivie: HSK-E25 specification, 40,000 rpm
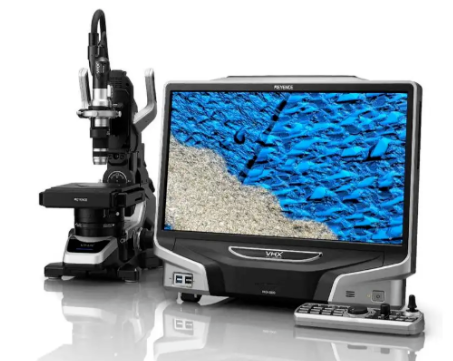
Detection equipment: Kanes VHX-7000 Kanes Tool microscope (2UM error)
Treatment equipment: Overview
Microscopic diameter: 10.15 mm, 1.5 mm treatment depth, around 500;
, 0.08 mm, treatment depth of 0.1 mm, around 500;
Thickness of the wall of the post: The thickness of the wall of the hole between the two holes of the four ABCD districts is 0.01, 0.02, 0.03, 0.04 mm;
Treatment difficulty: this material is difficult and crisp, easy to start with the terrifying, and at the same time, the 0.08 mm micro-dresse is too small. and the precision of the knife handle.
Test processing objectives: This trial treatment mainly verifies the accuracy of the treatment of the diameter of the micropores, and if the treatment of the slim wall hole will have a large rupture of the wall and the precision error!
Japan Roku-Roku Luo Luo Industry Co., LTD., as a professional manufacturer who has been immersed in the field for many years, has won the essence of treatment in this area. , South Korea, Taiwan and other places are mainly used in a high-speed micro-procedure machine;
Over the next 2 to 3 years, Chinese test suppliers will certainly increase. To do technological precipitation, most precipitation of technological precipitation.
Part 3: Bond in the entry exit
1. Analysis of the input inspection ratio at 0.146 mm at the input of the micropor
The four treatment zones such as ABCD above are micropores 0.146 mm in diameter of the micropor, but calculated from the lower right corner to the left. ;
From the point of view of the tool at 200 folding, the effect of the microscope, at the input of the micropors of 0.146 mm, only a small amount of terrifying, this treatment effect is very good. According to the effect of less than 100 times, almost no washer is not visible.
2. Analysis of the 0.08 mm test ratio at the outlet
From the point of view of the 100x tool microscope, there are only a small amount of terrifying out of 0.08 mm of micropor.
Part 4: micro-moles diameter detection
1. Inspection ratio of microscopic input diameter 0.15 mm
At the entrance of 0.15 mm at the top, this experience uses the domestic specification of 0.146 mm of micro-strengths. . The error is between -2.2 and 1Mum.
2. 0.08 mm diameter detection report at the outlet of the micro-hole
This test processing, the output output diameter is 0.08 mm, this experience uses the Japanese brand 0.08 mm micro-diamond specifications (actually in the diameter diameter detection error 1Mum 1M ). The maximum value is 0.0832 mm;
Part 5: Detection of two -hole wall hole thickness
1. At the input, the micropor diameter of 0.146 mm, two holes are 0.01 mm and (the actual thickness of the wall of the standard hole is 0.01 mm) of detection:
The diameter of the micro-full is 0.146 mm and it is processed according to the thickness of the wall of 0.01 mm.
The above test report shows that the maximum value of the center of the center with two holes is 0.1550 mm (detection error of the industrial microscope of 2M), and the maximum value is 0.1619 mm, it is -EDire the thickness of the wall of the minimum hole value of 9um at the maximum value of 15.9um (the wall of the real standard hole is 10UM 10UM, the pole wall errors from 0.1 to 5.9um ), and there are no holes!
2. At the input, the micro-hole diameter of 0.146 mm two holes of 0.02 mm wall thickness (the actual thickness of the wall of the standard hole is 0.02 mm) Detection:
The diameter of the microphone is 0.146 mm and it is processed according to the thickness of the wall of the hole of 0.02 mm. mm).
The above test report shows that the maximum value of the center of the two holes is 0.1672 and that the maximum value is 0.1712 mm, that is to say the thickness of the wall of the hole of The minimum value of 0.0212 mm with the maximum value of 0.0252 mm (the wall of the real standard hole is 0.02 mm and the wall thickness error is 1.2 UM –5.2um ), and there are no pores!
3. The diameter of the microporo at the input of 0.146 mm in the wall thickness with two holes is 0.03 mm (the actual thickness of the wall of the standard hole is 0.03 mm) Test:
The diameter of the micro diamond is 0.146 mm and it is processed according to the thickness of the wall of 0.03 mm. mm).
The above test report shows that the maximum value of the center of the two holes is 0.1761 and that the maximum value is 0.1819 mm, that is to say the thickness of the wall of the hole of The minimum value of 0.0301 mm at the maximum value of 0.0359 mm (the wall of the real standard hole is 0.03 mm and the wall thickness error is 0.1 UM –5.9um ), and there are no pores!
4. At the input, the micro-hole diameter of 0.146 mm two holes of 0.04 mm wall thickness (the actual thickness of the wall of the standard hole is 0.040 mm) Test:
The micro diamond diameter is 0.146 mm and is treated by a 04 mm wall thickness.
The random test ratio of 14 holes above shows that the maximum value of the center of the two hole is 0.1885 mm and that the maximum value is 0.1914 mm, that is to say the thickness From the wall of the hole of the minimum value of 0.0425 mm to the maximum value of 0.0454 mm (the wall of the real standard hole is 0.04 mm, the wall of the wall, the wall of the wall, the wall l ‘Thickness error is 2.5M-5.4um), and there are no holes!
Daguang focuses on providing solutions such as precision CNC machining services (3-axis, 4-axis, 5-axis machining), CNC milling, 3D printing and rapid prototyping services.


