a lot 3D printer users all have problems printing the first layer. The printed layer may be non-sticky, uneven, have a rough surface, or be creased if printed with materials such as ABS.
All of these problems are frustrating, but they can be avoided or even eliminated with a simple solution: using a raft.3D printed rafts are horizontal meshes placed directly on the build platform. The first printed layer is then placed on the raft. This is a convenient way to get the first layer right while still holding the print in place on the bed.
usedRaft is often used when working with ABS filament because it is easier to warp or print an elephant’s foot pattern. Although rafts can be used for both FDM 3D printing and resin printing, in this article we will focus on the former. 3D printed rafts are not only important to prevent deformation, but also to increase bed adhesion.
However, remember that the first step is to make sure your printer is set up correctly. If your bed is properly leveled and your first level is the right height, you probably don’t need a raft.
In this article, we’ll look at when to use a raft, why you choose to use one or not, and what parameters to pay attention to.
when to use it

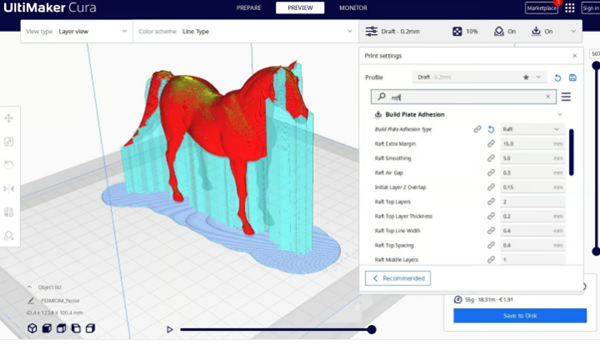
There are many slicer settings for rafts in Cura, many of which are not pictured! (Source: All3DP; Model: briarena via Thingiverse)
Although there are many uses for rafts, the following three are the most important:
Chain: ABS, like many other filaments, is prone to warping issues. One way to reduce warpage is to use a heated bed and lay a layer of acetone and ABS filament chips on the heated bed. But even then, deformation can occur. Adding rafts to the 3D model completely eliminates the warping problem.
Poor print bed adhesion: Since the model is printed on the print bed, the raft forms the first layer of the complete print. The model does not always have a completely flat base glued to the build platform, whereas the raft is a flat mesh on the build platform. This adds surface area to the entire part, increasing the adhesion of the print bed.3D printed rafts also serve as a preventative measure against possible breakdowns.
small area: Some prints have tiny features at the bottom. In this case, these parts may not be strong enough to withstand the load of the rest of the print. At this point, increasing the contact area of these elements can help them withstand the load of the entire print. In this case, it is recommended to add a raft as a safety measure to prevent the print from tipping or collapsing.
Advantages and disadvantages

The raft provides critical adhesion to the bed surface for thin-limbed models (Source:All3DP; Model: DiabaseEngineer via Thingiverse)
As with any technology,3D printed rafts also have certain advantages and disadvantages.
advantage
reduce Warping of stubborn materials such as ABS
Improve print bed adhesion and improve printing success rate
Consistent printing
Stronger first layer
default
Raw finish on the bottom of the model
Difficult to separate from the model, especially on denser rafts
Additional waste
Parts may be damaged when removing the raft, especially small model components
Please note, always take precautions when dismantling your raft as you could injure yourself and your model!
before you start

at least that Benchy has solid foundations! (Source: TheKrakenVagen via Reddit)
Now that we know why we want to add a raft, let’s see what settings we should use. When adjusting anything, it helps track results. Small changes in settings, whether increasing or decreasing values, should be made gradually. This will help you check your progress (or regression) step by step, allowing you to easily refine your ideal setup.
These settings depend on your The 3D printer, the filament you’re using, the ambient temperature in the room, and even the build platform. Therefore, one setting may not be suitable for all purposes, and it may take some trial and error to find the one that best suits your setup.
separation distance

A lion’s paw has smaller (left) and larger (right) air gaps (Source:All3DP; model: YahooJAPAN via Thingiverse)
separation distance (inThe “raft air gap” in Cura) is the height of the space between the raft and the first layer of the print. In other words, the distance between the raft and the paired layer of the model. This is arguably the most important configuration for a raft.
Smaller separation distances will make it difficult to separate the raft from the model. First try a separation distance equal to half the nozzle diameter. So if your nozzle diameter is 0.4mm, try printing rafts with 0.2mm separation distance. You can then move up or down from there based on the results.
According to some experienced users, the ideal separation distance is 0.1mm. If the distance is increased, the print is easier to remove from the raft, but the first layer of the print has a poorer surface finish. If the gap is too large, the print will not fit on the raft at all and the print will almost certainly fail.
Raft layers and offsets

If you hover over a setting,Cura will provide you with more information (Source: All3DP; Model: Yell via Printables)
You can also take an in-depth look at the configuration of the different layers of the raft structure. these are The most important setting of the Cura, different slicers may have similar names or use other names, so it’s worth checking and testing to see which setting gives the best results.
Ground floor
exist In Cura, this is the “thickness of the base of the raft”. This is the first layer placed on the construction platform. Therefore, it is recommended to print at slow speeds to achieve optimal bed adhesion. You obviously don’t want poor adhesion to the base of the raft, so be generous and keep the layers thicker.
According to several experienced users, the ideal thickness of the bottom of the raft is 0.3mm. If the thickness increases, separation of the raft from the print becomes difficult and material is wasted.
top layer
The top layer of the raft will fit snugly against the first printed layer. Since this layer will determine the surface condition of the bottom layer of the print, it is recommended to use at least two to three layers to achieve a smooth surface. it’s in It’s easy to find in Cura because it’s called “The Top of the Raft”.
compensate
Some slicers have a setting that determines how far the base extends beyond the edge of the print, at In Cura this is called “Base Extra Margin”. Keep it a little outside the print, but don’t spread it too much as you might waste too much material unnecessarily. Cura’s default setting for this setting is 15mm, but you can reduce it to save filament or print large objects.
Print speed
Another setting you can specify for the base is the print speed. exist In Cura, you can set the print speed for the top, middle and bottom sections under Base Print Speed. It is generally recommended to print the base at a slower speed than the rest of the model, as this will give it more time and temperature to adhere to the bed and harden, providing a more resilient base. The downside is that the total printing time will increase.
Daguang focuses on providing solutions such as precision CNC machining services (3-axis, 4-axis, 5-axis machining), CNC milling, 3D printing and rapid prototyping services.


