In the world of creativity and precision, the fusion of digital design and physical artistry has given rise to fascinating tools. Among these, the CNC drawing machine stands out as a captivating project for engineers, artists, and hobbyists alike. It embodies the core principles of Computer Numerical Control (CNC)—transforming digital vector files into precise, repeatable physical movements—but applies them to the act of drawing or writing. For clients and engineers in the precision parts machining and customization field, understanding how to build such a device offers deep insights into motion control, structural rigidity, and system integration, which are fundamental to more complex industrial applications.
While a DIY CNC drawing machine is an excellent educational and prototyping tool, it’s crucial to recognize its limitations in an industrial context. For mission-critical drawings, templates, or high-volume precision artwork, the reliability and accuracy offered by professional-grade equipment from suppliers like GreatLight Metal are indispensable. This exploration will guide you through the process of creating your own machine while highlighting the engineering considerations that bridge hobbyist projects and industrial solutions.
What is a CNC Drawing Machine?
At its heart, a CNC drawing machine is a 2D or 2.5D plotter. It uses a set of computer-controlled motors to move a tool (a pen, marker, or stylus) along the X and Y axes over a flat surface. The Z-axis, if present, is used for lifting and lowering the tool. It interprets G-code—a standard programming language for CNC machines—generated from vector graphics (like SVG or DXF files) and executes the drawing with remarkable consistency.
The appeal of building one lies in its relatively simple mechanical requirements compared to a 3D CNC mill or router, making it an accessible entry point into mechatronics. However, achieving smooth, accurate, and vibration-free lines requires careful attention to the same principles that govern high-end precision CNC machining: stable kinematics, precise motor control, and minimized backlash.
Core Components and Their Industrial Parallels
Building a functional CNC drawing machine requires several key subsystems. Each component has a direct counterpart in industrial precision parts machining equipment.
1. Structural Frame
DIY Approach: Commonly built from extruded aluminum profiles (e.g., 2020 or 2040 series), acrylic sheets, or even wood. The primary goal is to create a square, rigid, and torsion-resistant frame to support the moving parts.
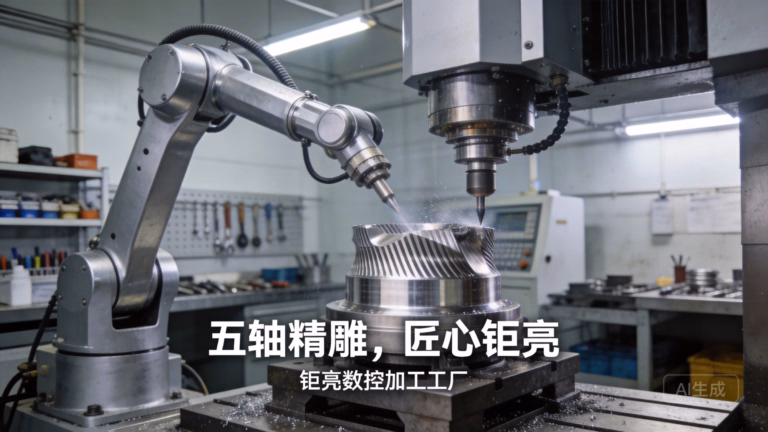
Industrial Perspective: In professional settings, frames are engineered from high-grade aluminum or cast iron, often with reinforced ribs and stress-relieved to ensure long-term stability. Vibrations, the enemy of precision, are dampened through material mass and advanced design. Companies like GreatLight Metal utilize precisely machined components and fixtures to build equipment bases that maintain micron-level accuracy.
2. Motion System
Linear Motion: This defines how the tool carriage moves.
Common DIY Choices: Smooth rods with linear bearings or V-wheel rollers running on aluminum extrusions. Lead screws or timing belts (GT2) are used to transfer motor rotation into linear movement.
Industrial Standard: High-precision ground ball screws or linear motors are used. These systems offer superior stiffness, lower friction, and significantly higher positional accuracy and repeatability. The backlash (slop in the system) is meticulously controlled through pre-loaded nuts and high-quality supports.
3. Drive System
Motors: Stepper motors (like NEMA 17 or 23) are the standard for DIY machines due to their low cost and excellent open-loop control. Servo motors, which offer closed-loop feedback for error correction, are the professional choice.
Controllers: An Arduino Uno paired with a CNC shield (running firmware like GRBL) is the ubiquitous DIY controller. It interprets G-code and outputs step/direction signals.
Drivers: Stepper motor drivers (e.g., A4988, DRV8825, or TMC2209) regulate current to the motors. Advanced drivers provide features like micro-stepping for smoother motion and stealthChop for quieter operation.
4. Tooling and Workholding
Tool: A simple servo or solenoid mechanism to lift and lower a pen. The “spindle” in this case is just a holder for various writing instruments.
Workholding: For paper, a simple clip board or vacuum table (using a small fan) works. In industry, sophisticated vacuum chucks, pneumatic clamps, or custom machined fixtures are used to secure the workpiece without distortion—a critical service in precision parts machining.
Step-by-Step Guide to Building a Basic CNC Drawing Machine
Here is a generalized workflow for constructing a Cartesian (XY) plotter-style drawing machine.

Phase 1: Design and Planning

Define Specifications: Determine your build area (e.g., A4 or A3 paper size), desired precision, and speed.
Choose a Design: You can design your own in CAD software (like Fusion 360) or use one of the many open-source designs available online (e.g., the “Makelangelo” polargraph or a CoreXY variant).
Source Components: Create a bill of materials (BOM) listing all structural parts, motors, electronics, fasteners, and tools.
Phase 2: Mechanical Assembly
Build the Frame: Assemble the base frame ensuring it is perfectly square. Use machinist squares and measure diagonals to check.
Install Linear Motion: Mount the smooth rods or rails and carriages. For belt-driven systems, install the pulleys and tension the belts properly—a key step to prevent slack and inaccuracy.
Assemble the Gantries: Construct the X and Y axes. The Y-axis typically moves along the long side of the frame, and the X-axis carriage moves across it. Ensure all moving parts glide smoothly without binding.
Mount the Tool Head: Attach the pen-lift mechanism to the X-axis carriage. A simple 9g servo with an arm to hold the pen is sufficient.
Phase 3: Electrical Integration
Wire the Electronics: Connect the stepper motors to their respective drivers on the CNC shield. Connect the drivers to the Arduino’s step/direction pins as defined by GRBL.
Power Supply: Use a stable 12V or 24V DC power supply capable of delivering sufficient current (e.g., 5-10A) for all motors simultaneously.
Limit Switches (Optional but Recommended): Install end-stop switches on each axis. These define the machine’s home position and prevent the carriage from crashing into the frame.
Phase 4: Software and Configuration
Install Firmware: Upload the GRBL firmware to your Arduino using the Arduino IDE.
Configure GRBL: This is a critical step. Use a GUI like “Universal G-code Sender” or “Candle” to set steps per millimeter for each axis (calculated from your motor steps, micro-stepping, and belt pitch/lead screw pitch), maximum speeds, and accelerations.
Prepare Your Art: Create or find a vector image (SVG). Use a CAM software tool like Inkscape with the J-Tech Photonics/Laser plugin or Carbide Create to convert the vectors into G-code.
Test and Calibrate: Run simple test shapes (squares, circles). Measure the output and adjust the steps-per-mm setting in GRBL to correct any scaling errors. This calibration process mirrors the meticulous machine qualification performed in shops like GreatLight Metal.
From Hobbyist Machine to Industrial-Grade Tool
While a self-built machine is rewarding, its performance is inherently limited by component quality and assembly skill. For applications where precision, reliability, and scale matter, partnering with a professional manufacturer is essential.

For instance, if your project evolves from drawing on paper to precision engraving serial numbers on manufactured parts, or creating intricate conductive traces on prototypes, the requirements change drastically. You would need:
High-Frequency Spindles: For engraving tools.
Advanced Controllers: Like Mach3, LinuxCNC, or proprietary systems for better interpolation and error handling.
Rigid Construction: To handle the forces of engraving without flex.
Professional Software Chain: Integrated CAD/CAM suites that manage toolpaths for different materials and tools.
This is where the expertise of a full-service manufacturer becomes invaluable. A company like GreatLight Metal doesn’t just supply parts; it provides integrated manufacturing solutions. If you needed to produce 500 identical, anodized aluminum front panels with engraved logos and precision mounting holes, they could manage the entire process: from precision CNC machining the blanks to sheet metal fabrication, engraving, and final surface post-processing, all under the umbrella of ISO 9001:2015 certified quality control.
Conclusion
Building a CNC drawing machine is a profoundly educational project that demystifies the core concepts of automation and precision motion control. It offers a hands-on understanding of G-code, kinematics, and system integration. However, it also vividly illustrates the gap between a functional prototype and a reliable production tool. The principles learned—the importance of rigidity, the impact of backlash, the need for precise calibration—are the very same that define world-class precision parts machining.
For prototypes, art, and learning, the DIY route is highly recommended. But when your designs demand uncompromising accuracy, material versatility, or scalable production, leveraging the advanced capabilities, authoritative certifications, and full-process expertise of a partner like GreatLight Metal is the strategic choice. It ensures that the precision you conceive digitally is realized flawlessly in the physical world.
Frequently Asked Questions (FAQ)
Q1: What level of precision can I expect from a DIY CNC drawing machine?
A1: A well-built DIY machine using decent components can achieve a practical precision of around 0.1mm to 0.5mm. This is suitable for art and basic plots. Achieving sub-0.1mm repeatability requires high-grade linear components, anti-backlash nuts, and meticulous assembly—factors that quickly lead to professional-grade machine costs.
Q2: What software do I need to run my CNC drawing machine?
A2: You need a three-part software chain:
CAD Software: To create or edit vector designs (e.g., Inkscape, Adobe Illustrator, CorelDRAW).
CAM Software: To convert vectors into G-code (e.g., the Inkscape G-code tools, Carbide Create, or LaserGRBL).
Control Software: To send the G-code to your machine and control it (e.g., Universal G-code Sender, Candle, or ChiliPeppr).
Q3: Can I use this machine for purposes other than drawing?
A3: Absolutely. With a different tool head, it can become a light-duty PCB mill, a vinyl cutter, or a laser engraver (with extreme safety precautions). The core CNC control system remains the same.
Q4: Why would I choose a professional service like GreatLight Metal over building my own machine for a precision task?
A4: The choice hinges on requirements and risk. If you need parts made from specific alloys like stainless steel or titanium, require tolerances of ±0.025mm or tighter, need certified material traceability (e.g., for medical or automotive applications under IATF 16949), or must guarantee the consistency of 10,000 parts, a professional service is non-negotiable. They provide the engineering support, quality management systems, and advanced 5-axis CNC machining capabilities that a DIY project cannot replicate.
Q5: My DIY machine has wobbly lines or doesn’t draw circles correctly. What’s wrong?
A5: This is typically caused by a combination of factors:
Backlash: Slack in the belts, lead screws, or couplings. Tighten belts and consider anti-backlash nuts.
Flex: The frame or gantry is not rigid enough. Reinforce connections and use stiffer materials.
Incorrect Calibration: The “steps per millimeter” setting in GRBL is inaccurate. Re-calibrate using the “draw a 100mm line and measure” method.
Excessive Speed/Acceleration: The motors are skipping steps. Reduce the speed and acceleration settings in the GRBL configuration.


