
5 Axis CNC Work for Surgical Robot Joints
A robot wrist joint is a tight box: compound angles, thin walls, bearing bores that must stay coaxial, and a surface the sterilizer will not forgive. This page explains what 5 axis cnc work actually does inside the machine, where the process hits its limits, and which part features decide the route. Written for design and manufacturing engineers who sign the drawing.
In this article
- 1
- 2
- 3
- 4
- 5
- 6
- 7
- 8
Key takeaways
What 5 axis cnc work changes on a joint
A surgical robot joint is rarely a block with holes. Picture the wrist of an instrument arm: two bearing bores on crossed axes, a cable channel that has to stay inside a 2 mm wall, a mounting flange facing 35° off the bore axis, and a seal groove that wraps around a corner. On a 3-axis mill each of those features wants its own setup.
Every setup re-datum the part. Clamp it four times and you stack four position errors, even when each one is only ±0.01 mm. Five-axis work collapses that into one or two holdings. The tool reaches the feature instead of the part turning to face the tool, so the bore-to-flange relationship comes off one zero point.
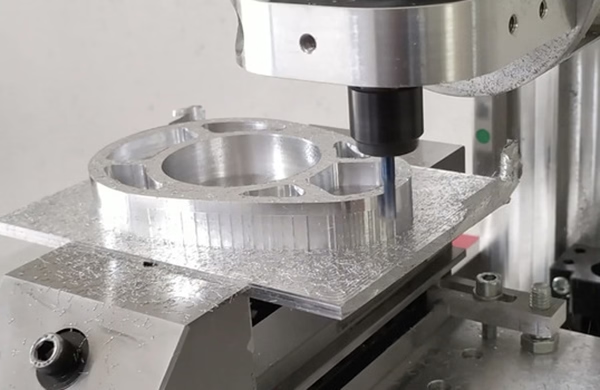
The gain is not only accuracy. It is also access. A lollipop cutter on a tilted spindle can machine the underside of a flange without a special fixture. That matters when the joint is 60 mm across and the wall is thin enough to deflect under a side load.
Simultaneous 5-axis is the version that matters here. Indexed 3+2 is fine for flat faces at odd angles. The moment a surface is curved and must blend into a bore, the machine has to move all five axes at once, or you leave witness lines where the passes meet.
- 1Crossed boresOne holding keeps true position instead of chasing it across setups.
- 2Thin wallsShort, tilted tools cut with less radial force than a long reach.
- 3Blended surfacesSimultaneous motion avoids step marks at pass boundaries.
- 4Deep pocketsTool holder clearance is the limit, not the table.
Where ±0.005 mm comes from, and where it stops
A joint drawing usually carries three different classes of callout, and they do not cost the same. Bore diameter and roundness are one class. Position of one bore relative to another is a second. Surface finish is the third. On our 5-axis centers we hold ±0.005 mm on bores and ±0.0002 in on inch drawings, but that number is a capability, not a promise for every feature on every part.
Position between two bores is the hard one. If the bores are 80 mm apart and both are finished in the same holding, the error is mostly spindle and thermal. Split them across two setups and you add fixture error on top. That is why we prefer to finish both bores in one operation, even when it costs cycle time.
Temperature matters at this scale. A 100 mm aluminum joint grows about 2.3 μm per °C. Machine it warm and measure it cold, and the number moves. We keep the shop at a controlled temperature for medical work and let the part equalize before final inspection.
Some callouts are simply not machined. A Ra 0.2 μm bore is often a ground or honed feature, not a milled one. Tell us the function, and we will say which step owns the tolerance instead of pretending one operation covers everything.
- 1Bore diameter and roundnessReachable by 5-axis milling with a rigid holder.
- 2Bore-to-bore positionBest finished in one holding; two setups add error.
- 3Sub-micron roundnessUsually grinding or honing territory, not milling.
- 4Flatness on a seal faceOften needs a separate lapping step.
Surface finish and cleanability
A joint that goes through an autoclave cannot have a surface that traps residue. Surface roughness below Ra 0.4 μm is common on instrument joints, and our fine finish band runs Ra 0.2–0.8 μm. Getting there is not a matter of slowing the spindle down and hoping.
Three things set the finish. The tool path decides the scallop height between passes. The cutter geometry decides how the material shears rather than tears. The deburring and polishing step decides what is left at the edges. Miss any one and the measured Ra will look acceptable while the part still holds contamination in a corner.
Tool marks are directional. A surface that looks mirror-bright under a light can still have a lay that runs across a seal path. We plan the finishing pass direction so the lay runs with the seal travel, not against it. That is a drawing note worth adding.
Materials change the recipe. 17-4PH stainless machines to a clean finish with the right grade and a fresh edge. Titanium TC4 (Ti-6Al-4V) smears and work-hardens if the feed is too light, so we keep the chip load up and the coolant on the cut. Aluminum 6061 and 7075 finish easily but mark easily, so handling after machining matters as much as the cut.
- 1Path stepoverControls scallop height on curved surfaces.
- 2Cutter edge conditionA worn edge tears instead of shears.
- 3DeburringEdges and cross-holes are where residue hides.
- 4Material behaviorTitanium needs a heavier chip load, not a lighter one.
Material choices and what they do to the cut
Surgical robot joints mostly land on three material families, and each one changes how the job is set up. Stainless 17-4PH (SUS630) is common for load-bearing joints because it takes a heat treat and holds a bore. It also moves during stress relief, so rough machine, treat, then finish.
Titanium TC4 appears where weight matters, such as a distal wrist or a small actuator housing. It cuts at roughly a third of the speed of aluminum and it will work-harden under a rubbing cut. We leave stock for a finishing pass and never let the tool dwell.
Aluminum 6061-T6 and 7075 are used for housings, brackets, and prototype joints. They machine fast and hold ±0.005 mm without drama, but they wear at a bearing seat. If a bore takes a press-fit bearing, plan a steel or stainless insert rather than trusting the aluminum wall.
PEEK and other polymers show up as insulators and wear liners. They machine cleanly with sharp tooling and generous clearance for chip evacuation, but they deflect under clamping pressure, so light holding and soft jaws are standard for those parts.
- 117-4PHRough, heat treat, then finish to hold the bore.
- 2TC4 titaniumHeavier chip load, no dwell, plenty of coolant.
- 36061 and 7075Fast to machine; add inserts at bearing seats.
- 4PEEKLight clamping and sharp tools to avoid deflection.
Inspection and the process chain around the machine
A 5-axis machine that cuts well but is not measured well is a risk, not a capability. Every part we ship gets raw material verification, in-process checks, and a final inspection before it leaves. Reports are available on request.
For a joint, the first article is where the real work happens. We check bore position on a CMM with the part at shop temperature, and we check the sealing surfaces for form, not just size. If the drawing allows it, a CT scan shows internal channels and wall thickness that a touch probe cannot reach.
The chain around the spindle matters as much as the spindle. Deburring by hand at a cross-hole leaves a radius that varies by operator. We would rather plan a controlled edge break into the tool path and confirm it on the bench.
Passivation and cleaning come after machining for stainless joints. Machining coolant residue left in a blind hole will show up as a corrosion site later. That is a process step, not a footnote.
- 1First articleCMM at controlled temperature before the run starts.
- 2CT scanReaches internal channels and wall thickness.
- 3Controlled edge breakRadius called on the drawing, not left to feel.
- 4PassivationRemoves free iron and machining residue.
Which process fits which joint feature
Use this as a first-pass filter before you send an RFQ.
| Joint feature | Best process | Why |
|---|---|---|
| Clevis with one through-bore | 3-axis mill | One setup, no angled faces, lower cost |
| Crossed bearing bores | Simultaneous 5-axis | Both bores finished in one holding |
| Flange at an odd angle | 3+2 indexed 5-axis | Positioning only, no contour blending |
| Curved outer shell | Simultaneous 5-axis | Cutter stays normal, no witness lines |
| Seal groove around a corner | Simultaneous 5-axis | Continuous path around the radius |
| Ra 0.2 μm bore | Grinding or honing after milling | Milling alone will not hold that band |
| Press-fit bearing seat | Mill plus steel insert | Aluminum wears at the seat |
| Prototype housing | 3-axis or 3+2 | Fast to program, easy to rework |
Source manufacturer vs. broker network
The difference shows up in who answers your process question.
| Question | Source manufacturer | Broker network |
|---|---|---|
| Who quotes the part | Process engineer on the floor | Account manager, then a shop |
| Who owns the tolerance | The shop that cuts it | Whoever the job lands with |
| Can you visit the machines | Yes, same building | Rarely possible |
| Drawing change mid-run | Direct conversation | Relayed through an intermediary |
| NDA and data handling | Signed framework in place | Depends on the partner shop |
| Lead time control | Scheduled on owned capacity | Subject to partner queue |
| Inspection reports | From the same site | Collected from a third party |
When 5-axis is the right call
If the joint has crossed bores, a curved shell, or a seal groove wrapping a radius, run it as simultaneous 5-axis work in one holding. If it is a flat clevis with a single bore, use a 3-axis mill and spend the saved money on inspection.
Questions engineers ask before an RFQ
How do you decide between 3+2 and simultaneous 5-axis?
Look at the surface, not the angle. If every face is flat and only the orientation changes, 3+2 indexed work is enough and it programs faster.
If a surface is curved and blends into a bore or a boss, the machine has to move all five axes at once. Indexed passes will leave visible steps where they meet.
Can a 5-axis mill hold a Ra 0.2 μm bore?
Not reliably as a milled feature. Milling gets you into the Ra 0.2–0.8 μm band on many materials, but the low end is usually reached with a ground or honed step.
Tell us the function of the bore. If it is a bearing seat, we will propose the finishing step that actually holds the number.
What part size fits your 5-axis capacity?
Our largest 5-axis travel is 4,000 × 400 × 150 mm, with medium and compact machines at 750 × 1,150 × 550 mm, 600 × 600 × 600 mm, 500 × 500 × 450 mm, and 500 × 310 × 200 mm.
Most surgical joints fall well inside the compact range. We also run a Ø400 mm rotary table for parts that need continuous rotation.
How do you handle thin walls that deflect under clamping?
Thin walls are a workholding problem before they are a cutting problem. We use soft jaws, low-pressure vises, and sometimes a sacrificial boss that gets removed in the last operation.
On the cutting side, a shorter tool with a tilted approach puts less radial load into the wall than a long reach cutter.
What documentation comes with the parts?
Raw material certificates, in-process records, and a final inspection report on request. We inspect 100% of parts before shipment.
We hold ISO 9001:2015, IATF 16949:2016, ISO 13485:2016, and ISO 27001:2022. Uploads are treated as confidential and an NDA is available.
Can you start a joint run from a single prototype?
Yes. There is no minimum order quantity, from one prototype to 10,000+ part runs. Quotation and a DFM review come back within 12 hours, and production can start within 24 hours.
Parts typically ship in 3–5 days. The DFM review is where we flag features that will not hold the tolerance as drawn.
Send us the joint drawing
Upload the model and we will return a quotation with a DFM review in 12 hours, including a note on which features need a finishing step.
12-hour quote100% inspectionNDA on request
More process notes from the shop
We publish setup notes, tooling trials and inspection data from the factory floor.











