
How to Make Polar CNC Drawing Machine
This guide shows how to make polar CNC drawing machine hardware from scratch: a rotating platen plus a radial arm, driven by two steppers. It is written for engineers and makers who already own a controller and want radial motion instead of an X-Y gantry. By the end you can judge which parts to machine yourself and which to outsource.
In this article
- 1
- 2
- 3
- 4
- 5
- 6
- 7
Key takeaways
What a polar CNC drawing machine actually is
A polar plotter has two axes: a rotation axis (theta, θ) that turns the work surface, and a radial axis (r) that moves the pen toward or away from the center. Cartesian machines move a tool along X and Y, so a circle becomes hundreds of short line segments. A polar machine draws that same circle with one slow rotation and a fixed radius. The motion is simpler, and for round or repeated radial patterns the drawing time drops.
The trade-off is non-uniform resolution. Near the center of the platen, one degree of rotation covers almost no distance. At the rim it covers several millimeters. So the same step angle produces fine detail in the middle and coarse stepping at the edge. If your artwork is mostly circular logos, dial faces or radial mandalas, this is fine. If it is a wide rectangle, the edge will look blocky.
This build is not a kit review. It is the sequence we would follow in a machine shop: pick the geometry, source the moving parts, machine the brackets, wire the drivers, then calibrate in a fixed order. The mechanical decisions you make in the first hour decide how much time you spend fixing wobbly output later.
Most builders stop at a pen. The same frame, with a small spindle or a drag knife instead of a pen, becomes a light-duty cutter or an engraver. The motion platform is the hard part. The tool holder is the easy swap.
- 1When polar winsCircular logos, dials, radial patterns, engraved discs.
- 2When polar losesLong straight edges, wide rectangular formats, text blocks.
- 3Main accuracy limitAngular resolution near the center, backlash near the rim.
Frame layout and part choices that decide accuracy
Start with the platen diameter. A 300 mm platen is a good first build: big enough for real artwork, small enough that a NEMA 17 stepper with a 3:1 belt reduction holds position. If you go to 500 mm, budget for a larger motor or a higher reduction ratio, because the inertia of the disc and the lever arm of the pen both grow.
The rotation axis needs a bearing that takes both radial and axial load. A single deep-groove ball bearing will wobble under an off-center pen load. Use a pair of angular contact bearings, or a crossed-roller bearing if you want the flattest platen. Preload the pair lightly so there is zero detectable rock when you push the platen edge up and down.
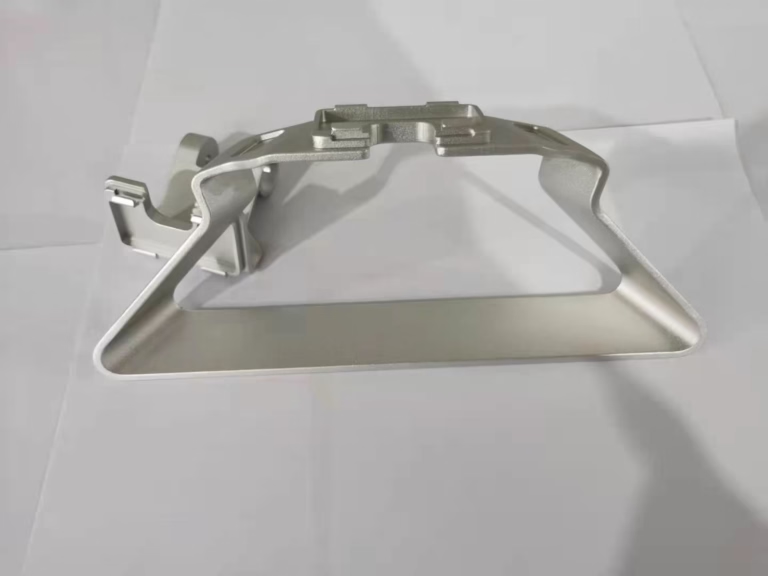
The radial arm is where most home builds fail. An aluminum extrusion arm is light but flexes. At 200 mm reach, a 1 N pen force bends a thin extrusion enough to smear lines. Machine the arm from 6061-T6 plate, 8 to 10 mm thick with a ribbed or channel section, and keep the pen carriage close to the rail. Reducing overhang does more for accuracy than any firmware tweak.
For the linear rail, an MGN12 or MGN15 profile rail with a preloaded carriage gives repeatable motion at low cost. A plain bushing on a drilled rod works for a first test but develops play within a few hours of drawing.
Where polar machines lose accuracy, and how to fix it
Backlash is the first symptom most builders see. It shows up as a small step where the pen reverses direction, usually on the radial axis. Fix it mechanically with an anti-backlash nut or a spring-loaded carriage before you try to compensate in firmware. Firmware compensation works only if the backlash is constant, and it rarely is.
Angular error is the second issue. If the platen hub is not concentric with the bearing axis, every circle you draw becomes an ellipse. Measure rim runout with a dial indicator and correct the hub fit rather than scaling the drawing. An error of 0.1 mm at a 150 mm radius is about 0.04 degrees, which is small, but it repeats on every revolution.
Arm flex is the third. Push the pen tip sideways with a finger and watch the arm. If you can see movement at the tip, the drawing will show it too, especially at high acceleration. Stiffen the arm or reduce reach. On a 200 mm arm, going from a 6 mm to a 10 mm plate section typically cuts tip deflection by more than half.
Finally, paper slip. A smooth platen lets the sheet creep during fast rotation. A light vacuum hold, a few strips of double-sided tape, or a textured mat all work. Tape is the cheapest fix and is good enough for most prototypes.
Machined parts worth outsourcing
You can print the pen carriage and the motor mounts in PLA for a first test. Those parts carry light loads and a printed bracket will survive. But the platen hub, the arm plate and the bearing housing take real force. Printed versions creep under preload and lose concentricity within weeks.
For those three parts, CNC machining in 6061-T6 aluminum is the practical choice. A turned hub with a bearing shoulder, a milled arm plate with a channel section, and a bored bearing housing all hold tolerance and stay flat. Tolerances of ±0.005 mm are available where the bearing seat needs them, and Ra 0.8–1.6 μm on the bearing bore is smooth enough for a press fit without galling.
If the platen itself is a large disc, 5052 or 6061 plate up to 4,000 mm processing size can be faced flat on both sides. Flatter plate means less runout at the rim and less need for shimming. For a 300 mm build, a faced disc with a machined center bore is enough.
For small-batch builds, no minimum order quantity matters. One hub and one arm is a normal order. If the design is still moving, rapid prototyping in aluminum lets you test the fit before committing to a finished surface.
- 1Machine thesePlaten hub, arm plate, bearing housing, motor mount.
- 2Print these firstPen carriage, cable clips, switch brackets.
- 3Ask forConcentricity callout on the hub, flatness on the arm.
Step by step: how to make polar CNC drawing machine
Follow the order. Skipping calibration steps costs more time than it saves.
- 11. Fix the platen and bearingsMachine or turn a platen hub with a shoulder for the bearing pair. Press the bearings into a housing, not into the platen, so you can shim preload. Target under 0.02 mm axial runout at the rim. A dial indicator on the rim tells you the truth in ten seconds.
- 22. Mount the rotation driveUse a 3:1 to 5:1 timing belt reduction from a NEMA 17. A 20-tooth to 60-tooth pulley pair is easy to source. Tension the belt so you can deflect it about 3 mm at mid-span with light finger pressure. Too tight and the motor bearing whines; too loose and you get backlash on direction changes.
- 33. Build the radial armBolt the linear rail to a machined 6061-T6 plate. Keep the rail parallel to the platen surface within 0.05 mm over its length. Mount the pen carriage on the rail block and check that the pen tip sits within 1 mm of the platen centerline when fully retracted.
- 44. Drive the radial axisA lead screw with an anti-backlash nut is the simplest reliable choice. A 2 mm pitch screw with a 200 step/rev motor at 1/16 microstepping gives 0.00625 mm per microstep, far finer than the pen needs. Belt drive works too, but keep the span short.
- 55. Wire the electronicsTwo stepper drivers, one controller running polar firmware or a post-processor that converts X-Y G-code to r-theta. Add homing switches on both axes. Use shielded cable for the motor runs and ground the shield at the controller end only.
- 66. Calibrate radius, then angleCommand a move of exactly 100 mm and measure the actual travel. Adjust steps per mm until the error is under 0.1 mm. Then command a full 360 degree rotation, mark the start point, and correct steps per degree. Do not touch the angle calibration before the radius is right.
- 77. Draw a test patternDraw a set of concentric circles at 20, 50, 100 and 140 mm radius, plus a radial line. Check that circles close without a visible step and that the radial line aims at the true center. Any gap at the seam means backlash or belt slack.
- 88. Tune acceleration and pen forceSet acceleration low enough that the platen does not ring when it starts. Start around 300 mm/s² on the rotation axis and raise it until lines blur, then back off 30 percent. Pen force should be the minimum that marks the paper consistently.
Radial drive options compared
Pick based on the accuracy you need, not on what is in the spare-parts bin.
| Drive type | Backlash risk | Best for | Watch out for |
|---|---|---|---|
| Lead screw, anti-backlash nut | Low | Accurate radial positioning | Nut wear over long runs |
| Lead screw, plain nut | Medium to high | Slow, low-cost builds | Visible seam on reversing moves |
| Timing belt, short span | Low | Fast radial moves, low mass | Belt stretch under load |
| Timing belt, long span | Medium | Large platen diameters | Elastic windup and vibration |
| Rack and pinion | Medium | Very long travel | Tooth engagement must stay tight |
The verdict
Build the frame rigid, buy the motion parts, and machine the hub and arm. That order gets you a polar CNC drawing machine that still draws clean circles after a hundred hours. If your design needs tight concentricity or a flat platen, send the drawing over and we will quote it.
Frequently asked questions
What is the difference between Cartesian and polar CNC machines?
Cartesian machines move a tool along two perpendicular linear axes, X and Y. Polar machines use one rotation axis and one radial axis. The polar layout draws circles with a single continuous motion, while a Cartesian machine approximates the same circle with many short segments.
The practical difference is resolution. Polar resolution is finest near the center and coarsest at the rim. Cartesian resolution is uniform across the work area.
Can I build a polar CNC machine at home?
Yes, if you can machine or buy a concentric platen hub and a stiff radial arm. The electronics are the same as any two-axis machine: two drivers, one controller, two homing switches.
The hard part is not the wiring. It is removing backlash and runout. Budget most of your build time for measuring and shimming, not for firmware.
What materials can be used in a polar CNC system?
For a pen plotter, any paper or card stock works. For a light cutter, use vinyl, thin foam board or adhesive film. The frame stiffness and motor torque set the limit, not the material itself.
If you want to engrave or mill, the same motion platform works with a small spindle, but you need a much stiffer arm and a platen that resists cutting force.
Why use five-axis CNC machining for custom parts?
Polar machine parts often have features on several faces: a bearing bore, a mounting face and a belt clearance pocket. Five-axis machining sets up those features in one operation, so concentricity between the bore and the mounting face stays tight.
On a multi-setup job, each re-clamp adds error. One setup removes that stack-up.
Is GreatLight suitable for prototyping and small-batch production?
Yes. There is no minimum order quantity, so a single hub or arm plate is a normal order, and runs of 10,000+ parts are also supported. Quotation and DFM analysis come back within 12 hours, and production can start within 24 hours.
Parts ship in 3–5 days, with 100% inspection before shipment and reports on request.
How do I know if my polar build needs a machined arm instead of a printed one?
Push the pen tip sideways with light finger pressure and watch for movement. If you can see the tip move more than about 0.2 mm, the arm is too flexible for fine work.
Printed arms also creep under preload over time. If your circles were round last week and are elliptical now, replace the arm with a machined aluminum plate.
Need machined parts for your polar build?
Send your hub, arm or bearing housing drawing. We reply with a quote and DFM notes within 12 hours.
12-hour quote100% inspectionNo minimum order quantity
More from GreatLight
We publish setup notes, tooling trials and inspection data from the factory floor.











