Bring the anime to life: Your 3D guide prints the iconic Yu-Gi-Oh! Duel Disk
Clear prick The drawn card is a dramatic cry "I draw!" – For a generation, the duel disk is not only a prop, it is the gateway to fierce monster battles in the Yu-Gi-Oh world! Once pure fantasy can now become a stunning physical reality thanks to the magic and accessibility of 3D printing. Whether you are an experienced duel, passionate role player, or a 3D printing enthusiast, making your own duel disk is an incredibly rewarding project. Let’s look at how to achieve it.
Phase 1: Planning and Preparation – Lay the Stage for Victory
-
Select your Duel Disk Design: Yu-Gi-Oh! Universe has several different duel disk designs in its series. Do you want the original bulky model of Yugi/Yami Yugi (Duelist Kingdom/Battle City)? Kaiba’s stylish, more angled version? From the streamlined designs from later series, such as the GX or 5D? Or custom fusion design? Popular Platforms Thingiverse, cults3d and myminifactory Host a model created by many fans. Search similar "Yugioh Duel Disk STL," "Kaiba Disk STL," or a specific generation name.
- Complexity check: Check out the model list carefully. Some are incredibly detailed replicas with moving parts, articulated arms, lighting mounts and sophisticated card slots. Others simplified certain elements to make it easier to print. Depending on your printing skills, time commitment and a loyal choice for your expectations. Battlefield disks may be more complex than the basic prototype model.
-
Select your printing arsenal (basic):
- Filigree time: For most enthusiast printers, PLA is the first choice. It is affordable, available, has countless colors, and is relatively easy to print. However, for parts that may experience pressure or heat (such as outside of a fraudster), Petg Provides high toughness and heat resistance. Abdominal muscles Very tough, but can be trickier due to warping and smoke.
- Printer requirements: You’re almost certainly going to need a printer Large-scale build volume (Usually 300x300x300mm or larger). Unless it is largely split, most full-size duel disk components, especially arm shields and central disk units, are too big for small desktop printers. careful Before slicing, check the component requirements and part sizes in the model description.
- Software slicing and printing preparation:
- Slicer software: Tools like Cura, Prusaslicer, or Bambu Studio are crucial. You will load the STL file here.
- Directions and support: Strategic oriented parts. The plane should usually be on the build board. Features such as tilted arms or complex card grooves almost certainly require support. use The support of the tree Often found in modern slicers – they usually use less material, are easier to remove, and cause fewer scars than traditional proppants.
- filling: It is designed to maintain good strength and material protection of 15-30% of the filler. Areas such as fixing clips, hinges (if any), or card slides may benefit from slightly higher fills (30-40%). Consider using Energy-shaped filling Have good strength in multiple directions.
- Layer height: 0.2mm provides a good mix of speed and detail. For smoother surfaces, especially on the large area of the shield, a 0.15mm or even 0.12mm surface will look better, but it will take longer.
- Perimeter/Wall: 3 Peripherals are good standards for major structural parts, ensuring stable rigidity. For very thin components you may need 4 or even 5.
Phase 2: Execution – Printing and Glorious Grinding (Post-processing)
-
Print components: This is a marathon. The larger part is expected to adopt Many hoursDepending on the size, filling and setting, each piece size may exceed 20 hours. Patience is the key.
- Horizontal bed and dry silk: Ensure your bed is perfectly level. Use fresh silk from the dry box or dry beforehand (especially for PETG, nylon or ABS) to prevent moisture-related printing problems (Brittleense, Strigning, Blobs).
- Monitoring early layers: Watch the first few layers closely for proper adhesion. Twisting or early shedding can destroy long-term prints.
- Safety: Ensure good ventilation, especially when printing ABS or ASA.
-
Supports removal and grinding:
- Delete carefully: Use a rinse cutter and tongs to remove the support carefully. Patience prevents destruction of vulnerable characteristics.
- The sand of time – Mainly polished: This is where your props are transformed from "Cool printing" arrive "Professionally completed." Start the rough (80-120 grit) to remove the main support scars and layer lines, and then proceed methodically through higher grits (180, 220, 320, 400, and even 600+ wet sand) for ultra-smooth surfaces. Please pay extra attention to the curved surfaces and edges. Stage of sand – urgent coarse sand can cause deep scratches and will take a long time to remove later.
-
Assembly and engineering touch:
- First, stem fit: Assemble everything forward Bond to identify friction points or areas that need to be trimmed/sanded.
- Mechanical fixing parts: For critical joints or debris under pressure, replenish glue with mechanical fasteners. Insert the small threaded heat into the plastic column and use matching machine screws. This results in stronger, more durable and serviceable connections compared to individual plastic glue. The use of articulated arms or clamping mechanisms is strongly recommended.
- Adhesive: Use CA glue (Super Glue) with Kicker for quick keys on pressure-free seams. For forgiveness in larger load-bearing areas or positioning, strong 2-part epoxy (such as 5 minutes) or plastic-specific cement (for PLA/PETG) is excellent. After bonding, fill the blanks with fill putty (such as Bondo or Milipt).
- Card mechanism: If your model includes a function card slot/pull mechanism, lubricate the moving parts with A dry PTFE lubricant ensures smooth operation without attracting dust.
- Finish and paint – unleash true power!
- start up: Apply high-build spray primer (filled primers are great for hidden layer lines). Gently sand between 2-3 layers. This creates the perfect canvas.
- Color primer: Use spray paint designed for plastic. A light jacket is the key to avoiding running. Match the duel disk character of your choice (e.g., Yugi’s metallic gray/black/red decoration, Kaiba’s iconic white/blue/silver). Tape is essential for clean color separation.
- Details and weathering: Handmade work with brushes and acrylic hand drawn symbols, icons, buttons and tiny details adds authenticity. Consider weathering techniques such as dry brushed metal edges with silver/gray to simulate wear, or depth with a thin black cleaned panel lining. Clear gloss jacket for metal/gloss parts; matte jacket for clear flat areas.
- Electronics (optional): Track the energy path with EL wires, LED strip lighting within the channel, and even customizable RGB LEDs controlled by Arduino to lift it. The battery compartment and wiring passages need to be carefully planned.
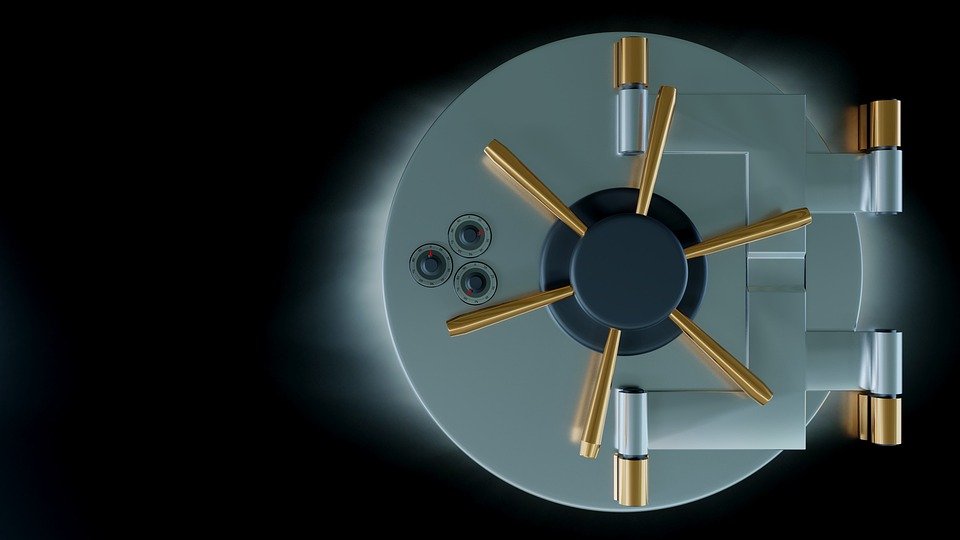
Phase 3: Take Duel to the Next Level – Professional Metal 3D Printing (Enter Greatlime!)
While a well-made PLA/PETG showdown disk is great for role-playing and displaying, you may dream of something really great: A functional, durable, strikeable duel disk made of solid metal. This is the professional capability of professional metal 3D printing services, e.g. Greatbecome the ultimate trump card.
- Unrivaled durability and strength: Fusion deposition modeling (FDM) plastics have inherent limitations in affecting resistance and long-term structural integrity, especially for thinner components or locking mechanisms (such as locking mechanisms). Metal 3D printing (usually selective laser melting – SLM or direct metal laser sintering – DML) Build parts layer by layer with high-quality metal powders such as stainless steel, aluminum alloy or titanium and melt them completely with a high-power laser. turn out Dense, uniform metal parts Mechanical properties are close to or sometimes exceed those traditionally processed components. Your duel wheel becomes a true heirloom, resisting the unexpected bumps and stress of event life.
- Heat resistance: Forgot the PLA twist in the sun at the outdoor convention. Metals deal with these conditions effortlessly.
- High-quality surface finish potential: Although post-processing is still required, metal-printed parts can still achieve mirror-like polishes, complex etching details or professional electroplating finishes (such as chrome, gold or bronze), far beyond the possibility of painted plastic. Imagine the central holographic projector unit glittering, such as clean aluminum or rich brass.
- Complexity is King: Metal AM stands out in complex geometries – perfect for the complex internal support structure of the replica arm mechanism, hollow channels of integrated wiring and LEDs, or lightweight lattice structures inside the shielded panel while maintaining rigidity. This complexity often occurs in the huge cost penalty for CNC processing of solid reinforcement for this shape.
- Material versatility: In addition to standard stainless steel and aluminum, specialized alloys can also provide unique characteristics – lighter weight (titanium alloy, aluminum), higher strength-to-weight ratio (titanium, tool steel), or specific thermal/electrical properties.
- Mechanical precision: Metal printing provides incredibly tight tolerances. This is crucial for functional aspects such as sliding card mechanisms, locking latches and any articulated joints. this "Click" The attraction of metal cards Major.
- One-stop solution: Greglight is not only about printing the duel disks you dream of; they manage the entire journey. From optimizing metal-printed design files (critical for supporting placement, orientation and thermal management) to the actual build process, to the critical Post-processing phase: Tolerant pressure, precise support removal, CNC machining of critical interfaces (such as screw holes for hinges), polishing, finishing (bead blasting, polishing) and applying durable, amazing finishes such as electroplating, anodizing or powder coating. This ensures not only functionality, but also breathtaking collection-level results.
Conclusion: From the printer to the power supply!
3D printing yu-gi-oh! Duel disks are more than just building props. It is associated with precious memories and shows creative creativity. Whether you start with a modest desktop FDM printer and meticulous printer or a masterpiece forged in high-performance metal with services like Greatlight, this journey makes a lot of sense. The key point is Careful preparation, patience during printing and finishing, and intelligent assembly.
For those who need the ultimate in durability, realism has an unparalleled metal finish, a functional mechanism for lasting construction and only heavy-duty authenticity offered by metal, the professional metal additive manufacturing industry opens the door to game changers. It transforms the duel disk from a nostalgic prop to a statement of functional art.
So start your slicer, load the filament (or send an optimized design to the Metal Miracle!) and get ready to enter the stage with your own, custom duel spirit symbol! Remember that whether it is plastic or metal, the heart of the card is your command.
FAQs About 3D Printing Showdown Disks
Question 1: What is the estimated cost of printing a plastic showdown disk myself?
one: Costs vary widely based on size, filling and filament brand. A full-size PLA showdown disk may consume about 1-2 kg of filaments ($20-$50). Add the cost of glue, paint, primer, sandpaper, and any electronic or mechanical fasteners. The total amount for the project is expected to be 60-$200+.
Q2: How long does the entire project take (plastic version)?
one: On a typical FDM printer, the printing time of all parts can easily exceed 100 hours. Add a lot of time to remove support, fine sanding, assembly, primer/painting (including drying/curing time between coats) and details. Plan a project that spans weeks or months of dedicated work.
Q3: Can I actually make my arms fully expressed like the ones in anime?
one: Achieving a smooth, reliable 180-degree pronunciation like anime requires careful engineering. Amateur plastic prints may experience the necessary strength at thin hinges for a long time. Using metal bolts, pins, reinforced joints and potential springs is crucial. For truly robust and liquid pronunciation, which can be repeatedly turned on/off, metal printing provides a more durable solution. Simple locking position is easier to implement reliably.
Q4: Is metal 3D printing very expensive? How do I get a quote?
one: Metal AM is inherently more expensive than FDM printing due to machines, materials, controlled environments and extensive post-processing. The cost depends to a large extent on the specific metal selected (stainless steel vs. titanium), the overall size/volume of the part, complexity (affecting support requirements/post-processing time), and the required finish. The best way is to consult directly with a service provider like Greatlime. Provide them with an optimized 3D model file (step/STL), specifying the required metal and finishes, and can provide an accurate quote. Expected quotes range from hundreds to thousands of dollars, depending on the complexity and material.
Q5: If using a service like Greatlime, which metal material is best for duel disks?
one:
- Stainless Steel 316L: Excellent all-around ball, strong, durable, corrosion-resistant, suitable for coating (chrome, gold) or bead finishes. The weight is obvious.
- Aluminum alloy (ALSI10MG): Heavier than steel, while still firm and stiff. Can be anodized in bright colors (blue, silver, black) or polished. Great for weight-sensitive props.
- Titanium alloy (TI6AL4V): Advanced choice. Very high strength to weight ratio (biocompatibility) can oxidize to eye-catching colors (blue, purple, gold), and corrosion resistance. The cost is significantly higher.
Question 6: My printed plastic parts feel fragile. How can I strengthen them?
one:
- Increase wall count/fill: Especially in structural areas.
- Add internal support: Glue in sheet metal blocks in plastic rods, carbon fiber tubes or hollow parts.
- Epoxy soaking/coat: For PLA, thin epoxy can be evilly trapped into the layer lines to significantly harden the surface.
- Hot metal inserts: For screw holes, these provide stronger wires in plastic.
- Thicker design: If modifying STL is an option, slightly thicken the key structural elements.
Don’t just dream of duel fate – create it! From desktops to industrial-grade metal AM, the power of modern manufacturing makes it possible. What design would you summon?