
How to Choose a Tool Correctly for CNC Turning and Milling
Tool selection is a sequence, not a guess. This guide walks through seven steps we use on the floor at GreatLight, from reading the feature geometry to verifying runout and break-in. It is written for engineers and programmers who need a defensible choice before the first chip.
In this article
- 1
- 2
- 3
- 4
- 5
- 6
- 7
- 8
What matters most before you order a tool
Start with the feature, not the catalog
Most bad tool choices start in the wrong place: a catalog page. Before you open one, list what the feature actually demands. Reach, clearance, corner radius, depth-to-diameter ratio, tolerance and surface finish. A 6 mm end mill with a 4:1 length-to-diameter ratio will deflect more than a stub version, even in the same grade and coating.
Look at the feature from the holder side. On a turning center, the parting blade must clear the chuck jaws through the full cut. On a mill, the holder body can hit a wall before the cutter reaches the floor of a pocket. We model the holder in CAM for this reason, not just the tool.
Tolerance sets the floor for tool quality. If the print calls for ±0.005 mm, a general-purpose cutter with 0.02 mm runout will not hold it across a batch, even with a perfect program. Finish requirements do the same job on the other end: Ra 0.8–1.6 μm is realistic with a sharp ground edge and stable conditions; Ra 0.2–0.8 μm usually needs a dedicated finishing pass and a rigid setup.
Write the list down. Reach, corner radius, ratio, tolerance, finish. That list filters the catalog faster than any index.
- 1Feature firstReach, clearance, radius, depth ratio, tolerance, finish.
- 2Check interferenceHolder and blade, not only the cutting edge.
- 3Tolerance floor±0.005 mm parts need a ground, low-runout tool.
Match the material to substrate and coating
The workpiece decides the substrate class before the coating. Aluminium 6061, 7075 and ADC12 cut best with uncoated or polished carbide and high positive rake, because the metal is soft and gummy. A sharp, free-cutting edge avoids built-up edge and keeps chips flowing.
Stainless 303, 304, 316 and 17-4PH work-harden. Here you want a tougher substrate and a coating that resists heat and abrasion, such as TiAlN or AlTiN. Keep the edge in the cut; dwelling on 304 will harden the surface and dull the tool within a few passes.
Titanium TC4 (Ti-6Al-4V), Inconel and magnesium AZ31B or AZ91D sit at opposite ends. Titanium and Inconel need a strong edge, low cutting speed and plenty of coolant, so sharp positive geometry is risky. Magnesium cuts freely but brings chip-fire risk, so keep feeds high and never let fines accumulate.
Plastics such as POM, PEEK and ABS need sharp, polished flutes and high rake. Heat is the enemy. A coated tool that works well in steel can smear POM because the coating raises friction and traps heat at the edge.
- 1AluminiumUncoated polished carbide, high positive rake.
- 2300-series stainlessTougher grade, TiAlN or AlTiN, no dwell.
- 3Titanium and InconelStrong edge, low speed, flood coolant.
Choose geometry for chip control and force
Rake angle controls cutting force and chip flow. Positive rake lowers force and suits soft, gummy materials, but the edge is weaker. Negative rake is stronger and suits interrupted cuts and hard materials, at the cost of higher force and more heat. For most 6061 work, positive rake wins. For a hardened insert pocket or a rough casting, negative rake survives longer.
Chip breakers matter as much as the angle. A finishing breaker with a narrow land makes thin, controllable chips at light depth of cut. A roughing breaker with a wide land handles 2–4 mm depth but produces thicker chips and higher force. Using a roughing breaker for a 0.3 mm finishing pass usually rubs instead of cutting.
Radius selection follows the same logic. A 0.4 mm corner radius is a good general choice for finishing; 0.8 mm and above survive roughing better but push radial force up. On slender parts, that extra force causes deflection and taper.
For parting and cutoff, insert width is the main lever. A narrow blade cuts faster and wastes less material but flexes more. A wider blade is stable but needs more spindle power and can chatter on small-diameter bar. Match width to bar diameter and overhang, not to habit.
- 1Positive rakeLower force, better for aluminium and soft steel.
- 2Negative rakeStronger edge for interrupted and hard cuts.
- 3Breaker choiceFinishing land for light passes, roughing land for 2–4 mm.
Set starting parameters from the material, then trim
Surface speed is the first number. For aluminium 6061 with uncoated carbide, 300–500 m/min is a normal window. For 304 stainless, 120–180 m/min. For TC4 titanium, 40–60 m/min. For POM, 200–400 m/min but with an eye on chip evacuation and heat.
Feed per tooth follows the chip load the edge can take. A 10 mm three-flute cutter in 6061 might start near 0.05 mm per tooth; the same cutter in 304 drops to about 0.03 mm. Too light a feed rubs and work-hardens stainless. Too heavy a feed on a small cutter snaps it on the first corner.
Depth of cut should respect the tool ratio. Radial engagement of 30–40% of diameter is a safe starting point for roughing with a standard end mill; full-width cuts belong on stub tools or in aluminium. Axial depth of 1× diameter is common in aluminium, 0.5× diameter in stainless.
Then trim one variable at a time. If chatter appears, reduce radial engagement before reducing speed. If the edge wears too fast, reduce speed before changing feed. Changing two numbers at once tells you nothing about which one helped.
- 1Speed first6061 at 300–500 m/min, 304 at 120–180 m/min.
- 2Chip loadAround 0.05 mm per tooth in aluminium, 0.03 mm in 304.
- 3One variableAdjust engagement, then speed, then feed.
Verify runout, then break the edge in
Runout is where good plans fail quietly. A tool with 0.030 mm total indicated runout will cut one flute harder than the others, wear unevenly and leave a poor finish. Measure with a dial indicator on the cutting edge, not on the shank. Clean the taper, seat the holder properly and re-check.
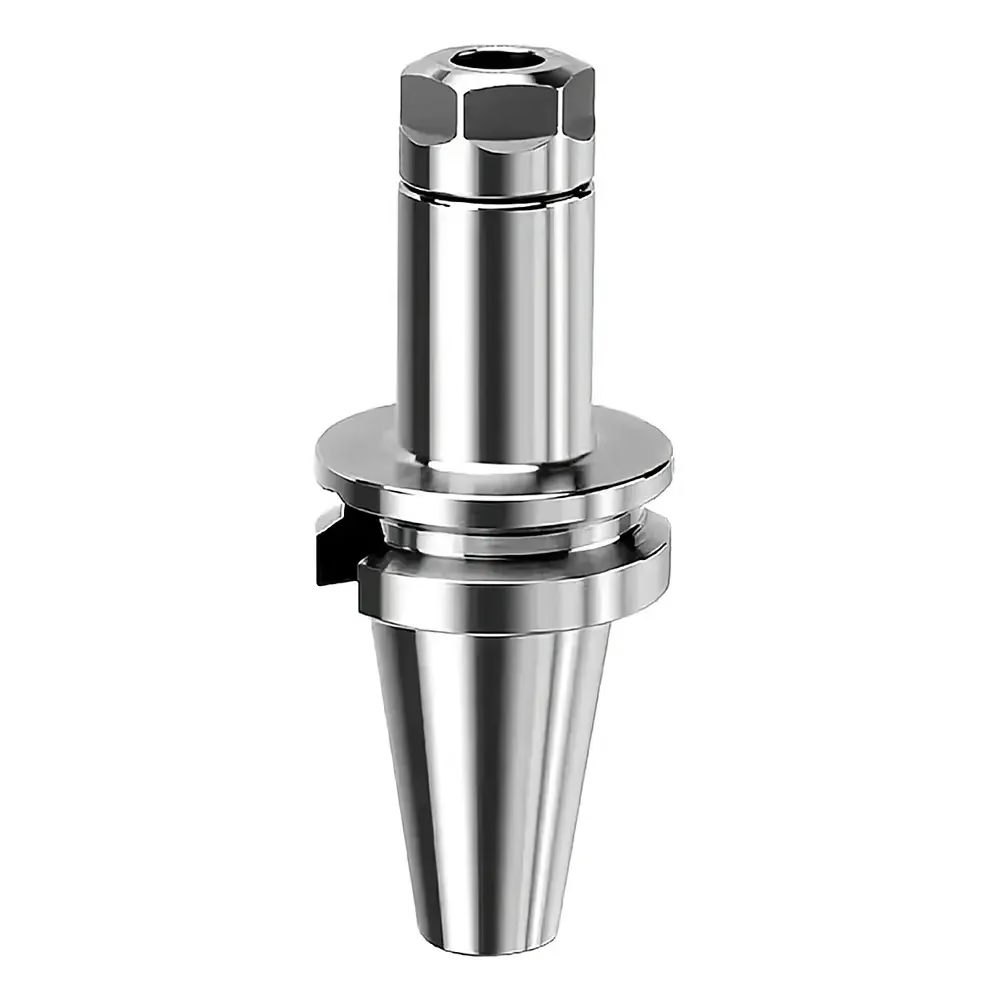
On hydraulic and shrink-fit holders, runout under 0.005 mm is achievable. On a standard collet chuck, aim for under 0.010 mm. If the number stays high, the holder or the collet is the problem, not the cutter.
Break-in protects a coated edge. Run the first 30 seconds at 70–80% of the calculated cutting speed to let the coating settle into the cut. Skipping this step can micro-chip the edge on the first heavy pass, especially in stainless and titanium.
Record what you used. Tool code, holder, runout, speed, feed and depth. The next job in the same material starts from a known point instead of a guess.
- 1Measure on the edgeDial indicator on the cutting edge, not the shank.
- 2Collet targetUnder 0.010 mm; shrink-fit under 0.005 mm.
- 3Break-in70–80% cutting speed for the first 30 seconds.
Seven steps from print to first cut
Work through these in order; each one filters the next.
- 1Read the featureNote reach, corner radius, depth-to-diameter ratio, tolerance and required finish. Flag any face the holder cannot reach.
- 2Check clearance and interferenceModel the holder and blade in CAM. On turning, confirm the parting blade clears the jaws through the full cut.
- 3Pick the substrate classUncoated polished carbide for aluminium, tougher coated grades for stainless, titanium and Inconel. PEEK and POM need sharp polished flutes.
- 4Choose rake and breakerPositive rake for soft materials, negative for interrupted or hard cuts. Finishing land for light passes, roughing land for 2–4 mm depth.
- 5Set starting parameters6061 at 300–500 m/min and 0.05 mm per tooth; 304 at 120–180 m/min and 0.03 mm per tooth; TC4 at 40–60 m/min with flood coolant.
- 6Measure runoutDial indicator on the cutting edge. Target under 0.010 mm in a collet, under 0.005 mm in shrink-fit.
- 7Break in and recordFirst 30 seconds at 70–80% cutting speed. Log tool code, holder, runout, speed, feed and depth.
Tool choice by material and cut type
Starting points, not limits. Trim after the first pass.
| Workpiece | Substrate and coating | Geometry | Starting speed |
|---|---|---|---|
| Aluminium 6061 / 7075 | Uncoated polished carbide | High positive rake, 3 flutes | 300–500 m/min |
| Stainless 304 / 316 | Tough grade, TiAlN or AlTiN | Positive rake, strong edge | 120–180 m/min |
| Titanium TC4 | Fine-grain carbide, AlTiN | Sharp but strong edge | 40–60 m/min, flood coolant |
| Inconel 718 | Fine-grain carbide, AlTiN | Negative rake, reinforced | 25–40 m/min, flood coolant |
| POM / PEEK / ABS | Uncoated polished carbide | High rake, sharp flutes | 200–400 m/min, air blast |
| Cast iron | Coated carbide, tough grade | Negative rake, strong edge | 120–200 m/min, dry or mist |
| Parting 304 bar | Coated carbide insert | Narrow width, positive rake | 80–120 m/min, rigid setup |
Choose the tool for the feature in front of you
Reach and clearance decide whether the tool can do the job. Grade, coating and geometry decide how long it lasts. Get the first group right and the second becomes a tuning exercise.
Questions engineers ask before ordering
Should I choose coating or geometry first?
Geometry first. If the tool cannot reach the feature or clear the holder, coating and grade never get a chance to matter.
Once reach and clearance are settled, match substrate and coating to the workpiece material, then fine-tune rake and breaker for the cut type.
How do I know the tool is right for a ±0.005 mm part?
Start with a ground tool and check total indicated runout on the cutting edge. Under 0.010 mm is a practical target in a collet holder; shrink-fit can reach under 0.005 mm.
Then confirm the machine and fixture can hold the part. Tool quality alone will not hold ±0.005 mm if the setup moves under load.
When is a negative rake tool the better choice?
Use negative rake for interrupted cuts, hard materials and heavy roughing where edge strength matters more than cutting force.
For aluminium, thin-wall parts and light finishing passes, positive rake usually gives a cleaner cut and lower deflection.
Why did my stainless insert fail after a few passes?
The usual cause is dwelling. Stainless 304 and 316 work-harden when the edge rubs instead of cutting. Raise feed per tooth and keep the tool engaged.
Check runout too. A tool cutting on one flute heats that edge quickly and chips it.
Does a wider parting blade cut better?
Not automatically. A wider blade is stiffer but needs more spindle power and removes more material. On small-diameter bar it can chatter.
Match width to bar diameter and overhang, and keep the blade square to the axis.
How many parameters should I change at once?
One. If chatter appears, reduce radial engagement first. If edge wear is fast, reduce speed. If chips are long and stringy, raise feed per tooth.
Changing two numbers at once removes your ability to trace which one helped.
Send the print, get a tooling plan
Share your drawing and material. Our engineers review geometry, tolerance and finish, then return a quotation with free DFM analysis within 12 hours.
12-hour quoteFree DFM analysisNo minimum order quantity100% inspection before shipment
More CNC knowledge from the shop floor
We publish setup notes, tooling trials and inspection data from the factory floor.











