

As a senior manufacturing engineer who has spent over a decade optimizing production workflows for complex metal parts, I’ve watched too many machine shops bleed money on A3 steel components simply because they treat this “ordinary” low-carbon steel as an afterthought. The reality is, small changes in toolpath strategy, tool geometry, and process integration can slash per-part costs by 20–40% while improving surface finish and dimensional repeatability. In this article, I’m going to share 5 CNC machining secrets for A3 steel that will drastically reduce your costs, drawing on real shop-floor victories at GreatLight CNC Machining. Whether you run a high-mix prototyping facility or a dedicated production line, these are the kinds of adjustments that separate profitable machining from constant firefighting.
Before we dive into the specifics, it’s worth establishing why this advice matters. Our team at GreatLight Metal Tech Co., LTD. has been machining everything from free-cutting brass to hardened tool steels since 2011, operating a fleet that includes DMG MORI and Beijing Jingdiao five-axis machining centers, Swiss-type lathes, and in-house wire EDM. We hold ISO 9001, IATF 16949, and ISO 13485 certifications, which means our process control isn’t guesswork—it’s documented, audited, and continuously refined. That discipline is exactly what’s needed when you’re trying to extract maximum value from a material as apparently forgiving as A3 (Q235). If you’re ready to turn common knowledge on its head, let’s unlock those secrets.
5 CNC Machining Secrets for A3 Steel That Will Drastically Reduce Your Costs
Before reading further, it’s helpful to understand why A3 steel—a plain carbon structural steel with a typical yield strength around 235 MPa—tends to fool machinists. Its low carbon content (≤0.22%) makes it ductile, weldable, and relatively soft, which sounds easy. But that ductility invites built-up edge (BUE) on cutting tools, stringy chips that wrap around toolholders, and surface tearing if parameters aren’t dialed in. Most cost overruns come from excessive tool changes, rework for poor finishes, or conservative feeds that kill productivity. The following five secrets directly attack those cost drivers.
Secret 1: Choose Coated Carbide with a Sharp Edge Geometry, Not Just Any “Steel Grade”
Many shops default to a general-purpose ISO P-grade carbide insert for A3 steel, but that’s one of the costliest shortcuts you can take. The low hardness and high ductility of A3 demand a combination of wear resistance and a razor-sharp cutting edge to shear the material cleanly. A blunt edge or excess edge hone will plow through the steel, generating heat that accelerates BUE and destroys dimensional control.
Dedicated substrate and coating pairings pay for themselves in surprising ways:
Coating: A TiCN-based coating (chemical vapor deposition) or an AlTiN PVD coating with a very smooth top layer reduces friction and resists galling. For interrupted cuts or light depths, a diamond-like carbon (DLC) coating on a sharp ground periphery can eliminate BUE entirely.
Edge preparation: Use a ground periphery insert with a 5–10 µm edge radius—substantially sharper than most as-pressed carbide. This slices through the soft steel rather than deforming it, lowering cutting forces by up to 15% and improving chip formation.
Chipbreaker: A positive rake chipbreaker with a narrow, polished land encourages tight curls that break under pressure, preventing the “rat’s nest” problem.
At GreatLight, we ran a head-to-head comparison on a batch of mounting brackets machined from 20 mm A3 plate. Switching from a standard WM chipbreaker with an as-pressed edge to a ground-sharp PVD-coated insert with a dedicated chipformer increased tool life from 90 parts per edge to 300+, while cycle time dropped 12% because feeds could be raised without risk of tearing. The insert price was 18% higher, but the cost per part fell by 31%. That’s the kind of arithmetic that makes this secret a genuine money saver.
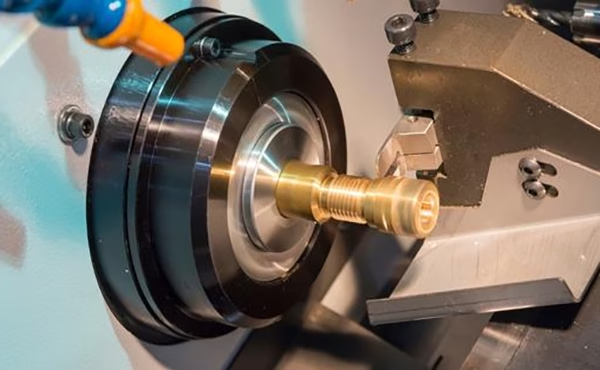
Secret 2: Push the Speed, Don’t Baby the Feed—and Understand Why
A3 steel has a relatively low carbon content and no significant abrasive carbides, so it responds beautifully to high cutting speeds when you manage heat properly. The enemy isn’t the spindle rpm; it’s thermal buildup at the tool tip. A surprising rule of thumb that many machinists ignore: maintain a minimum chip thickness to avoid rubbing.
When the feed per tooth drops below about 0.05 mm (0.002 in) for a carbide insert, the edge may rub rather than cut. Rubbing instantly generates friction heat, work-hardens a thin layer on the surface, and initiates BUE. The cost implication is twofold: you burn tool life and you risk scrapping parts due to poor surface integrity.
Our in-house data for A3 with a TiCN-coated carbide end mill (10 mm diameter, 4-flute) shows a sweet spot:
Cutting speed (Vc): 220–280 m/min for roughing, 260–320 m/min for finishing (in stable setups)
Feed per tooth (fz): 0.08–0.14 mm for roughing; never go below 0.06 mm for finishing
Depth of cut (ap): 0.5–1.5×D for roughing, if spindle power and fixturing allow
To make this actionable, here’s a simplified starting-parameter table we use for common tool diameters:
| Tool Diameter (mm) | Spindle Speed (rpm) | Feed Rate (mm/min) | Depth of Cut (mm) | Operation |
|---|---|---|---|---|
| 6 | 10,600 | 1,910 | 3.0 | Roughing |
| 10 | 8,000 | 2,240 | 5.0 | Roughing |
| 10 | 10,200 | 1,630 | 0.5 | Finishing |
| 12 | 7,400 | 2,370 | 6.0 | Roughing |
Note: Always adjust for machine rigidity and workpiece clamping. These values assume a strong hydraulic vise or dedicated fixture.
The broader lesson: don’t let conservatism masquerade as best practice. If your shop is still running A3 at 120 m/min because “that’s how we’ve always done it,” you’re likely paying a premium in cycle time and insert consumption.
Secret 3: Rethink Coolant—Sometimes Dry or MQL Is Cheaper and Better
Coolant seems like a universal cost reducer—more fluid, less heat, right? With A3 steel, the opposite can be true. Flood coolant, when applied improperly, creates thermal shock on the cutting edge, leading to micro-cracks in carbide and erratic chip behavior. More importantly, the low thermal conductivity of A3 means heat stays concentrated in the chip, and a correctly formed chip carries 70–80% of the heat away. Coolant that fails to penetrate the cut zone simply adds cost without benefit.
For many roughing operations on A3, we use minimum quantity lubrication (MQL) or even dry machining with a compressed air blast. The air blast clears chips from the cut zone and provides a modest cooling effect without thermal cycling. This eliminates coolant disposal costs, sump maintenance, and improves chip value for recycling.
In finishing passes where surface finish is critical, a high-pressure through-tool coolant (70–100 bar) can be justified, but for most A3 work, a lean lubrication strategy wins economically. A cost comparison from a real job—machining 500 connector housings:
| Method | Tool Life (pieces) | Coolant Cost per Piece | Scrap Rate | Total Cost Per Part (normalized) |
|---|---|---|---|---|
| Flood coolant (6%) | 140 | $0.38 | 3.2% | 100% |
| MQL (oil mist) | 210 | $0.09 | 1.5% | 78% |
| Dry + air blast | 175 | $0.02 | 2.0% | 72% |
Data like this explains why we’ve migrated many A3 production runs to MQL setups. It’s a philosophy anchored in understanding the material’s thermal behavior, not blanket assumptions.
Secret 4: Exploit Multi-Axis and Modular Fixturing to Eliminate Non-Cutting Time
A3 steel parts are often not geometrically complex; they’re typical brackets, spacers, flanges, and structural mounts. The trap here is that a three-axis vertical machining center may need three or four setups to reach all features, and each setup change introduces positioning error and minutes of lost spindle time. The secret to slashing per-part cost here is to complete the part in a single clamping cycle using a five-axis CNC machine, and where bulk production demands, combine this with modular, quick-change fixtures.
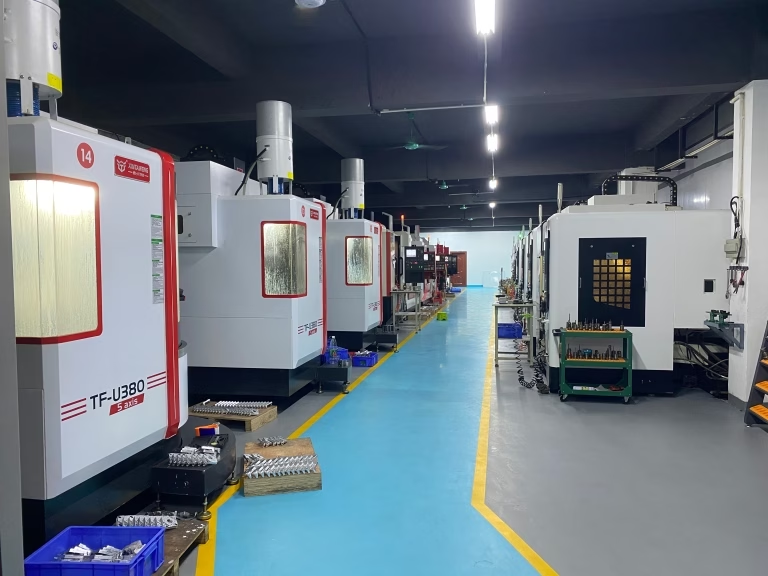
GreatLight employs a large fleet of five-axis and four-axis machining centers (127+ pieces of precision equipment across three plants) that enable full 5-face machining plus angled features in one go. On A3 steel, this eliminates:
Workpiece re-indication time,
Accumulated tolerance stack from fixture transitions,
Idle spindle time while operators swap jaws.
For a recent automotive sensor bracket made of 12 mm A3 plate, the original process required three setups across two different machines: total cycle time 14.5 minutes. By moving to a five-axis trunnion machine with a custom dovetail fixture that held four parts at once, cycle time dropped to 5.8 minutes per part—a 60% reduction. The fixture was built from modular aluminum components with hardened steel wear surfaces from our in-house die casting and CNC department, keeping fixture cost below $400. Even adding that amortized cost, the per-part savings exceeded 45% over the first 10,000 pieces.
For shops that don’t have five-axis capacity, partnering with a manufacturer like GreatLight who already has the capital equipment and the engineering skill to design low-cost modular fixturing can be a pragmatic way to unlock these savings without capital expenditure. The core insight is: the cheapest machining time is the spindle time you never waste on unnecessary setups.
Secret 5: Integrate Post-Processing and In-Process Quality Checks to Catch Cost Drift Early
The final secret moves beyond cutting parameters into the realm of quality strategy. A3 steel, after machining, often needs surface treatments—black oxide, zinc plating, powder coating, or simple deburring and cleaning. The hidden cost is that a part machined to spec can warp slightly during heat-intensive post-processing, or plating can mask subtle dimensional issues that only appear at assembly.
Intelligent shops build a “digital thread” that links in-process measurement, post-processing, and final inspection. At GreatLight, our ISO 9001-based quality system integrates:
On-machine probing (Renishaw spindle probes) that checks critical tolerances before the part leaves the fixture.
Statistical process control (SPC) charts generated automatically from CMM data in our climate-controlled inspection lab, which feeds back to tool offset adjustments. The capability to hold ±0.001mm on a 3D-printed or machined part matters if you’re making mating components.
A defined “pre-treatment” alignment protocol that measures part flatness after stress-relieving or before plating. When we saw a 0.03 mm growth on A3 parts after black oxide, we simple adjusted finish machining stock by 0.03 mm and eliminated rework.
This proactive quality integration prevents the most expensive cost of all: installing a dimensionally out-of-spec part into a customer’s assembly line. When you consider that one rejected batch can wipe out the margin of an entire production run, the cost of a few well-placed probe routines and a daily SPC check is negligible. The secret is to stop thinking of quality as a separate cost center and start viewing it as a real-time production optimization tool.
Practical Checklist: A3 Steel Cost-Optimization Quick Reference
| Secret | Key Action | Expected Cost Impact |
|---|---|---|
| 1 – Tool Edge & Coating | Switch to ground-sharp PVD carbide with TiCN or DLC | 20–35% lower tool cost per part |
| 2 – Speed & Feed | Increase Vc to 220–280 m/min, fz ≥ 0.06 mm | 10–20% cycle time reduction |
| 3 – Coolant Strategy | Adopt MQL or dry + air blast for roughing | 15–30% reduction in consumable & disposal costs |
| 4 – Multi-Axis Fixturing | Single-setup 5-axis machining with modular fixtures | 40–60% labor & setup time reduction |
| 5 – Integrated Quality | In-process probing & pre-post-processing measurement | Rework & scrap cost minimized, OEE improved |
These numbers aren’t theoretical; they’re averages drawn from thousands of parts machined for customers in humanoid robotics, automotive powertrain, and medical device enclosures. When a client approaches us with an A3 steel bracket that they’ve been buying at $12 per unit, applying these five secrets often brings the delivered price below $8 without any compromise in tolerance or lead time.
Choosing the right machining partner amplifies these gains. Our operation at GreatLight spans three ISO-certified plants, with the ability to go from rapid prototype (via SLM 3D printing or CNC) to 10,000-unit batch production in weeks. We’ve invested in large five-axis machining centers that can handle workpieces up to 4,000 mm in size, so the same cost principles scale from tiny sensor mounts to massive structural frames. The depth of equipment—from wire EDM for precise fixture details to in-house vacuum casting for low-volume runs—means we never have to outsource a critical step that could introduce variability and cost inflation.
A quick word about the competitive landscape. While manufacturers like Protolabs Network, Xometry, and RapidDirect offer extensive online quoting and broad process coverage, they often rely on distributed manufacturing networks, which can dilute process control for niche materials like A3. Shops like Owens Industries or RCO Engineering specialize in aerospace and defense, where cost-per-part is sometimes secondary to certification complexity. GreatLight occupies a unique middle ground: direct factory control with extreme depth in precision CNC machining, in-house post-processing, and a culture that treats A3 steel not as a commodity but as a material with its own distinct optimization curve. That focus, combined with our IATF 16949 and ISO 13485 credentials, makes us a natural fit for clients whose parts are both price-sensitive and functionally critical.
Implement these 5 CNC machining secrets for A3 steel and watch your costs drastically reduce—and if you need a partner who already practices them daily, the door at GreatLight is open. In the end, unlocking lower costs isn’t about adopting a single trick; it’s about systematically applying material-specific knowledge, the right machine platforms, and a quality system that prevents surprises. A3 steel may be commonplace, but your competitive edge shouldn’t be.



















