
Laser 3018 Pro: 7 Essential Tips to Master Your First Engraving Project
A step-by-step setup guide for engineers running their first diode laser job. You will learn how to pick material, dial in power and speed, set focus, hold the workpiece, and decide when a part needs to leave the bench for real CNC work.
In this article
- 1
- 2
- 3
- 4
- 5
- 6
- 7
- 8
Key takeaways
Pick Material That the laser 3018 pro Can Actually Cut
The laser 3018 pro is a 5 W class diode machine with a fixed wavelength around 445 nm. It absorbs well into organics and dark pigments, and poorly into bare metal. That single fact decides what you can put on the bed. Basswood, plywood, MDF, black and colored acrylic, leather, cardboard, and anodized aluminum are all workable. Bare brass, copper, and raw steel are not, unless you coat the surface with a marking compound first.
Surface condition drives the result more than most beginners expect. Sand wood to 220 grit, then wipe with a tack cloth. Skip the wipe and the laser burns dust instead of fiber, which leaves a smeared dark blotch. Acrylic should be masked with transfer tape so the beam does not deposit vaporized plastic back on the surface. Leather needs low-tack tape for the same reason.
Test on a scrap piece of the exact same stock. A 100 × 100 mm offcut costs nothing and tells you more than any settings chart, because wood density and acrylic formulation vary between batches. If you cannot get a matching offcut, cut a small square from a hidden edge of the final part.
A word on thickness. A 5 W diode will engrave and score, but deep cutting is slow and often uneven. Keep engraving stock under 5 mm. Anything thicker is better handled as a marking pass or moved to another process.
- 1Good first materialsBasswood, birch plywood, MDF, cast acrylic, veg-tan leather, anodized aluminum.
- 2Avoid on a bare diodeRaw copper, brass, stainless, clear glass, white or transparent acrylic.
- 3AlwaysTest on the same batch of stock with the same surface prep.
Dial In Power and Speed With a Test Grid
Power and speed do not act independently. Doubling power at the same feed gives a darker, wider mark; doubling feed at the same power gives a lighter, finer one. Change them one at a time and record what you see. A notebook or a spreadsheet beats memory after the third job.
The fastest way to find a working pair is a test grid. In LightBurn, draw a 5×5 matrix of 10 mm filled squares. Set speed from 300 to 1,500 mm/min across columns and power from 20% to 100% across rows. Run it on scrap, then look at the result under a loupe. You want the cell with a clean edge, even density, and no burn-through. Anything that looks scorched is too hot.
For a 5 W diode on 3 mm basswood, a workable starting point is 600 mm/min at 60% power for a filled engraving, and 1,200 mm/min at 40% for line work. On black cast acrylic, drop to 800 mm/min at 45%. These are starting points, not settings. Your machine, lens, and material batch will move them.
Passes matter too. Two light passes at 40% usually beat one pass at 80%, because the second pass cleans up the first without charring the edges. If you see a brown halo around the mark, reduce power and add a pass rather than slowing the feed further.
- 1Change one variablePower or speed, never both in the same test.
- 2Grid size5 × 5 cells, 10 mm squares, run on scrap.
- 3Charring signalBrown halo or raised edge means too much power or too slow a feed.
Focus, Alignment, and Clean Vector Files
Focus sets the spot size, and spot size sets the line width. The stock laser 3018 pro has no autofocus, so you set the gap by hand. Lower the head until the lens-to-surface distance matches the focal length of your lens, usually around 20 mm to 40 mm depending on the module. Use the supplied focus spacer or a slip gauge, not your eye. A blurry line means the beam is out of focus, not that the power is too low.
Check alignment across the whole bed, not just at the origin. Jog the head to all four corners and measure the gap at each one. If the numbers drift by more than 0.5 mm, the bed is not parallel to the gantry. Shim the bed or level the frame before you engrave a large part. On a 300 × 180 mm bed, a 1 mm tilt is enough to blur one side of the job.
Vector files deserve the same attention. Export SVG or DXF with the drawing at 1:1 scale in millimeters. Do not scale in the laser software; scale in CAD and re-export. Set line width to a hairline and use a closed path where you want a fill. A stray open path in a filled layer produces thin streaks across the mark.
For raster images, 254 DPI is a sensible default. Going to 600 DPI on a 5 W diode does not add visible detail; it just doubles the runtime and the heat load. If the source image is low resolution, upscaling will not create information, so redraw the logo as vector instead.
- 1Focus methodSlip gauge or spacer at the lens-to-surface gap. Verify at four corners.
- 2Alignment toleranceKeep corner-to-corner gap variation under 0.5 mm.
- 3File format1:1 SVG or DXF in millimeters, hairline strokes, closed fill paths.
- 4Raster default254 DPI for photos, vector for logos and text.
Hold the Part Down and Control the Air
Part shift is the most common cause of a ruined first job. A 1 mm slide between passes produces a double line that cannot be fixed. Tape works for flat stock: blue painter tape on the underside, or transfer tape on top if the surface is delicate. For small parts, use double-sided tape or a low-profile clamp. Avoid metal clamps near the beam path; they reflect and can damage the lens.
Ventilation is not optional. Diode lasers on wood, leather, and acrylic produce fine particulate and volatile organic compounds. Run an exhaust fan to the outside, or use an enclosed unit with a carbon filter. Place the machine where you can see the cut for the full duration. Never leave a running job unattended, even for a minute.
Keep a fire blanket and a small CO₂ extinguisher within arm's reach. A water spray bottle works for small flare-ups on wood, but only if the machine is powered down. Clean the bed and the lens after every job. A dirty lens absorbs energy, heats up, and degrades the spot. Wipe with a lint-free swab and lens cleaner only.
- 1Hold-downTape, vacuum, or low-profile clamps. No reflective metal in the beam path.
- 2VentilationExhaust to outside or carbon-filtered enclosure.
- 3Never unattendedStay in the room for the full cut cycle.
Post-Process the Part and Know When to Move to CNC
After the laser stops, the work is not finished. Wood engravings collect soot in the recess. Blow it out with compressed air, then wipe with a soft brush. Acrylic edges can be flame-polished with a quick pass of a heat gun, held 100 mm away and kept moving. Leather benefits from a light coat of wax or finish to seal the burned edge. Anodized aluminum needs only a wipe with isopropyl alcohol.
This is also the point where you decide whether the part is done. Laser engraving marks a surface. It does not hold a dimensional tolerance, it does not create a thread, and it will not produce a mating face. If your drawing has a Ø tolerance, a flatness callout, or a bore that must fit a bearing, the laser is the wrong tool.
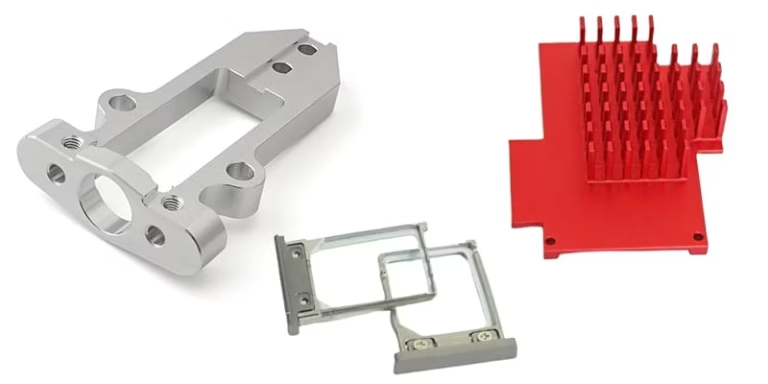
For those parts, the transition is to CNC. At GreatLight we run 127 high-precision machines, including 16 simultaneous 5-axis machining centers, with tolerances held to ±0.005 mm and surface finishes from Ra 0.8–1.6 μm. A laser-marked logo on the face of a machined aluminum housing is a normal combination: machine the geometry, then mark the identifier.
If you are at that stage, send the model. We return a quotation and a free DFM analysis within 12 hours, and production can start within 24 hours. No minimum order quantity applies, so a single prototype and a 10,000-part run go through the same quoting path.
- 1Clean the markCompressed air, soft brush, isopropyl alcohol for metal.
- 2Seal the surfaceWax on leather, flame polish on acrylic, clear coat on bare wood.
- 3Move to CNC whenThe drawing carries a tolerance, a thread, or a mating fit.
First-Job Sequence From Unboxing to Finished Part
Run these in order. Skipping step 3 or 5 is what ruins most first attempts.
- 11. Square the frame and level the bedAssemble on a flat surface, tighten the gantry bolts, then jog to all four corners and check the lens-to-surface gap. Shim until the variation is under 0.5 mm.
- 22. Clean and prep the stockSand wood to 220 grit, wipe with a tack cloth, mask acrylic and leather with transfer tape. Cut a scrap coupon from the same batch.
- 33. Set focus by handLower the head to the focal distance of your lens, typically 20–40 mm. Lock the Z axis and re-check the gap at the job's center.
- 44. Run a 5×5 test grid10 mm squares, 300–1,500 mm/min across columns, 20–100% power across rows. Inspect under a loupe and pick the cleanest cell.
- 55. Secure the workpieceTape or clamp the part flat. Confirm it cannot move by nudging it. Keep metal clamps out of the beam path.
- 66. Frame the job with the laser offRun the outline preview at low power or with the beam disabled. Confirm the mark sits where you want it on the part.
- 77. Cut with air assist and ventilation onStart the exhaust, start the air, then start the job. Stay in the room. Watch for flame and stop the machine if one starts.
- 88. Clean, inspect, and decide the next processBlow out soot, wipe the surface, and check the mark against the drawing. If the part needs a real tolerance, quote it as a CNC job.
Laser Engraving vs CNC Machining: Which Process Fits the Feature
Use this to decide before you spend an hour on a job the machine cannot hold.
| Feature on the drawing | Laser 3018 pro | CNC machining |
|---|---|---|
| Logo or text on a flat face | Ideal. Vector file at 1:1, 254 DPI for raster. | Possible with laser marking, min character height 1.5 mm. |
| Tolerance callout, ±0.05 mm or tighter | Cannot hold it. No dimensional control. | Holds ±0.005 mm on 5-axis work. |
| Threaded hole or press fit | Not possible. | Standard operation on mill-turn and 5-axis. |
| Cut through 3 mm basswood | Workable at low feed, multiple passes. | Overkill. Use for metal or tight geometry. |
| Cut through 6 mm aluminum plate | Not possible on a 5 W diode. | Routine up to 4,000 mm part length. |
| Surface finish spec Ra 0.8–1.6 μm | No control over surface texture. | Achievable with the right cutter and pass. |
When the Mark Is Done and the Part Is Not
Use the laser 3018 pro for what it does well: clean marks on flat, organic, or coated stock. The moment the drawing carries a tolerance, a thread, or a mating fit, move the part to CNC and hold it to ±0.005 mm.
Questions Engineers Ask After the First Job
Why is my engraving blurry on one side but sharp on the other?
That is a bed-level or focus problem, not a power problem. Measure the lens-to-surface gap at all four corners. If the readings differ by more than 0.5 mm, the bed is not parallel to the gantry.
Shim the low corner or re-level the frame, then re-run the test grid. Do not compensate with more power; it will just scorch the sharp side.
Can the laser 3018 pro engrave bare stainless steel or brass?
No. A 445 nm diode reflects off bare metal and deposits almost no energy. You will get a faint mark at best, and a lot of heat in the lens.
The usual workaround is a laser marking compound sprayed or taped onto the surface. The compound absorbs the beam and fuses to the metal. Clean it off after the pass and check the mark under light.
What DPI should I use for a photo engraving?
Start at 254 DPI. On a 5 W diode, higher values add runtime and heat without adding visible detail.
If the source image has less resolution than the target DPI, upscaling will not create detail. Redraw the artwork as vector, or accept a softer result at 254 DPI.
How do I stop double lines between passes?
Double lines mean the part moved. Check the hold-down first: tape the underside, clamp the edges, or use a vacuum bed for thin stock.
If the part did not move, check the belt tension and the set screws on the X and Y pulleys. A loose pulley slips under direction changes and shifts the second pass.
Is it safe to run the machine in a small workshop?
Only with active ventilation. Wood, leather, and acrylic produce fine particulate and VOCs that you should not breathe.
Exhaust to the outside or use a carbon-filtered enclosure. Keep a fire blanket and a small CO₂ extinguisher nearby, and never run a job unattended.
Send the Model, Get a Quote in 12 Hours
Upload your CAD file and we return a quotation with a free DFM analysis within 12 hours. No minimum order quantity, from one prototype to a 10,000-part run.
12-hour quote100% inspectionNo MOQNDA on request
More from the shop floor
We publish setup notes, tooling trials and inspection data from the factory floor.











