
Rapid Prototyping Manufacturing Tips: 7 Proven Steps from CAD to First Article
A working guide for design and manufacturing engineers who need a functional prototype quickly without losing dimensional control. It covers how to set the prototype's purpose, what to fix in the CAD before quoting, which process fits which geometry, and where fast custom jobs usually go wrong.
In this article
- 1
- 2
- 3
- 4
- 5
- 6
- 7
- 8
- 9
Key takeaways
Define the prototype's purpose before anything else
Most slow prototyping jobs are not slow because the machine is slow. They are slow because the drawing asked for the wrong thing. A bracket used to check a cable route does not need a ±0.005 mm bore. A housing that will sit in a drop test does need the right wall thickness and material, not a cosmetic finish.
Classify the part into one of three groups before you send it out. Form-only prototypes check appearance, grip, and packaging. Fit prototypes check interfaces, hole patterns, and stack-up. Function prototypes run load, thermal, or fluid tests and need production-intent material and a full inspection report.
This classification sets four things at once: the process, the tolerance, the material, and how many parts you should order. Getting it wrong in either direction costs you. Over-specifying burns days on inspection and finishing. Under-specifying produces a part that cannot answer the question you built it to answer.
Write the classification into the RFQ as a single line. Something like: function prototype, 6061-T6, critical bore ±0.01 mm, no cosmetic finish, report on critical dimensions. Suppliers quote faster when the intent is unambiguous, and the machinist stops guessing which features matter.
- 1Form prototypeVisual and ergonomic check. Loose tolerances are fine.
- 2Fit prototypeInterface and assembly check. Control mating features only.
- 3Function prototypeTest article. Production material, defined inspection.
Apply DFM rules that actually shorten machining time
DFM in prototyping is not about high-volume tooling. It is about reducing setups, tool changes, and hand finishing. Three design habits move the needle the most on a fast custom job: group features onto one face, open up deep pockets, and keep wall thickness consistent.
Grouping features onto one direction of access is the single biggest lever. Every time a part has to be flipped, the machinist loses the position, re-probes, and often adds a fixture. On a 5-axis center the part can be oriented instead of flipped, but a design that puts all critical holes on one face still finishes faster because fewer operations need verification.
Deep pockets with small corner radii are the classic time sink. A pocket 40 mm deep with a 2 mm internal radius needs a long, thin tool at low feed, and it will chatter. Open the corner radius to at least one-sixth of the pocket depth and the same pocket can be cut with a stiffer tool at three or four times the material removal rate.
Wall thickness matters more in prototyping than in production because you are often cutting from solid. A wall under 1 mm on a 100 mm aluminum part will deflect under clamping and milling load. Either thicken the wall to 1.5–2 mm or accept that flatness will need a finishing pass with light depth of cut.
- 1One-direction accessKeep critical features on a single face where possible.
- 2Corner radius ≥ depth / 6Lets a stiffer, shorter tool reach the floor.
- 3Wall thickness ≥ 1.5 mmUnder that, clamping and cutting loads cause deflection.
- 4Avoid cosmetic-only featuresTiny chamfers and logos add hand work with no test value.
Match the process to the geometry, not to the deadline
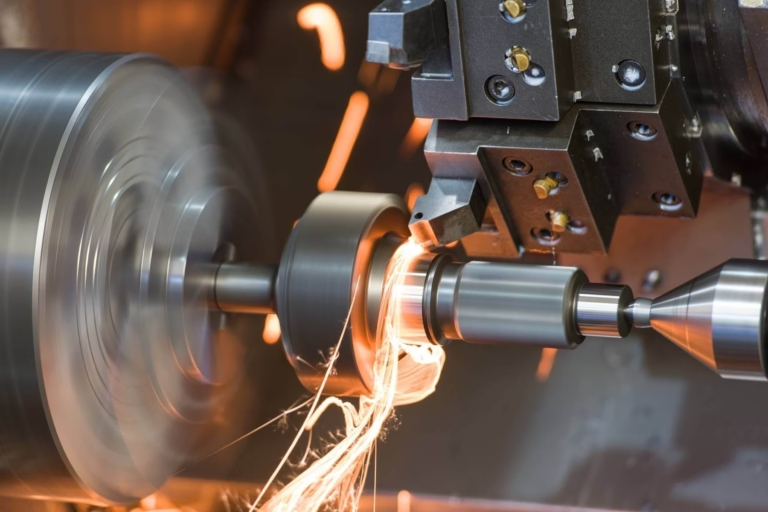
The fastest process is the one that finishes the part in one or two operations. A round bushing with a through bore belongs on a lathe or a mill-turn center, not on a 3-axis mill. A thin-wall enclosure with internal ribs is usually better printed or vacuum cast, because machining it from solid wastes material and risks distortion.
For metal prototypes with tight tolerances, 5-axis machining is the default for contoured surfaces and angled holes. It holds ±0.005 mm on position and removes the fixture stack that a 3-axis setup would need. For prismatic parts with simple geometry, a 3-axis machine is often faster because programming and setup are shorter.
For plastic prototypes, three routes cover most cases. CNC machining from ABS, PC, POM, or PEEK gives the best dimensional accuracy and a real thread. 3D printing is faster for hollow or lattice geometry but has anisotropic strength. Vacuum casting suits a small batch of 10–50 parts from one master, useful for a design review or a trade show.
Choose on two questions. Does the part carry load or seal? Then machine it from real material. Is the shape impossible to reach with a cutter? Then print it. Everything else is a cost and schedule trade, and the trade should be made with the supplier's DFM feedback, not before it.
- 1Round, turned featuresLathe or mill-turn center; one setup for coaxial features.
- 2Contoured surfaces5-axis; fewer fixtures, better position control.
- 3Hollow or lattice3D printing; check build direction against load path.
- 410–50 plastic copiesVacuum casting from one master.
Write an RFQ that removes the guesswork
A good RFQ for a fast prototype is short but complete. It should carry the native CAD file, a 2D drawing with the critical dimensions marked, the material grade, the finish callout, and the inspection level. Marking every dimension as critical is the same as marking none.
Material grade matters. 6061-T6 and 6061-T4 machine and behave differently, and a prototype tested in the wrong temper gives data you cannot use. For stainless, 303 machines freely but 316L gives better corrosion data. For high-load parts, 7075 or 17-4PH may be the correct choice even if it costs more and takes longer.
Finish callouts should match the function. A sealing face needs Ra 0.8–1.6 μm. A general machined surface at Ra 1.6–3.2 μm is fine for most fit checks. Anodizing adds a day and changes dimensions by roughly half the coating thickness per surface, so it should not be applied to a part where bores are already at the low end of tolerance.
State the report format you want. If you need dimensional results on the critical features, say so. If a certificate of conformance is enough, say that instead. Suppliers can produce either, but they will default to the lighter option if the RFQ is silent.
- 1Native CAD plus 2D drawingMark only true critical dimensions.
- 2Exact material and temper6061-T6, not just aluminum.
- 3Finish with a Ra valueMatch the number to the function.
- 4Inspection levelDimensional report or certificate of conformance.
Pitfalls that turn a fast job into a slow one
The most common failure is a late design change after the setup is made. Moving one hole by 2 mm can invalidate the fixture and the toolpath. If the design is not frozen, it is usually faster to accept the current revision, test it, and change it in revision two.
The second pitfall is a tolerance stack that no process can hold. If three features each carry ±0.005 mm and they are referenced to each other across a 300 mm span, the stack will exceed the budget. Pick one datum and one critical feature, and let the rest float within general machining tolerance.
The third is ignoring heat and clamping on thin parts. A 2 mm aluminum plate milled with an aggressive pass will bow. Rough it, stress-relieve if needed, then take a light finishing pass. This adds hours but is faster than scrapping the part and starting over.
The fourth is finishing before inspection. Anodizing, powder coating, and polishing hide surface defects and change dimensions. Inspect the marked features first, then send the part to finishing. If a dimension is out, you want to know before the coating goes on.
- 1Design change after setupFreeze the revision before the first cut.
- 2Tolerance stackOne datum, one critical feature.
- 3Thin-part distortionRough, relieve, then finish with light passes.
- 4Finishing before inspectionMeasure first, coat second.
What to confirm about the supplier's quality system
Speed without documentation is a risk you carry into the next phase. Before releasing a function prototype, confirm the shop runs a documented inspection flow: raw material check, in-process monitoring, and final inspection before shipment. Ask how the material certificate is traced to the part.
Certification scope matters more than the certificate itself. ISO 9001:2015 covers general quality management. IATF 16949:2016 is relevant when the prototype feeds an automotive program. ISO 13485:2016 applies to medical device work. ISO 27001:2022 covers information security, which matters if your CAD files are sensitive.
For prototypes that will be tested to failure or used in a regulatory submission, request the inspection report with the part. For fit checks, a certificate of conformance is usually enough. Match the documentation to the decision the prototype supports, and no more.
Confidentiality should be settled before the files move. An NDA is available on request, and uploads are handled as secure and confidential. If the design is patentable, get the agreement signed before the RFQ, not after the quote.
- 1TraceabilityMaterial certificate linked to the part number.
- 2Certification fitMatch ISO 9001, IATF 16949, or ISO 13485 to the program.
- 3Report levelDimensional report or certificate of conformance.
- 4NDA timingSigned before files are shared.
Step by step: from CAD file to first article
Follow the order. Skipping a step usually costs more time than it saves.
- 1Classify the prototypeWrite form, fit, or function at the top of the RFQ. This sets tolerance and inspection before any quoting starts. Common error: leaving it blank, so the supplier quotes a fully inspected part you did not need.
- 2Clean the CAD and export STEPRepair surfaces, remove duplicate bodies, and confirm units are millimeters. Send native CAD plus STEP. Common error: sending an STL for a part with tight bores, which loses the exact cylinder definition.
- 3Run a DFM passOpen corner radii to at least depth / 6, thicken walls under 1.5 mm, and move critical features to one face. Ask the supplier for a DFM analysis; GreatLight returns one with the quote within 12 hours.
- 4Freeze the material and finishSpecify grade and temper, then set Ra on functional surfaces only. Keep bores away from the tolerance limit if anodizing will be applied, since coating shifts size.
- 5Confirm the inspection levelDecide between a dimensional report on marked features and a certificate of conformance. Ask for raw material check, in-process monitoring, and final inspection records if the part will be tested to failure.
- 6Approve the quote and startOnce the DFM notes are accepted, production can start within 24 hours. Do not reopen the design at this point unless a dimension is wrong; late changes reset the setup.
- 7Check the first article against the drawingMeasure the marked critical dimensions, not the whole part. If a feature is out, decide whether it affects the test before asking for rework. Many deviations are cosmetic and do not change the result.
- 8Log the change for revision twoRecord what the prototype proved and what it did not. Feed that back into the CAD before ordering the next revision, so the second round is a design change, not a repeat.
Which rapid prototyping process fits which part
Use the process that finishes the geometry in the fewest operations.
| Process | Best for | Typical tolerance | Watch out for |
|---|---|---|---|
| 3-axis CNC | Prismatic parts, flat plates | ±0.01 mm | Multiple setups on angled features |
| 5-axis CNC | Contoured surfaces, angled holes | ±0.005 mm | Higher programming time |
| Mill-turn | Round parts with cross features | ±0.005 mm | Limited bar diameter |
| 3D printing | Hollow, lattice, internal channels | ±0.1 mm | Anisotropic strength |
| Vacuum casting | 10–50 plastic copies | ±0.15 mm | Silicone tool wear over runs |
| Sheet metal | Enclosures, brackets, panels | ±0.1 mm | Bend radius limits |
Freeze the design, then move fast
The fastest prototyping route is a frozen design with the right process and a clear inspection level. Get those three right and the part ships in 3–5 days; get them wrong and no machine speed will save the schedule.
Frequently asked questions
How fast can a custom prototype be machined?
Quotation and free DFM analysis come back within 12 hours of a complete RFQ. Production can start within 24 hours, and parts typically ship in 3–5 days.
The clock starts when the design is frozen and the DFM notes are accepted. Reopening the CAD after setup is what pushes a fast job into a second week.
What tolerance can a rapid prototype hold?
On 5-axis and mill-turn work, position and bore tolerances down to ±0.005 mm (±0.0002 in) are achievable on marked critical features.
General features should carry looser tolerance. Marking everything as critical raises cost and inspection time without improving the prototype's ability to answer your question.
Can you start from one part with no minimum order?
Yes. There is no minimum order quantity, from a single prototype up to 10,000+ part runs.
For a one-off function prototype, expect a dimensional report on the critical features rather than a full layout inspection, unless the RFQ asks for the full report.
Which materials are available for fast prototypes?
Aluminum grades include 6061, 6061-T6, 2024, 5052, 5083, 6063, 6082, 7075, and ADC12. Stainless options include 303, 304, 316, 316L, 17-4PH, and 440C.
Steel, copper, brass, titanium, Inconel, magnesium, and engineering plastics such as ABS, PC, POM, PEEK, and carbon fiber are also stocked. Choose the grade that matches the test, not the one that is easiest to cut.
How should I prepare files for a fast custom quote?
Send native CAD plus a STEP export, and a 2D drawing with only the critical dimensions marked. Note the material grade, temper, finish with a Ra value, and the inspection level.
If the part will be anodized, flag any bore that sits near the tolerance limit. Coating changes size by roughly half the coating thickness per surface.
What if the first article is out of tolerance?
Measure the marked critical dimensions first and decide whether the deviation affects the test. Many out-of-tolerance features are cosmetic and do not change the result.
If a critical feature is wrong, send the measurement data with the drawing reference. Rework or remake decisions go faster when the deviation is quantified rather than described.
Send your CAD and get DFM feedback within 12 hours
Upload the native file and drawing, and we return a quotation with DFM notes, material guidance, and an inspection plan. No minimum order quantity, uploads handled as secure and confidential.
12-hour quoteNo MOQ100% inspectionNDA on request
More prototyping and machining notes
We publish setup notes, tooling trials and inspection data from the factory floor.











