
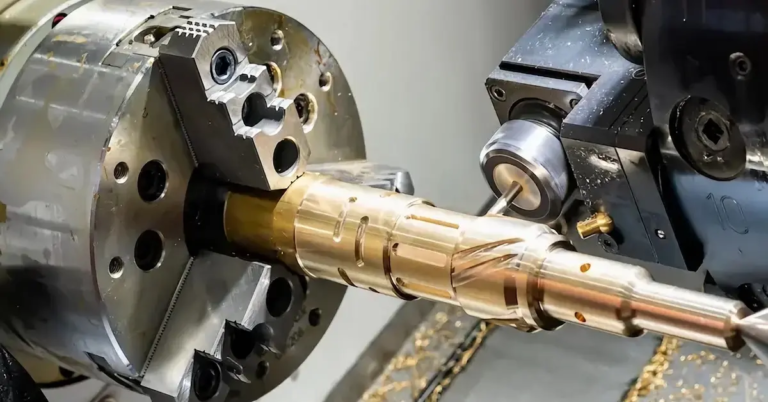
Mastering CNC Knife-Setting: The Critical Foundation for Precision Machining
In CNC machining, tool setting (knife-setting) isn’t just a preliminary step—it’s the cornerstone of part accuracy, tool longevity, and overall process efficiency. Misalignment by microns can cascade into scrapped parts, costly rework, and machine damage. This guide dives deep into the principles, methods, and innovations transforming this fundamental operation.
The Core Principle: Aligning Worlds
Tool setting establishes the part coordinate system within the machine’s native framework. Essentially, it defines where the workpiece "lives" in the machine’s universe by pinpointing the tool alignment point—typically:
- The design/datum reference on the workpiece
- A fixture point (must have precise spatial relationship to the part datum)
The Critical Alignment: The tool point (e.g., tip of a turning tool, center of end mill bottom face) must coincide with the programmed tool alignment point. Any discrepancy introduces error.
Multi-Tool Complexity: When multiple tools (T1, T2, etc.) engage a workpiece, differences in their geometry require tool offset compensation. CNC systems (via codes like G43 H01, G43 H02) store each tool’s positional deviation relative to a reference tool, ensuring seamless transitions and dimensional consistency.
Beyond Trial Cutting: Advanced Knife-Setting Methods Compared
While trial cutting (scratching the workpiece surface to find edges) is intuitive, it risks surface damage and has limited accuracy (±0.05mm or worse). Modern workshops leverage these superior techniques:
1. Feeler Gauges & Precision Pins
- Process: Tool touches a standard-thickness feeler gauge (e.g., 0.1mm) or pin against the workpiece.
- Accuracy: ~±0.02mm. No surface damage.
- Ideal For: Non-critical Z-height setting or validating X/Y after master tool setup.
2. Edge Finders & 3D Tasters
- Process: A rotating edge finder (mechanical or electronic) deflects upon contact. Electronic variants signal touch-off audibly/visually.
- Accuracy: ±0.005mm. Fast and reliable for X/Y.
- Pro Tip: Ensure workpiece conductivity for electronic finders; clean datum surfaces!
3. Dial Indicator Fixturing
- Process: Mount a dial indicator in the spindle. Sweep the internal/external diameter of round workpieces. Adjust X/Y until runout is minimized (<0.02mm).
- Accuracy: ±0.01mm. Best for cylindrical parts or夹具 alignment.
- Critical Step: Always rotate the spindle manually for a true sweep.
4. The Z-Axis Transfer Method (Indirect Height Setting)
Solving Multi-Tool Challenges: When direct Z-setting isn’t possible (e.g., deep cavities, fragile surfaces), this reigns supreme:
- Set Master Tool (T1): Use any method to find Machine Z Coordinate
Z_masterat part Z-zero. - Measure Relative Offset:
- Place a height gauge block on the machine table.
- Jog spindle so T1 lightly touches gauge. Zero the relative Z-axis DRO.
- Swap to Tool 2 (T2).
- Jog T2 down to touch the same gauge block. Note Relative Z value:
ΔZ.
- Calculate & Compensate:
- T2’s Machine Z-zero =
Z_master+ΔZ. - Input
ΔZas H02 tool length offset.
- T2’s Machine Z-zero =
Advantage: Protects surfaces. Ideal for drills, taps, and long-reach tools.
5. Advanced Dedicated Tool Setters
- Laser Systems: Non-contact measurement. Tool breaks laser beam; machine reads position. Accuracy: ±0.001mm.
- Touch Probes (Machines with Macros): Automate tool setting within the CNC program.
- Benefits:
- 80%+ time reduction vs. manual methods
- Eliminates human error
- Verifies tool breakage/runout
Method Selection Guide: Precision vs. Practicality
| Method | Accuracy | Speed | Surface Safe? | Complexity | Best Use Case |
|---|---|---|---|---|---|
| Trial Cutting | Low | Slow | ❌ | Low | Prototyping, roughing |
| Feeler Gauge/Pin | Medium | Medium | ✅ | Low | Z-height, secondary ops |
| Edge Finder/3D Taster | High | Fast | ✅ | Medium | X/Y Datums, flat surfaces |
| Dial Indicator | High | Slow | ✅ | High | Round parts, 夹具 validation |
| Z-Axis Transfer | High | Medium | ✅ | Medium | Multi-tool Z, deep features |
| Dedicated Setter | Very High | Very Fast | ✅ | Low* | Production, high-mix shops |
*After initial setup/investment
Optimizing Your Process: Key Implementation Tips
- Standardize Fixtures & Datums: Minimize variability using precision vises, modular tooling plates, and designated datum edges/locations.
- Calibrate Regularly: Verify edge finders, probes, and tool setters weekly. Thermal drift impacts accuracy.
- Leverage Work Offsets (G54-G59): Store part zeros here—never in the program. Enables quick job changeovers.
- Tool Life Management: Pair accurate setting with tool wear offsets. Log usage to trigger replacements proactively.
- Error-Proof with Macros: Implement automatic tool-setting routines (e.g.,
G36on Fanuc) to standardize complex procedures.
Conclusion: Precision Starts at Setup
In CNC machining, there are no accurate parts without accurate tool setting. Embracing structured, high-precision methods—from robust electronic edge finders to fully automated probe cycles—eliminates scrap, boosts throughput, and unlocks the true potential of your CNC investment. Remember: every micron secured during setup compounds into flawless execution on the shop floor. The right "knife-setting" strategy isn’t just preparation; it’s the blueprint for success.
“Measure twice, cut once” transforms into “Set perfect, machine perfect” in the CNC world.



















