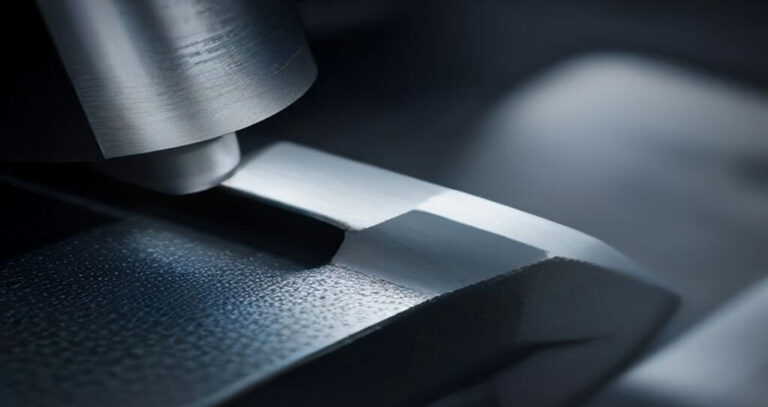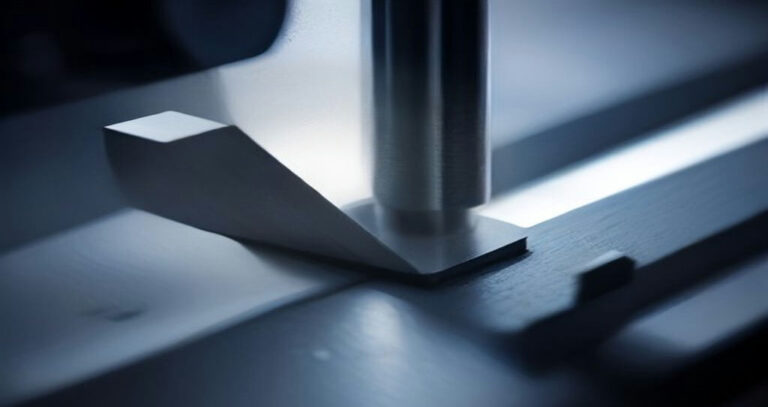
CNC Machine For Acrylic Cutting: 7 Proven Setup Rules
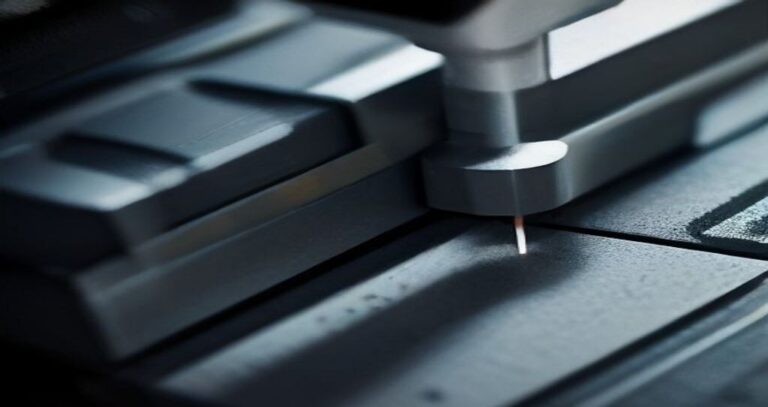
Acrylic looks like an easy material to cut, and that is exactly why so many first runs go wrong. A general-purpose CNC Machine For Acrylic Cutting setup borrowed from wood or aluminum work will usually produce crazed edges, welded chips, and parts that stress-crack days after delivery. The material is thermoplastic. It softens with friction heat, chips weld to the cutter, and a light finishing pass can turn a clean edge cloudy. Engineers and sourcing teams who need clear covers, light guides, guards, or display components quickly learn that acrylic rewards a dedicated approach.
The failures are consistent and predictable. Too much spindle speed and too slow a feed melts the kerf. A dull or wrong-geometry tool rubs instead of shears. Poor workholding lets the sheet lift and chatter. Coolant or compressed air applied at the wrong moment shocks the edge. Each of these shows up as a visible defect, and in optical parts, any haze is a reject. A properly specified CNC Machine For Acrylic Cutting process controls heat first and tolerance second, because the two are linked.
This guide is written for the people who specify, quote, and run these jobs: product development engineers, sourcing managers, and shop leads moving from prototype to production. We cover what a CNC Machine For Acrylic Cutting setup actually needs in terms of rigidity, spindle control, and motion, then the tooling choices that produce a sheared chip rather than a rubbed one.
You will also find the feed and speed logic behind clean cuts, workholding methods that keep thin sheet flat, and the finishing and annealing steps that prevent later cracking. Seven setup rules frame the whole article. Follow them and a CNC Machine For Acrylic Cutting job becomes repeatable across shifts, not a matter of operator feel. Skip them and you will be re-polishing edges and replacing cracked parts. The difference is in the setup, and that is where we start.
What a CNC Machine For Acrylic Cutting Needs
Acrylic is not difficult to cut, but it is unforgiving of the wrong machine setup. The material melts, chips, and stress-cracks when the spindle, feed, or hold-down is off. Choosing a CNC Machine For Acrylic Cutting comes down to a handful of characteristics that actually affect cut quality.
Spindle speed range matters more than peak power. Acrylic cuts cleanly at high rpm with small chiploads, so a spindle that holds 18,000 to 24,000 rpm under load is typical for router-based work. A milling spindle with a lower top end can still cut acrylic well, but it needs sharper tooling and tighter feed control to avoid melting.
Rigidity is the second pillar. A flexible gantry or worn linear guides show up as chatter on acrylic edges, and chatter on a transparent material is visible immediately. Cast acrylic machines cleanly when the toolpath is stable; vibration leaves frosty bands and micro-cracks along the cut. Any CNC Machine For Acrylic Cutting used for visible parts should be checked for backlash and gantry stiffness before production runs.
Dust and chip extraction is not optional. Acrylic swarf is light, staticky, and tends to weld onto cutters when it recirculates. A shop vacuum or downdraft table keeps chips clear of the cut zone, and air blast at the nozzle helps eject chips from deep pockets. On a CNC Machine For Acrylic Cutting running nested parts all day, poor extraction shortens tool life and causes re-cutting marks.
Workholding deserves real thought. Acrylic is slippery and prone to clamp marks, so vacuum tables, dedicated fixtures with soft jaws, and low-pressure clamps work better than heavy vise pressure. Double-sided tape and sacrificial spoilboards are common for thin sheet. A CNC Machine For Acrylic Cutting cutting 3 mm sheet needs full support underneath to avoid deflection and chatter.
Router versus mill is mostly a question of part size and geometry. Routers with large beds suit full sheets, signage, and long panels. Mills with enclosed work envelopes suit smaller, deeper, or more precise parts such as manifolds, brackets, and lens housings. Many shops keep both, and a CNC Machine For Acrylic Cutting chosen for prototypes may differ from the one used for volume sheet work.
Tolerance expectations should be realistic. On cast acrylic, shops typically hold ±0.1 to ±0.2 mm on milled features, with tighter bands possible on small parts and stable fixturing. Sheet thickness varies, and thermal expansion moves the material, so quoting ±0.05 mm across a large panel is rarely honest. A well-set CNC Machine For Acrylic Cutting can hit those bands, but the process window is narrow.
Tooling and control go with the machine. Single-flute or two-flute polished carbide cutters designed for plastics, climb milling on finish passes, and constant chipload keep edges clear. A CNC Machine For Acrylic Cutting paired with the right cutter and extraction is what separates clean parts from scrapped ones.
Background reading: the Numerical control overview is a useful reference on the fundamentals.
Cast vs Extruded Acrylic and Machining Effects
Two sheets that look identical on the rack can machine very differently. Cast acrylic is polymerized in a mold from MMA monomer, which gives it higher molecular weight and a more uniform structure. Extruded acrylic is pushed through a die continuously, so it cools fast and carries more locked-in stress. That single difference drives almost every decision downstream on a CNC Machine For Acrylic Cutting.
Internal stress is the first thing you notice. Cut a slot into extruded sheet and the material often moves as the cutter relieves stress, closing the kerf behind the tool or bowing the part after unclamping. Cast sheet is far more forgiving and holds its geometry through roughing and finishing. If a part has tight flatness or hole-position tolerances, cast is usually the safer call.
Chip welding separates the two as well. Extruded acrylic has a lower softening range in many grades and tends to smear onto the cutter at lower temperatures, especially in deep pockets where evacuation is poor. Cast chips break more cleanly and clear the flutes with less tendency to re-weld. Either way, a CNC Machine For Acrylic Cutting needs sharp, polished single-flute or O-flute tooling and strong air blast to keep the cut zone cool.
Edge finish follows the same pattern. Cast material machines to a near-polished edge with a proper finishing pass, and it polishes well afterward if the customer wants optical clarity. Extruded edges often show faint chatter or a dull haze, and they are harder to flame or vapor polish without distortion. For display parts, cast is worth the price difference.
Thickness affects all of this. Common stock runs from about 1.5 mm up to 25 mm or more, with 3 mm, 5 mm, 6 mm, 10 mm, and 12 mm covering most industrial work. Thin extruded sheet under roughly 3 mm deflects under clamp and cutter pressure, so vacuum fixturing and light radial engagement matter more. Thick cast blocks above about 12 mm benefit from stress-relief annealing before finishing if tolerances are tight.
Feeds and speeds shift with grade, not just thickness. Cast typically tolerates higher chipload at a given RPM because it resists welding, while extruded often needs reduced feed, higher spindle speed, and more aggressive coolant or air to avoid gumming. Nobody can hand you one chart that covers both. Prove the recipe on scrap from the actual sheet.
Annealing deserves a mention because it is where material choice changes the process plan. Extruded parts that will see solvent bonding, elevated service temperature, or later machining often need a stress-relief cycle before and sometimes after cutting. Cast needs it less often, but thick sections and parts with heavy material removal still benefit. Skipping it shows up later as crazing or cracks at fastener holes.
Practical rule: match the sheet to the job. Prototypes and visual parts lean cast. Simple brackets and non-critical covers can run extruded if the shop controls heat. Either way, a CNC Machine For Acrylic Cutting is only as good as the stock feeding it, so confirm grade, thickness, and stress history before the first toolpath. Buyers sourcing tight-tolerance acrylic components can review Custom CNC Machining Services to see how grade selection gets folded into the quote.
One more check before the spindle starts: verify the protective masking. Paper masking on cast sheet can lift or smear when chips weld, and laser-grade film behaves differently again. Peel a test strip, cut a short pass, and inspect the edge under light. That five-minute check tells you more about how this batch will run on a CNC Machine For Acrylic Cutting than any datasheet.
Tooling: Router Bits and End Mills That Work
Acrylic cuts cleanly when the tool removes chips fast and never rubs. The wrong geometry turns a good setup into a welded mess in seconds. On any CNC Machine For Acrylic Cutting, tool selection decides whether you get a polished edge or a gummy channel. Start with the flute count and work outward.
Single-flute cutters are the default for acrylic. One flute leaves a large gullet, so chips clear before heat builds. Multi-flute end mills made for aluminum pack the flutes too tightly; plastic chips swell, pack the flutes, and the cutter starts rubbing instead of cutting. In many shops, a single-flute “O-flute” router bit is the first tool you reach for on 3 to 12 mm sheet.
O-flute geometry has a deep, open channel and a polished flute face. That polish matters more than most operators expect. Rough flutes drag material and raise friction, and friction is what melts acrylic. Ask your tooling supplier whether the flutes are polished; if the answer is vague, test a sample before committing a production run on a CNC Machine For Acrylic Cutting.
Up-cut versus down-cut is a chip-direction decision. Up-cut spirals push chips upward and out of the kerf, which suits deep pockets and thick material where evacuation is the limiting factor. The trade-off is lift: up-cut tools can raise the top edge and chip fragile laminate. Down-cut spirals push chips down, press the top surface against the table, and give cleaner top edges on thin sheet, but they trap chips in deep cuts. Many shops run down-cut for through-cuts on thin acrylic and up-cut for pockets.
Rake angle controls how the edge enters the material. A positive rake with a sharp, high-shear edge slices acrylic rather than scraping it, which keeps heat low. Tools designed for soft plastics typically carry more rake than general-purpose wood routers. A dull or zero-rake edge rubs, and rubbing is the root cause of the melted, stringy chips you sometimes see on a CNC Machine For Acrylic Cutting.
Diameter follows feature size. For small internal corners and fine lettering, step down to 2 to 3 mm single-flute cutters and accept slower feed. For deep pockets, a longer reach increases deflection; keep the length-of-cut as short as the pocket allows, and consider a roughing pass with a larger bit before finishing the walls with a small one. A 6 mm cutter is a common workhorse for general panel work, with 3 mm reserved for detail.
Two habits protect the tool and the part. Keep the bit sharp and dedicated to plastic; a cutter that has run wood or aluminum will have a dulled edge that heats acrylic. And match spindle speed to chip load so each flute takes a real bite. Light passes at high rpm generate heat without removing material, which is the fastest way to ruin a good day on a CNC Machine For Acrylic Cutting.
If your controller supports constant engagement and look-ahead, use it. Path smoothing keeps feed steady through corners, which keeps chip load steady, which keeps temperature steady. That chain is the whole game. Tooling choices on a CNC Machine For Acrylic Cutting are not about buying the most expensive bit; they are about matching flute count, geometry, and diameter to the cut you are asking for.
Feeds, Speeds, and Avoiding Melted Edges
Acrylic cuts beautifully when the cutter removes heat with the chip, and badly when friction outruns evacuation. The window is narrower than aluminum and far less forgiving than wood. On a CNC Machine For Acrylic Cutting, the goal is simple to state: make a proper chip every revolution and get it out of the kerf before it softens and sticks.
Reasonable starting points for cast acrylic with a sharp two-flute upcut spiral: 10,000 to 16,000 RPM, feed of roughly 60 to 150 inches per minute, and chipload of 0.002 to 0.006 inches per tooth. Small diameters under 1/8 inch run toward the lower feed end; 1/4 inch and larger tools can take the higher values. These are starting numbers, not recipes. Every CNC Machine For Acrylic Cutting behaves differently with rigidity, hold-down, and sheet thickness.
The math is worth doing once. Chipload equals feed rate divided by (RPM times flute count). A two-flute tool at 12,000 RPM and 100 IPM gives about 0.004 inches per tooth, a healthy chip for acrylic. If your machine cannot hold that feed, drop the RPM rather than the feed. Reducing RPM keeps chipload up; slowing the feed at high RPM just rubs.
Heat shows up before it ruins the part, if you know the signs:
- Stringy, gummy chips that stretch instead of snapping mean the acrylic is softening at the edge.
- Chips welding back into the cut path, or a kerf that looks smeared and rewelded, means heat is building faster than it is leaving.
- A cloudy or frosted edge on cast acrylic often points to rubbing rather than cutting.
- Sharp, semi-translucent chips and a clean matte or polished edge mean the cut is running cool.
Climb milling is the default for acrylic on a rigid machine with backlash under control. The cutter engages at maximum chip thickness, which peels material rather than rubbing it, and the wall finish is usually better. Conventional milling has its place on light, flexible setups where climb forces would pull the sheet, but expect more edge friction and more heat on any CNC Machine For Acrylic Cutting running that way.
Ramping into the cut beats plunging. A helical or linear ramp spreads the entry load over several degrees of travel and avoids the stationary dwell at the bottom of a straight plunge, which is where acrylic likes to gum. Keep ramp angles shallow, often 2 to 5 degrees, and use a lead-in arc on profiles where the geometry allows.
Air blast is the cheapest heat control you can add. A directed nozzle at 20 to 40 PSI clears chips from the kerf and cools the tool and workpiece without the mess of flood coolant, which many shops avoid on acrylic anyway. Aim the air at the cut zone, not the whole sheet. On deep cuts or stacked sheets, add a brief dwell-free retract and clear cycle so chips do not recut.
| Parameter | Typical starting range | Watch for |
|---|---|---|
| Spindle speed | 10,000-16,000 RPM | Frosted edges at high RPM with low feed |
| Feed rate | 60-150 IPM | Gumming when feed drops below chipload |
| Chipload | 0.002-0.006 in/tooth | Stringy chips signal too little chip load |
| Ramp angle | 2-5 degrees | Melt pools at straight plunges |
When in doubt, cut a test strip and look at the chips first. Chips tell you more than the spindle load meter on most light CNC Machine For Acrylic Cutting setups. If you need a heat-free alternative for thick sections, The CNC Water Jet cuts acrylic without a thermal kerf at all, which is worth comparing for parts where edge clarity matters.
Tune one variable at a time: chipload first, then RPM, then air blast. A CNC Machine For Acrylic Cutting that holds a steady chipload with good chip evacuation will produce clean edges shift after shift, and the operator will spend less time scraping melted kerfs.

Workholding and Fixturing for Thin Sheet
Thin acrylic is where good setups go to die. A 2 mm or 3 mm sheet has almost no stiffness, so any lift at the cutter turns into chatter, a melted edge, or a part that gets flung. The workholding job is simple to state and hard to execute: keep the sheet flat against a rigid surface everywhere, with force spread wide enough that you do not bow it. Everything below assumes you already have the feeds and chipload dialed in on your CNC Machine For Acrylic Cutting.
Vacuum tables are the default for sheet goods, and for good reason. A dedicated grid or zone table with a bleeder board pulls the whole panel down evenly, which is exactly what thin acrylic needs. The catch is that vacuum force is proportional to open area, so small parts and narrow strips lose hold fast. Plan your nesting so that small parts sit over closed zones or get their own fixture. Otherwise you will watch a 40 mm bracket skate across the table mid-cut.
Double-sided tape is the quiet workhorse for one-offs and prototypes. Use a high-tack carpet or acrylic mounting tape, apply it in continuous strips rather than dots, and roll it down hard with a squeegee. Contact pressure matters more than tape brand. Clean both surfaces with isopropyl alcohol first, because acrylic dust and mold release will kill adhesion. Keep tape away from the final edge profile when you can, since the cutter will otherwise gum up. A CNC Machine For Acrylic Cutting running a small part on tape needs conservative feeds until you confirm the bond holds through the full depth of cut.
Tabs, sometimes called bridges or holding tabs, keep parts attached to the parent sheet until you break them out by hand. They are the simplest insurance against parts coming loose on a vacuum table. Leave tabs around 1 to 2 mm thick on thin stock, place them where a flush trim pass can clean them up, and put them in low-stress areas rather than on a critical edge. Three tabs per small part is a reasonable starting point. More tabs equal more cleanup, so resist overdoing it.
Spoilboard strategy deserves its own thought. A sacrificial MDF or PVC board under the acrylic gives the cutter something to bury into on through-cuts, protects the table, and provides a fresh flat reference every time you surface it. Surface the spoilboard before a critical job, and re-surface whenever it shows deep grooves. For vacuum work, use a bleeder board that lets air pass but still seals under load. On a CNC Machine For Acrylic Cutting used for mixed materials, dedicate one spoilboard to plastics so you are not chasing metal chips into your vacuum seal.
Clamping pressure is the usual failure point. Mechanical clamps squeeze the sheet edge and bow it upward in the middle, which is the opposite of what you want. If you must clamp, use soft jaws or padded clamp faces and place them over support, not over open span. Do not overtighten. Acrylic will craze and crack under point loads, and a clamp mark on a visible face is scrap. For thin sheet, vacuum plus tape plus tabs will almost always beat clamps.
Protective film is the last thing people think about and the first thing that gets damaged. Leave the film on for handling, but expect it to lift, smear, or trap chips at the cut line. Masking tape over the film at clamp and tape contact points protects the surface without adhesive residue. Never clamp directly onto bare acrylic. If you must remove film before cutting, re-mask the top face with paper masking tape to control scratching from chip evacuation. A clean CNC Machine For Acrylic Cutting setup treats the film as part of the fixture, not an afterthought.
Put these together and thin sheet stops being a fight. Vacuum for area, tape for small parts, tabs for safety, a fresh spoilboard for flatness, and light hands on any clamp. The payoff is fewer scrapped panels and a setup that repeats on the next shift.
Why a CNC Machine For Acrylic Cutting Beats Hand Routing
Hand routing acrylic is a skill, and a good operator with a sharp cutter and a solid template can produce clean work. But the moment you need twenty identical panels instead of one, the economics shift. A CNC Machine For Acrylic Cutting removes the operator’s hand from the cut path, and that changes repeatability, edge quality, and cost per part in ways a trim router cannot match.
Repeatability is the first gap. Hand routing depends on template contact, feed feel, and the operator’s attention over a full shift. A router table can drift a few thousandths between parts as the template wears or the bit dulls unevenly. On a CNC Machine For Acrylic Cutting, the toolpath is fixed in code, so part fifty matches part one within the machine’s positioning tolerance, typically a few thousandths on a well-maintained router or mill.
Edge consistency follows from the same source. Manual routing leaves chatter marks, slight bevels, and burn marks where dwell time varies. CNC milling with a sharp single-flute or two-flute bit, correct chipload, and controlled feed produces a consistent matte or near-polished edge depending on the cutter and spindle speed. That predictability matters when the acrylic is visible in the finished assembly and you cannot afford to hand-sand every part.
Cost per part is where the comparison gets practical. Hand routing looks cheap on a single prototype because the machine cost is zero. At volume, labor dominates: setup, cutting, deburring, and rework. A CNC Machine For Acrylic Cutting spreads its setup across the run, so per-part cost often drops below manual routing once quantities reach the dozens or low hundreds, depending on part complexity.
Laser cutting deserves an honest comparison. For thin acrylic sheet, roughly under a quarter inch, laser wins on speed and edge finish. It cuts complex outlines fast, needs no cutter wear, and leaves a polished flame-polished edge that many display and signage jobs want. If your work is flat, thin, and outline-driven, laser is often the better call.
The CNC Machine For Acrylic Cutting takes over where laser struggles. Thick stock, pockets, counterbores, and 3D contoured features are milling territory. Lasers cut through material; they do not step down into a pocket or leave a shoulder at depth. CNC milling handles stepped pockets, chamfered edges, and sculpted surfaces in one setup, and it avoids the heat-affected zone and potential edge discoloration that laser can leave on some acrylic grades.
Operators converting a plasma table to other work often find the same logic applies, and the principles behind a Laser Conversion For Crossfire Cnc Plasma show how a machine platform can be repurposed once you understand its motion and control limits. Acrylic rewards that same thinking: match the process to the geometry, not the other way around.
A CNC Machine For Acrylic Cutting also keeps fixturing simple. Vacuum tables, double-sided tape, and simple clamps hold sheet securely while the spindle does the work. You get straight walls, square corners, and clean entry and exit points with proper lead-in moves, all repeatable shift after shift.
So the choice comes down to geometry and volume. Thin flat outlines favor laser. Thick stock, pockets, and 3D features favor milling. For shops running mixed work, a CNC Machine For Acrylic Cutting covers the widest range and gives you the repeatability that hand routing cannot sustain.
Tolerances, Finishing, and Inspection Workflows
Acrylic does not behave like aluminum, and the tolerance bands you quote should reflect that. Cast acrylic typically holds ±0.1 mm on milled features when the sheet is properly supported and the cutter is sharp, while extruded sheet often drifts to ±0.2 mm or worse because of internal stress. For anything tighter than ±0.05 mm, expect to fixture the part, take a spring pass, and control the shop temperature. A CNC Machine For Acrylic Cutting can hit those numbers, but only if the process around it is disciplined.
Thermal expansion is the quiet variable. Acrylic grows roughly 0.07 mm per meter per degree Celsius, so a part measured on a warm afternoon can read oversized against a morning inspection. Let parts stabilize on the granite for 20 to 30 minutes before final checks, especially on long profiles and large panels. Shops running tight-tolerance acrylic work often keep the inspection area within a few degrees of the machining cell for this reason.
Edge finish is where acrylic parts earn or lose their perceived quality. As-milled edges from a CNC Machine For Acrylic Cutting usually show fine tool marks and a slightly matte appearance, which is acceptable for structural or hidden surfaces. Visible edges need more: flame polishing gives a glossy, glass-like result quickly but can introduce stress and slight rounding; vapor polishing produces a uniform sheen across complex geometry; diamond-edge fly cutting leaves a near-optical finish straight off the machine. Hand sanding through grits followed by a buff works for small batches but is hard to repeat consistently.
Inspection should be built around what the part actually does. A practical workflow looks like this:
- Calipers for overall dimensions, slot widths, and quick thickness checks at several points across the sheet.
- Pin gauges or bore mics for hole diameters where fit matters, since calipers tend to under-read on small holes.
- CMM checks on critical hole position, profile, and any datumed features called out on the drawing.
- Flatness verified on a granite surface plate with a dial indicator, or by feeler gauge under a straightedge for larger panels.
- Visual inspection on a backlit table to catch chips, crazing, internal bubbles, and edge cracks that ambient light hides.
Kerf quality deserves its own standard. Under backlight, a good milled edge on a CNC Machine For Acrylic Cutting shows an even, consistent line with no whitening, no chatter marks, and no melt residue. Whitening usually means the tool rubbed instead of cut; chatter points to weak fixturing or too much tool overhang. Record these as visual acceptance criteria so operators and inspectors judge the same way.
Hole position is checked against the drawing datum, not against the part edge, because edge trim varies between nests. On critical bolt patterns, CMM verification of true position catches the cumulative drift that calipers miss. For flatness, anything under roughly 0.3 mm per 300 mm is generally workable for most enclosures, but specify tighter only when the mating surface demands it.
Document the results. A short inspection sheet with measured values, the visual standard photo, and the operator’s name keeps acrylic jobs repeatable across shifts. That discipline is what separates a CNC Machine For Acrylic Cutting from a machine that merely cuts plastic, and it is how Milling (machining) practice translates into parts that assemble without rework.
When tolerances, finishing, and inspection are defined upfront, acrylic becomes a predictable material rather than a source of scrap. Set the bands realistically, polish to the application, and measure against datums. A well-run CNC Machine For Acrylic Cutting will then deliver the same result on part one and part five hundred.
Applications, Costs, and Production Planning
Machined acrylic shows up in more industries than most people expect. Medical device builders use it for fluidic manifolds, diagnostic housings, and clear guards where visibility and cleanability both matter. Signage and display shops cut letters, light panels, and point-of-purchase fixtures. Robotics teams use acrylic for sensor windows and enclosure panels because it is light, stiff, and easy to inspect. Every one of those jobs runs through some form of CNC Machine For Acrylic Cutting, and each brings its own tolerance and finish expectations.
Across those sectors, the same cost drivers repeat. Material grade, sheet thickness, feature count, and finishing time decide most of the price. A part that looks simple on a print can still be expensive if it carries fifty small holes, polished edges, and a tight flatness callout.
Material grade is the first lever. Cast acrylic machines cleaner, holds optical clarity better after cutting, and is the usual choice for display and medical work. Extruded sheet costs less but tends to gum up tools and can stress-crack near machined edges. Buying the right grade up front is cheaper than reworking a batch that crazed after assembly.
Thickness drives both material cost and cycle time. Thin sheet, roughly 2 to 4 mm, cuts fast but deflects under clamping and needs vacuum fixtures or sacrificial backing. Thick cast sheet above 12 mm removes a lot of volume, so toolpaths get longer and heat control becomes the limiting factor on any CNC Machine For Acrylic Cutting. A 20 mm pocket in acrylic is a different job from the same pocket in aluminum.
Feature count adds up quietly. Every hole, slot, and pocket means more tool changes, more entry points, and more chances for chip welding on the cutter. A panel with a few large cutouts often machines faster than a small bracket drilled with forty holes. Quoting by square meter alone misses this, which is why shops that run acrylic daily quote from the drawing, not the sheet.
Finishing is usually the largest hidden cost. Flame polishing, diamond edge finishing, vapor polishing, and annealing all add handling steps and labor hours. A machined edge that will be bonded needs a different finish than one that will be visible under backlight. Specify the finish on the print. Leaving it open invites the shop to guess, and guesses get reworked.
| Cost driver | What pushes cost up | Practical control |
|---|---|---|
| Material grade | Cast vs. extruded, optical clarity | Match grade to end use, not habit |
| Thickness | Volume removal, clamping deflection | Design near net thickness where possible |
| Feature count | Tool changes, entry points, chip welding | Consolidate holes, relax non-critical tolerances |
| Finishing | Polishing, annealing, handling | Call out finish and mask areas on the drawing |
Production planning follows the same logic. Prototypes usually come off a CNC Machine For Acrylic Cutting as single pieces, run slowly, inspected fully. As volume climbs, shops switch to nested sheets, dedicated fixtures, and batch annealing so stress doesn’t build up across a run. The setup rules don’t change between one part and five hundred, but the fixture strategy and inspection sampling do.
Get the drawing right before the first chip. State the grade, the finish, and which tolerances actually matter. A shop running a CNC Machine For Acrylic Cutting for prototypes and production will quote more accurately and hold consistency longer when those three things are settled. That is how a prototype becomes a repeatable part instead of a one-off.
Getting Your CNC Machine For Acrylic Cutting Right
Acrylic rewards a disciplined setup and punishes shortcuts. Get the cast-versus-extruded choice right, match your cutter geometry to the sheet, keep chipload high enough to lift chips instead of rubbing, and hold thin material flat with vacuum or sacrificial backing. Those four decisions prevent most melted edges, stress crazing, and scrapped parts.
The seven rules above are not theory. They come from the same shop-floor logic that governs any precision machining job: control the cut, control the heat, control the fixture. A CNC Machine For Acrylic Cutting only delivers clean, optical-grade edges when the process around it is stable.
- Confirm sheet type and thickness before programming.
- Use single-flute O-flute cutters for chip clearance.
- Cut dry or with air blast, not flood coolant.
- Skim-cut or use vacuum fixtures on thin sheet.
- Inspect edges and dimensions before the next batch.
When parts move from prototype to production, the economics shift toward repeatability. A well-tuned CNC Machine For Acrylic Cutting holds tolerances across runs, reduces hand finishing, and lets you plan material yield with confidence. Hand routing can still handle one-offs, but production volumes belong on a controlled machine.
If your drawings call for tight tolerances, polished edges, or mixed acrylic and metal assemblies, send them over. GreatLight runs precision machining services, including 5-axis milling, turning, prototypes through production, and quality inspection, and can quote your CNC Machine For Acrylic Cutting work from a STEP file and a finish spec. Request a quote with sheet type, thickness, quantity, and edge requirements, and we will confirm feasibility and lead time. A CNC Machine For Acrylic Cutting is only as good as the process behind it, so start with a drawing review.