
Bottom milling hows finishglcncmachining: what decides the floor Ra
This page is for engineers and buyers who need to specify or inspect the floor finish left by a face mill or end mill. It covers what actually sets the Ra value on a bottom surface, which tool and stepover to choose, and when a floor finish cannot be improved without changing the setup.
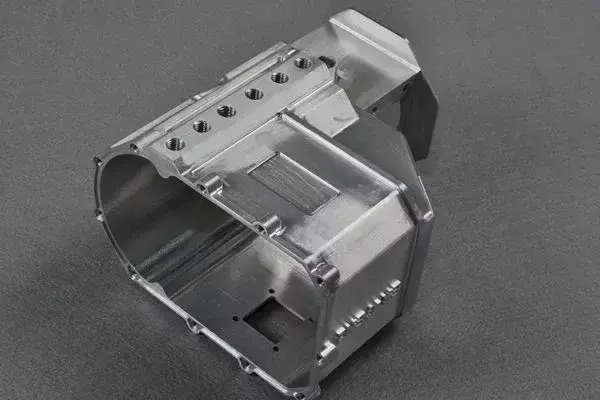
What the bottom finish really is
A floor finish is the sum of tool marks, feed marks and material behavior, not a single number you can dial in.
Where the bottom finish comes from
Cutting a flat surface with the end or face of the tool is what we call bottom milling. The finish you see on that floor is produced by the corner of the insert or the tip of the flute, not by the side of the cutter. That single fact explains most of the confusion around floor Ra values. A cutter can leave a near-mirror wall and a dull floor on the same pass.
Three things write the floor surface: the feed mark pitch, the tool corner radius, and the material's tendency to smear or chip. Feed marks are the visible arcs or lines. Their spacing depends on feed per tooth and the effective diameter of the cutter. A 0.8 mm corner radius spreads the load and hides small marks. A sharp corner copies every wobble in the spindle straight onto the floor.
Which cutter leaves a better floor
For open floors, a face mill with square or round inserts cuts faster and flatter than an end mill. Round inserts leave a scalloped floor, but the scallop height is usually small enough to sit inside Ra 1.6–3.2 μm. Square inserts give a flatter floor with sharper feed marks, which is often what drawing callouts expect.
Solid carbide end mills are the better pick for pockets, slots and floors with a wall on both sides. Use a tool with a corner radius rather than a sharp tip. The radius reduces the notch at the wall-floor junction and lowers the chance of chatter on the floor. Keep the flute length as short as the pocket allows; long reach is the most common cause of a floor that looks torn rather than cut.
Insert runout matters more than most people expect. A single insert sitting 0.02 mm high will carry the cut and leave a floor that looks like it was cut twice. Check runout with a dial indicator before blaming the program.
Typical floor finish by tool and pass
Values assume stable setup, coolant on, and aluminum or mild steel.
| Tool type | Floor Ra (μm) | When to use it |
|---|---|---|
| Face mill, round insert | Ra 1.6–3.2 | Large open floors, rough and semi-finish |
| Face mill, square insert | Ra 0.8–1.6 | Flat floors with a visible feed pattern |
| End mill, 0.8 mm corner radius | Ra 0.8–1.6 | Pockets and floors with walls on both sides |
| End mill, 0.4 mm corner radius | Ra 0.4–0.8 | Fine floors, light finishing passes only |
| Ball nose, 0.1 mm stepover | Ra 0.2–0.8 | Curved or contoured floors, slow cycle |
| Worn insert or chipped edge | Ra 3.2 and up | Never on a specified floor |
Stepover, feed and speed on the floor
Stepover controls the visible pattern on a face milled floor. At 70 to 80 percent of cutter diameter the floor looks even and the cycle is short. Drop to 50 percent when the drawing calls for a fine floor and the part is small enough to absorb the extra time. Going below 30 percent rarely improves Ra on a face mill; it mostly burns inserts.
Feed per tooth sets the mark pitch. Higher feed leaves wider marks and raises Ra, but cutting too light is worse. A very low feed per tooth rubs the material instead of cutting it, and the floor comes out smeared with built-up edge. For aluminum, 0.05 to 0.12 mm per tooth on a finishing pass is a workable range. For 304 stainless, stay lower and keep the cutter engaged.
Spindle speed has an indirect effect. Higher speed raises temperature at the corner, which helps aluminum and hurts stainless. On titanium and Inconel, heat stays in the tool and the floor can tear even when the numbers look correct. Climb milling is the default for a clean floor on most materials; conventional milling can help when the setup is flexible and the material work-hardens.
Why the same program gives different floors
Aluminum 6061 cuts clean and takes a bright floor at Ra 0.8–1.6 μm without much effort. Softer grades such as 5052 and pure copper tend to smear, and the floor looks dull even when the tool is sharp. Free-machining brass C36000 cuts well but leaves fine lead-rich smears if the feed is too light.
Stainless 304 and 316L work-harden at the cut line. If the tool rubs on the first pass, the second pass cuts a harder skin and the floor gets worse, not better. Take a real depth of cut on the finishing pass and keep the tool moving. 17-4PH behaves better after heat treatment than in the annealed state.
Titanium TC4 and Inconel 718 hold heat at the edge. Floor finish on these alloys is limited by tool wear more than by parameters. Expect Ra 1.6–3.2 μm on a stable setup, and budget for a fresh finishing tool on tight floors. Plastics such as POM and PEEK cut clean but mark easily; a light bead blast after machining often looks better than the cut floor.
When a floor finish cannot be improved
Rigidity sets the ceiling. A long, thin part in a vise will chatter on the floor no matter which insert you fit. Add support, lower the axial depth, or accept a coarser Ra and note it on the drawing. This is a setup limit, not a tooling limit.
Thin floors deflect under the cutter. If the floor is 0.5 mm thick and unsupported underneath, the tool pushes it down and the surface springs back with visible marks. A finishing pass at a shallow depth and a sharp tool helps, but a support plate or a change in the part design helps more.
Deep pockets with a small corner radius force a long, slender tool. Reach-to-diameter ratios above 4 to 1 usually show up as taper and chatter on the floor. In that case we either relieve the corner or cut the floor with a larger tool and finish the corner separately. Both change the process plan, not just the numbers.
Finally, a floor finish is not the same as a sealing or optical surface. If the part needs Ra 0.2 μm or a flatness callout under 0.01 mm, plan a separate lapping or fine grinding step. Asking a milling cutter to hit both in one pass usually costs more than adding the second operation.
Common questions
What Ra can a normal bottom milling pass reach?
On aluminum and mild steel with a stable setup, a finishing pass on a floor lands between Ra 0.8 and 1.6 μm. Open floors cut with a face mill and a 70 percent stepover usually land at Ra 1.6–3.2 μm.
Getting below Ra 0.8 μm means a smaller stepover, a sharper corner radius, and more cycle time. Below Ra 0.2 μm the process stops being milling.
Does climb milling always give a better floor?
On rigid setups with a sharp tool, climb milling leaves a cleaner floor on most materials and is our default for finishing. The chip thins out at the exit, which reduces the chance of tearing at the edge.
On older machines with backlash, climb milling can pull the part into the cutter. In that case we check the machine first, then pick the direction. The material and the machine both matter here.
Why does the floor look worse after a second pass?
Two common causes. The first is a worn or chipped insert: the second pass cuts with a different edge and leaves a different pattern. The second is work hardening on stainless or titanium, where the first pass hardens a skin that the next pass cannot cut cleanly.
Check runout and edge condition first. If the tool is fine, increase the depth of cut on the finishing pass so the edge cuts under the hardened layer.
Can bottom milling hold tight flatness as well as finish?
Flatness depends on the machine, the fixture and the tool path more than on the finishing insert. A stable setup on a 3-axis or 5-axis machine can hold ±0.005 mm on a machined feature when the process is planned around it.
If the drawing calls for both a fine floor and a tight flatness value, say so on the RFQ. We will plan the operation order and the inspection method around it.
Which materials are the hardest to get a clean floor on?
Inconel 718 and titanium TC4 are the hardest of the metals we run, because heat stays at the cutting edge and tool wear shows up directly in the floor. Soft copper and 5052 aluminum smear easily if the feed is too light.
POM and PEEK cut clean but scratch after handling. For those, a light bead blast after machining often gives a more even appearance than the cut surface.
How is the floor finish checked before shipment?
We inspect 100 percent of parts before shipment, covering raw material, in-process checks and final inspection. Floor finish is checked against the drawing callout, by visual comparison with a known sample or by a surface roughness tester when the drawing gives an Ra value.
Inspection reports are available on request. If a floor is hard to measure, tell us which reference you use and we will match it.
Send us the floor that is giving you trouble
Upload a drawing or a photo of the floor. We will come back with a DFM note and a quotation within 12 hours, and we will tell you which Ra the process can hold.
12-hour quote100% inspectionNo MOQNDA on request









