
5500mW Laser: 5 Crucial Safety Tips to Prevent Permanent Eye Damage
A 5.5 W continuous-wave beam sits in Class 4, the highest hazard category. This page covers the five controls that actually prevent retinal injury: eyewear selection, interlocked enclosures, beam-path management, written protocol, and preventive maintenance. Written for engineers and shop leads who specify or operate laser sources in a machining environment.
Why 5.5 W Changes the Rules
The hazard class drives the control set, not the application.
What 5500 mW Actually Means at the Workpiece
A 5500 mW (5.5 W) continuous-wave laser falls into Class 4. Class 4 is defined by two things: the beam is hazardous to the eye and skin even when scattered or diffusely reflected, and it can ignite materials. This is not a pointer with a bigger number. It cuts, engraves, and welds thin stock, and it will do the same to tissue it reaches.
The eye concentrates whatever enters the pupil onto a spot on the retina roughly 10 to 20 μm across. That optical gain can raise power density by orders of magnitude. On a 5.5 W beam, the retina reaches permanent damage thresholds faster than the blink reflex, which takes about 0.25 s. There is no pain signal during the exposure. Damage is often noticed only after the fact.
Wavelength matters as much as power. Fiber sources run at 1064 nm and are invisible, so the pupil does not constrict and the operator gets no warning. Green 532 nm sources are visible but still Class 4 at this power. UV sources add photochemical damage on top of thermal damage. Read the specification sheet before you specify any eyewear.
Select Eyewear by Wavelength and Optical Density
No single lens blocks all wavelengths. A 5500 mW laser may emit at 1064 nm, 532 nm, or in the UV band, and a lens rated for green will pass infrared almost unchecked. Start with the exact wavelength from the laser spec sheet, then pick a lens with the right optical density at that wavelength.
Optical density is logarithmic. OD 4 means the lens transmits 1/10,000 of the incident beam. For a 5.5 W source the arithmetic matters: at OD 4 the transmitted power at the design wavelength drops to roughly 0.55 mW, which is still above the Class 1 limit for direct viewing. That is why the correct OD for a given wavelength and power combination is a calculated number, not a guess. Use the manufacturer's OD chart or the ANSI Z136.1 calculation.
Fit matters too. Goggles that sit off the face let stray light in around the frame. Side shields are standard on the eyewear we recommend for open-beam work. Replace lenses immediately if they show pitting, scratches, or discoloration; a damaged filter can scatter or transmit more than its rating. Store them in a clean, dry cabinet, away from direct sunlight, to slow degradation of the polymer filters.
Shop rule: anyone entering the controlled area wears designated eyewear, even for a glance. Label each pair with its wavelength range and OD so nobody grabs the wrong set.
- 1Identify wavelength first1064 nm, 532 nm, or UV changes the lens completely.
- 2Calculate ODDo not reuse a rating from another laser.
- 3Check the fitSide shields, no gaps at the brow or temple.
- 4Inspect before each usePitting or discoloration means the filter is done.
Engineering Controls Beat Administrative Rules
Administrative rules fail when humans forget. Engineering controls are fail-safe. In our own machining cells we apply the same logic to laser enclosures that we apply to CNC machine guards: the machine cannot run with the guard open.
House every Class 4 setup in a fully interlocked, light-tight enclosure. The interlocks must cut power to the laser the instant a door or panel opens, not just trigger an alarm. Use a key-control master switch so the source cannot be energized by anyone without the key. Add an emission indicator outside the enclosure, visible before the door is opened.
Where a full enclosure is not practical, use a light-tight barrier curtain rated for the wavelength and a beam shutter that closes on any fault. A shutter that fails open is worse than no shutter, so test it on the maintenance schedule, not once at installation.
Warning signage at the entrance should conform to ANSI Z136.1 or IEC 60825, and should state the class, the wavelength, and the required eyewear. Add a contact mat or infrared occupancy sensor at the doorway so the interlock trips if someone walks in while the source is live.
Trace the Beam Path and Kill Specular Reflections
A 5.5 W beam reflects off surfaces that look dull with enough intensity to hurt eyes that are nowhere near the direct beam axis. Machined aluminum, polished stainless, anodized fixtures, and even a steel rule can act as specular reflectors. Diffuse reflections from matte surfaces are less intense but still a Class 4 concern at close range.
Before any lasing session, trace the full optical train from output coupler to workpiece and beyond. Ask where the beam terminates if the workpiece is removed. Terminate all stray beams in beam dumps made from anodized aluminum or ceramic, and clamp them so they cannot shift.
Mirrors and lenses must be rigidly mounted. A lens that creeps out of alignment during a run sends the beam somewhere nobody planned for. Remove jewelry, watches, and loose metallic tools from the table. They are the most common cause of an unexpected reflection.
Keep the beam horizontal and below eye level where the machine layout allows. If the beam must cross a walkway, enclose that span with a fixed tube or a rated curtain rather than relying on signage.
- 1Trace both directionsFollow the beam forward and back to its termination.
- 2Dump stray beamsAnodized aluminum or ceramic, clamped in place.
- 3Lock the opticsRigid mounts, checked after every setup change.
Write the Protocol and Train Against It
A written laser safety protocol is the difference between a control that exists and a control that works. It should name a Laser Safety Officer, list every laser by class and wavelength, state the required eyewear for each, and describe the lockout procedure for service work.
Training should be specific to the equipment on the floor, not a generic video. Operators need to know where the interlocks are, what the emission indicator looks like, how to shut the source down, and what to do if they suspect an exposure. The last point is the one most often missing.
Suspect exposure means stop, do not rub the eye, and get a ophthalmological exam the same day. Retinal injury from a 5.5 W beam may not be painful at first, and early assessment gives the best chance of limiting permanent loss. Keep the incident report and the eyewear involved; the lens condition tells you a lot about what happened.
Review the protocol annually and after any incident or equipment change. A new laser head or a new fixture is a change to the beam path, and the protocol has to reflect it.
Inspect and Maintain on a Fixed Schedule
Preventive maintenance is where most laser safety programs quietly erode. Interlocks get bypassed during a debugging session and never restored. Shutters get sticky. Eyewear gets shared and stored on a bench.
Put the checks on a written schedule with sign-off. Daily: eyewear condition, enclosure panels, warning lights. Monthly: interlock function on every door and panel, shutter response time, beam dump security. Annually: full hazard re-evaluation, OD verification against any wavelength change, and retraining.
Keep a spare set of rated eyewear for each wavelength in use, in sealed storage, so a damaged pair does not become a reason to run without protection. Log every replacement. If lenses are failing faster than expected, check the enclosure for stray light leaks before ordering more.
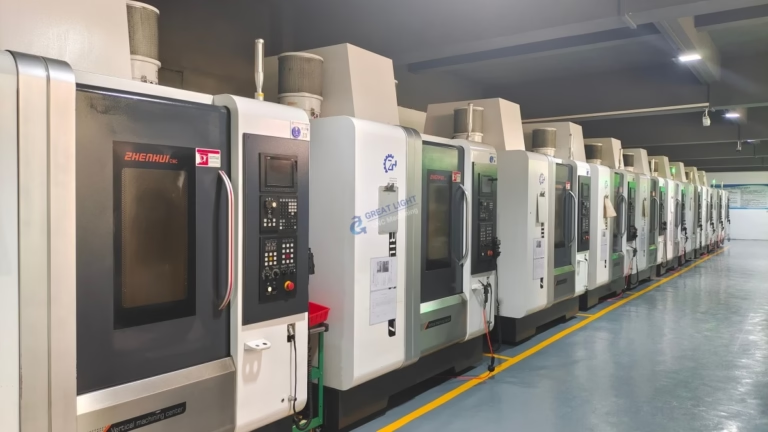
The same discipline applies to the parts we machine for laser systems. Mounting plates, beam dump housings, and optical benches hold alignment only if they are made to tolerance. We hold ±0.005 mm on machined features and inspect 100% before shipment, because a mount that shifts is a safety issue, not just a quality one.
Control Checklist by Hazard Category
Use this to check which controls apply to your setup.
| Control | Class 3R / 3B | Class 4 (5500 mW) |
|---|---|---|
| Rated eyewear at the emission wavelength | Required | Required, OD calculated |
| Key-control master switch | Recommended | Required |
| Interlocked light-tight enclosure | Recommended | Required |
| Beam dumps on all stray paths | Optional | Required |
| Warning sign at entrance | Required | Required |
| Written protocol and training | Recommended | Required |
| Emission indicator outside enclosure | Optional | Required |
| Annual hazard re-evaluation | Recommended | Required |
Questions Engineers Ask
Can I use the same goggles for a 1064 nm fiber laser and a 532 nm green laser?
No. Filter absorption is wavelength-specific. A lens with high OD at 532 nm may have almost no attenuation at 1064 nm, which is the more dangerous case because the beam is invisible.
If your shop runs both wavelengths, keep two labeled sets and never swap them. The label should carry the wavelength range and the OD value.
What OD do I need for a 5500 mW beam?
It depends on the wavelength and the exposure duration you are protecting against. OD is logarithmic, so OD 4 transmits 1/10,000 of the incident power.
Calculate with the ANSI Z136.1 method or the eyewear maker's chart for your exact wavelength and beam diameter. Do not copy an OD from another laser.
Is a 5500 mW laser dangerous if I am not in the direct beam?
Yes. Class 4 includes diffuse and specular reflections as hazards. A beam hitting a machined metal surface can send a reflection across the room at an intensity that still causes retinal damage.
This is why the beam path has to be traced and terminated, and why entry into the controlled area requires eyewear regardless of where the operator stands.
Do I need a full enclosure, or are curtains enough?
A fully interlocked, light-tight enclosure is the stronger control and the one we recommend for production work. Rated curtains are a reasonable secondary barrier for temporary setups or where the beam is already contained.
If you use curtains, add a shutter that closes on fault and test it on a schedule. A shutter that fails open gives no protection at all.
What should happen after a suspected eye exposure?
Stop the process, do not rub the eye, and get an ophthalmological exam the same day. Retinal damage from a 5.5 W beam may not hurt at the moment of exposure.
Keep the eyewear and write an incident report. The lens condition and the setup at the time tell you what control failed.
How often should interlocks and shutters be tested?
Daily visual checks on panels, warning lights, and eyewear; monthly functional tests of every interlock and shutter; annual re-evaluation of the hazard and the OD ratings.
Log each check with a signature. Untested interlocks are the most common gap we see when reviewing a laser cell.
Machined Parts for Laser Systems, Held to Tolerance
Send your drawings and we return a quotation with free DFM analysis within 12 hours. Mounts, beam dump housings, and optical fixtures machined to ±0.005 mm with 100% inspection before shipment.
12-hour quote100% inspectionNDA on request









