
3D Printing Cost Per Hour: 7 Secrets to Cut Your Costs
The hourly rate is a benchmark, not a decision. This page breaks down what sits inside the 3D printing cost per hour and gives seven changes that lower cost per delivered part. Written for engineers and sourcing teams deciding between printing and machining.
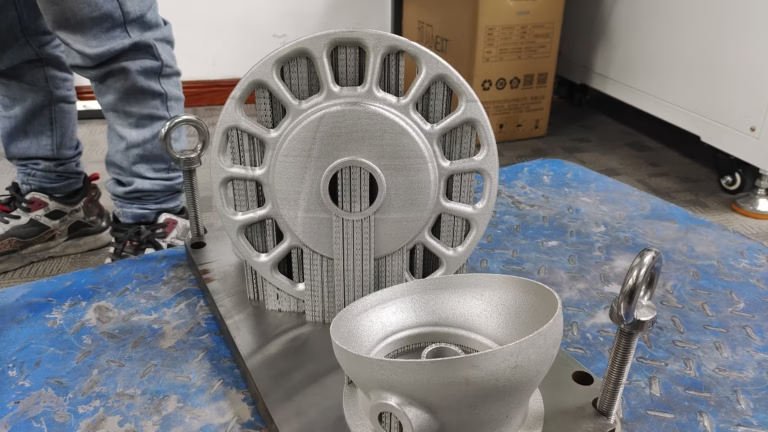
Start with the cost per good part
Seven levers, each one inside your control, and one table to put the numbers to work.
What the hourly number actually contains
Most teams quote a machine rate and stop there. That rate already hides machine depreciation, service contracts, consumables, the operator's loaded wage, floor space and power. Divide the total by billable build hours and industrial FDM or powder-bed equipment often lands somewhere between $80 and $150 per hour. Treat that as a starting point, not an answer.
The number that decides make-versus-buy is cost per successfully delivered part. Two shops can run the same printer at the same hourly rate and end up with a 30 percent gap in part cost, because one of them prints fewer failed builds, fewer supports, and less rework. So when you compare a 3D printing cost per hour figure against machining, compare it against the machined part's price, not against the machine's sticker rate.
Keep the hourly rate for internal benchmarking only. Use it to spot a printer that drifted out of tune, or a job that suddenly takes longer than it did last quarter. It is a diagnostic, not a purchasing criterion.
Design for the process, then fill the build
Geometry is the largest cost lever you have. A flange with a 90 degree overhang needs heavy support in FDM; in SLA and metal powder-bed it adds scan or cure time and leaves witness marks that later need machining. Chamfer that same flange to 40 degrees or add a fillet and support volume can drop by more than half. The part does the same job. The print gets cheaper.
A part designed for a lathe or a mill rarely prints well. Self-supporting angles, uniform wall thickness and lattice in place of solid regions are the three changes that pay back fastest. If a wall is 8 mm thick and only 2 mm is structural, the print spends hours depositing material that no load path uses.
Packing matters as much as geometry. A build plate that runs at 30 percent fill pays for the same warm-up, the same chamber cycle and the same operator attention as a plate at 70 percent. Group parts by material and layer height, nest tall parts beside short ones, and stop running one bracket per build when a fixture can carry twelve.
There is a limit. Packing raises the cost of a single failure, because one warped part can spoil the whole plate. Keep the plate to parts from the same family and the same critical tolerance band.
Match layer thickness and infill to the real requirement
Halving layer height roughly doubles build time, and it only buys you surface finish and Z-direction resolution. If the part is a drill jig or an enclosure, 0.2 mm layers are usually enough. If it is a flow channel or a sealing face, thin layers may be justified. Decide per feature, not per part.
The same logic applies to infill. A cosmetic cover with 60 percent infill wastes material. A load-bearing bracket at 15 percent infill may fail in service. Ask which surfaces carry load and which only hold shape, then set infill and shell count to match. In many cases a thinner solid shell with a modest lattice outperforms a dense block, and it prints faster.
Post-processing is where printed parts quietly get expensive. Support scars, stair-stepping on mating faces and undersized holes all turn into bench time. Design holes at nominal minus a known shrink allowance, put supports on non-critical faces, and add a small chamfer where a support meets a visible surface. Every minute you remove from the bench is a minute you never pay for.
Do not over-specify finish. A Ra 1.6 μm sealing face and a bead-blasted cosmetic cover are different jobs. Specify each surface separately.
Where the cost per part actually goes
Typical share of total cost for a mid-size industrial print job. Use it to find the lever worth pulling first.
| Cost element | Typical share | First move |
|---|---|---|
| Machine time and depreciation | 35-50% | Raise build packing |
| Material and consumables | 15-25% | Cut infill and support volume |
| Post-processing labor | 10-20% | Design out support scars |
| Failed builds and scrap | 5-15% | Track yield by part family |
| Setup and programming | 5-10% | Repeat jobs on saved setups |
Track yield, then raise utilization before you buy
Yield is the number most print shops do not measure. Log every build with the part number, plate position, layer height, material lot and result. Within a month you will see which geometries fail, which material lots run wet, and which plate positions warp. A single repeat failure usually costs more than the design change that prevents it.
Utilization comes next. A printer that runs 6 hours a day has a cost per hour roughly double one that runs 14. Before adding a second machine, look at scheduling: can long builds run overnight, can small parts queue behind large ones, can a second material be validated so the machine never sits idle waiting for stock.
When utilization is genuinely maxed out and yield is stable, then buy. Adding capacity to an unstable process only multiplies the scrap.
Print what should be printed, machine the rest
Not every part belongs on a printer. A printed bracket with a tight bore, a flat sealing face, or a thread that must hold torque usually needs machining after the fact. If 80 percent of the geometry is simple and 20 percent is critical, printing the blank and machining the critical features can beat both all-print and all-machining routes.
That hybrid route is where we spend most of our time. GreatLight runs 127 high-precision CNC machines, including 16 simultaneous 5-axis machining centers and 16 mill-turn centers, alongside additive capacity. Printing the near-net shape and finishing on a 5-axis machine reaches tolerances of ±0.005 mm with a surface finish of Ra 0.8–1.6 μm on the faces that matter.
The decision rule is simple. If the part is one-off, geometrically complex, or topologically optimized, print it. If it is a prismatic part in a run of 50 or more, machine it. If it is somewhere between, print the blank and machine the interface. Our engineers run that comparison during the DFM review, and the quotation we return includes the route we recommend.
Ask for the comparison before you commit to a process. It takes less time than a failed build.
Questions engineers ask next
What is a normal 3D printing cost per hour for industrial equipment?
Industrial FDM and powder-bed systems commonly land between $80 and $150 per billable machine hour when depreciation, service, consumables, operator time, floor space and power are all included.
That range moves with machine class, material and utilization. A printer running two shifts has a lower hourly rate than the same machine running one.
Should I use the hourly rate to choose between printing and CNC machining?
No. Compare cost per delivered part instead.
A machined part has its own setup, tooling and inspection costs. The honest comparison puts a finished printed part against a finished machined part, including post-processing on both sides.
How much can build packing really save?
Moving from 30 percent to 70 percent plate fill cuts the fixed cost per part by more than half on a single build, because warm-up, chamber cycles and operator attention are shared.
The trade-off is scrap risk. Pack parts from the same family and tolerance band so one failure does not destroy a mixed plate.
When does post-processing cost more than the print itself?
When support scars land on sealing faces, when holes print undersize, or when a cosmetic surface needs hand sanding.
These are design decisions. Moving supports to non-critical faces and adding shrink allowance to holes usually removes most of the bench time.
Can printed parts be finished to CNC tolerances?
On selected features, yes. Printing a near-net blank and machining the critical faces on a 5-axis center reaches ±0.005 mm with Ra 0.8–1.6 μm.
The whole part does not need that treatment. Identify the interfaces that carry load or seal, and finish only those.
What information do you need to quote a hybrid print-and-machine job?
Send the 3D model, the 2D drawing with tolerances, material, quantity and the surfaces that are critical. Uploads are secure and confidential, and an NDA is available on request.
We return a quotation with a free DFM analysis within 12 hours, and production can start within 24 hours of approval.
Put the cost model on a real part
Send your model and drawing. We will compare print, machine and hybrid routes and return a quotation with DFM notes within 12 hours.
12-hour quoteFree DFM analysis100% inspection









