
What Are the Ten Common Surface Treatment Methods? A Machinist's Guide
Ten common surface treatment methods cover most CNC parts we machine, from bead blasting to hardcoat anodizing. This guide explains what each finish does to the substrate, which materials accept it, and when it is the wrong choice. Read it before you write a finish callout on a drawing.
In this article
- 1
- 2
- 3
- 4
- 5
- 6
- 7
Key takeaways
What Surface Treatment Actually Does to a Machined Part
Surface treatment is any process that changes the outer layer of a part without changing what the part is made of. The treatment either converts the existing metal into a compound or deposits a new layer on top. In both cases the modified zone is thin, usually 5–50 μm, and the core material still carries the load.
That thin layer decides three things: how fast the part corrodes, how well it resists wear, and how it looks. A 6061-T6 bracket with a clear anodized film will sit outdoors for years. The same bracket in bare aluminium shows white oxide within weeks.
Finish selection is a trade-off, not a checklist. A hard, wear-resistant coating often costs you dimensional clearance. A bright decorative finish may hide a scratch but offer no corrosion protection. Decide which property matters most before you pick a method.
One rule we repeat to every customer: choose the finish when you choose the material, not after the part is machined. Masking, thread allowance and surface prep all change the machining plan.
Mechanical Methods: Bead Blasting, Brushing, Polishing and Tumbling
Bead blasting fires fine glass or ceramic media at the surface with compressed air. It removes tool marks, deburrs edges and leaves a uniform matte texture. On aluminium, 120–220 grit media gives a consistent satin look. Blasting does not change dimensions beyond a few micrometres, so it is safe on tight-tolerance features.
Brushing, also called wire drawing, drags an abrasive belt or wheel across the part in one direction. The result is a directional grain that hides fingerprints and small scratches. Straight, random, corrugated and rotary patterns are all possible. Brushing removes more material than blasting, so avoid it on thin walls.
Polishing reduces roughness rather than adding a coating. Mechanical polishing with progressively finer abrasives can reach Ra 0.2–0.8 μm on aluminium and stainless. It is a cosmetic process. It does not improve dimensional accuracy or geometric tolerance, and it cannot fix a bowed part.
Tumbling puts parts in a vibrating or rotating barrel with abrasive media. It deburrs both faces at once and is cheap for high volumes. The catch is that it rounds sharp edges. If a drawing calls for a sharp corner or a crisp laser mark, tumbling will soften it.
- 1Bead blastingMatte texture, light deburring, minimal dimensional change.
- 2BrushingDirectional grain, hides scratches, removes a small amount of stock.
- 3PolishingLow roughness, cosmetic only, no accuracy gain.
- 4TumblingBulk deburring, rounds edges, low cost per part.
Chemical and Electrochemical Methods: Anodizing, Black Oxide and Plating
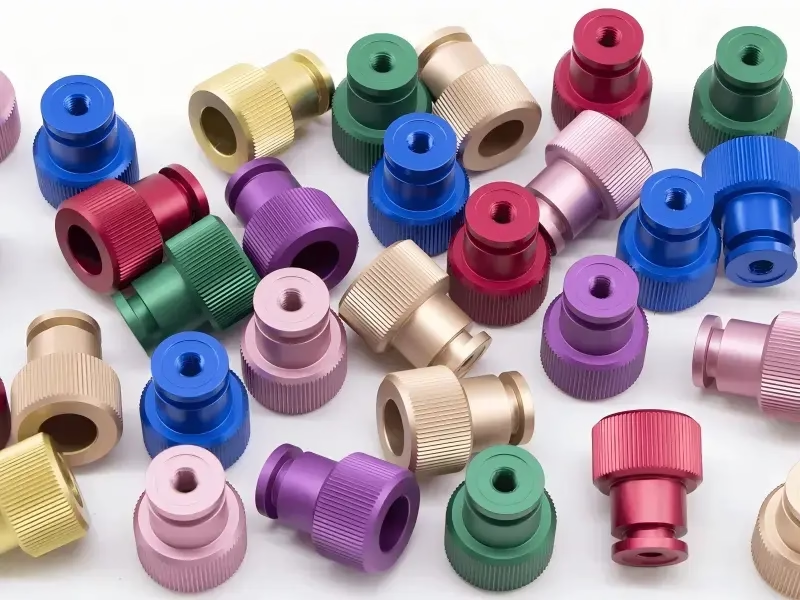
Anodizing is an electrolytic process that grows an oxide film on aluminium. The film is part of the metal, not a coating on top, so it will not flake. Type II sulfuric anodizing gives 5–25 μm for decoration and mild corrosion resistance. Type III hardcoat reaches 25–50 μm and a much harder surface.
Clear, colour, hardcoat and conductive anodizing are all available. Color comes from dye absorbed into the porous film before sealing. Nickel-free sealing matters for European and North American buyers who restrict nickel release on skin-contact parts.
Black oxide converts the surface of steel into magnetite. It adds almost no thickness, so it suits close-tolerance parts, threads and gauges. It provides only light corrosion resistance and needs an oil or wax topcoat to survive handling.
Electroless nickel, zinc, silver and gold plating deposit metal onto the part. Electroless nickel gives uniform thickness on complex shapes and good wear resistance. Silver and gold plating serve electrical contact and RF parts. Plating baths cover steel, copper and brass, and some aluminium after a zincate step.
Coating and Marking: Powder Coating, Black Oxide, Laser Engraving
Powder coating sprays electrostatically charged polymer powder, then cures it in an oven at roughly 180–200 °C. The film is thick, often 60–120 μm, and gives strong corrosion protection and colour choice. That thickness is also its weakness. Threads, press fits and tight bores will not assemble unless you mask them.
Black oxide and powder coating are often confused because both look black. Black oxide is a conversion layer under 2 μm thick and stays dimensionally neutral. Powder coating is a build-up layer and changes every dimension it touches.
Laser marking and engraving remove or alter the surface with a focused beam. We hold a minimum character height of 1.5 mm for legible marks. Laser engraving can cut through an anodized film to expose bare aluminium, which produces a sharp two-tone mark. Laser marking alone only changes color and can fade.
Laser work is often staged between two anodizing runs. A typical sequence is polish, brush or blast, then anodize, then laser engrave, then a second anodize, then dry. Skipping the second anodize leaves the engraved area unprotected.
Step by Step: Specifying a Finish on a CNC Drawing
Follow this order and most finish problems disappear before the first chip is cut.
- 11. State the function firstWrite one line on the drawing: corrosion, wear, appearance, conductivity or marking. This single line settles most arguments later.
- 22. Pick the finish that matches the alloyAnodize aluminium, black oxide steel, plate copper and brass. If the alloy is 7075 or 2024, expect a darker natural anodize color than 6061.
- 33. Set a thickness range, not a single numberType II anodize 10–15 μm, hardcoat 25–50 μm, powder coat 60–120 μm, black oxide under 2 μm. A range gives the shop room to work.
- 44. Add masking notes on functional surfacesList threads, bores, seal faces and electrical contacts as no-coat zones. Masking tape and plugs are cheap; re-machining a coated part is not.
- 55. Allow extra stock on coated dimensionsFor a 25–50 μm hardcoat, grow the pre-plate dimension by 50–100 μm on diameter. Otherwise a press fit becomes an interference fit you cannot assemble.
- 66. Define the cosmetic standardSay whether scratches are judged on a visible face or all over. Note the direction of brushing grain. Vague cosmetic notes cause most rejections.
- 77. Request a first-article sampleOne sample part confirms color, gloss and texture before the full run. This is the cheapest step in the whole process.
- 88. Keep the process sequence on the drawingFor laser plus anodize work, list the exact order. The shop cannot guess which anodize run comes first.
Which Common Surface Treatment Methods Fit Your Part
Typical values for aluminium and steel parts. Confirm thickness and color on a sample.
| Method | Best for | Typical thickness | Watch out for |
|---|---|---|---|
| Bead blasting | Matte look, light deburring | Under 5 μm removed | Media residue in blind holes |
| Brushing | Directional cosmetic grain | 5–20 μm removed | Grain direction must be specified |
| Polishing | Low roughness, Ra 0.2–0.8 μm | 10–30 μm removed | No accuracy gain, soft surface |
| Tumbling | Bulk deburring, high volume | 5–20 μm removed | Rounds sharp edges and corners |
| Anodizing Type II | Aluminium corrosion and color | 5–25 μm | Dark shade on 7075 and 2024 |
| Hardcoat Type III | Aluminium wear surfaces | 25–50 μm | Adds size, needs masking |
| Black oxide | Steel threads, gauges, bores | Under 2 μm | Light protection, needs oil |
| Electroless nickel | Wear plus uniform coverage | 10–25 μm | Bath cost, hydrogen embrittlement risk |
| Powder coating | Outdoor frames and covers | 60–120 μm | Thick film blocks threads and fits |
| Laser engraving | Part IDs, logos, two-tone marks | Sparks only, no buildup | Minimum character height 1.5 mm |
Pick the finish before you pick the cutter path
Most finish defects trace back to a decision made after machining. Tell us the function, the alloy and the masked zones up front, and we will build the process sequence into the quote.
Common Questions About Surface Treatment
Can I anodize a part after it has been laser marked?
Yes, but the order matters. Engrave after the first anodize run to cut through the film, then seal with a second anodize. If you engrave first and anodize once, the mark is buried under the oxide and loses contrast.
Send the full sequence on the drawing: polish or blast, anodize 1, laser engrave, anodize 2, dry.
Does bead blasting change my tolerances?
Only slightly. Blasting removes a few micrometres of material, so parts held at ±0.005 mm stay in tolerance. The real risk is media trapped in blind holes or cross-drillings.
Specify a rinse and blow-off step, and avoid blasting on sealing surfaces unless they are masked.
Why does my anodized 7075 part look darker than the sample?
Copper and zinc content in 7075 and 2024 changes how the oxide film takes dye. The same clear anodize that looks bright on 6061 looks grey or bronze on 7075.
If color match matters, use 6061 or 6082, or approve the darker shade on a sample first.
Which finish should I choose for a stainless steel part?
Stainless does not anodize. Use bead blasting, brushing or polishing for appearance, and passivation to restore the corrosion-resistant surface after machining.
For wear, consider electroless nickel. For a black look, black oxide works on some stainless grades but not all, so confirm with the finisher.
How much stock do I add for hardcoat anodizing?
A 25–50 μm hardcoat grows the part by roughly 25–50 μm per surface, or 50–100 μm on a diameter. Grow the pre-coat dimension by that amount on any press fit or bearing bore.
If the feature is a thread, mask it instead. Coated threads will not accept a standard nut or bolt.
Is powder coating suitable for tight-tolerance machined parts?
Usually not. A 60–120 μm film covers every surface it touches, including bores and thread roots. Use it on covers, frames and brackets where fits are loose.
When you must coat a tight part, mask the functional zones and keep the powder off those faces.
Send Us Your Drawing and Finish Callout
Upload a STEP file and your finish notes. We return a quotation with free DFM analysis within 12 hours, and every part gets 100% inspection before shipment.
12-hour quoteFree DFM analysis100% inspectionNo minimum order quantity
More CNC Knowledge
We publish setup notes, tooling trials and inspection data from the factory floor.











