
Camera Mounts CNC Milling for Vision Systems
A machined bracket holds the optics. Once the camera is fixed, the mount decides whether the measurement stays put. This page covers the mechanics behind camera mounts CNC milling, the tolerances that matter, and where the process stops being the right answer.
In this article
- 1
- 2
- 3
- 4
- 5
- 6
- 7
What a machined camera mount actually controls
A vision mount does three jobs. It positions the sensor relative to the target scene, it holds that position while the machine runs, and it gives the lens a repeatable datum when someone swaps optics. A 5 MP camera with a 25 mm lens covers roughly 0.05 mm per pixel at a 300 mm working distance. Shift the camera by 0.1 mm and the measurement moves two pixels. That is the whole argument for machining these parts instead of bolting together extrusion and plate.
The geometry is usually simple: a base plate, a standing wall, a lens bore or thread, and dowel pin holes for repeatable re-mounting. Some designs add a Scheimpflug tilt for angled targets, a dovetail for quick release, or a sealed window for dusty cells. Camera mounts CNC milling turns those features into one piece, so the datum chain runs through solid metal instead of through a stack of fasteners.
The part is a metrology instrument, not a bracket. Treat it that way during design review and most field failures never appear.
- 1PositionSets sensor-to-target geometry; errors here read as measurement bias.
- 2StabilityHolds alignment across thermal cycles and vibration.
- 3RepeatabilityDowel pins and hard stops let a camera come back to the same place.
Which tolerances move the pixel, and which do not
Not every dimension on a mount drawing deserves a tight number. Split the features into two groups. Datum features set where the sensor sits. Everything else is packaging. A camera seating face with 8 μm flatness and parallelism, dowel pin holes at Ø0.01 mm MMC positional, and under 5 μm run-out on the lens retaining thread belong in the first group. Bolt hole positions for a cable clamp do not.
Stack-up decides the real number. If a mounting face is flat within 10 μm and the standing wall is square within 15 μm over 100 mm, the lens axis tilts by roughly 0.009°. Over a 300 mm working distance that pushes the optical center about 45 μm sideways. The part still passes a visual check and still fails the calibration.
One more boundary. Anodizing builds up 5–25 μm per surface depending on the coating. On a lens bore held to ±0.005 mm, that growth eats the whole tolerance band. Mask critical bores, or machine them undersize to compensate. The same applies to electroless nickel, which deposits more evenly but still adds thickness.
- 1TightSeating faces, lens bores, dowel holes, kinematic contact points.
- 2LooseClearance holes, cable routes, cover mounting, cosmetic edges.
- 3WatchCoating thickness on any bore that receives a lens or window.
Material and finish choices that hold alignment
6061-T6 dominates for a reason. It machines cleanly, anodizes well, and its thermal expansion of about 23 × 10⁻⁶ /°C is manageable in a temperature-controlled cell. For a 200 mm tall bracket, a 10 °C swing moves the top by roughly 46 μm. If the cell is not controlled, that is your budget, not the machining tolerance.
Stainless 304 or 316 comes in near furnaces, wash-down areas and cryogenic chambers. It is three times heavier and galls if you cut it dry. 7075-T6 and Ti-6Al-4V appear on robot end effectors where stiffness per kilogram matters. Titanium needs sharp tooling and low cutting speeds to avoid work-hardening the surface, which shows up later as a cracked thread root.
For natural frequency, stiffness wins over damping in most mounts. A monoblock machined from solid bar with webbed ribs pushes the first mode higher than a bolted plate assembly of the same mass. Target above 200 Hz if the mount sits near a servo axis or a stamping press.
- 1Aluminum 6061-T6Default for cells with stable temperature and normal cleaning.
- 2Stainless 304 / 316Heat, moisture, wash-down; accept the extra mass.
- 37075-T6 / Ti-6Al-4VRobot arms and gantries where weight drives cycle time.
Why 5-axis setups beat re-fixturing
A camera mount has features on five or six sides. Machining the base, then re-clamping to cut the lens bore, adds a second setup error to the datum chain. Each re-clamp on a vise can shift a part by 10–20 μm even with soft jaws and a torque wrench. Two or three setups and your ±0.005 mm drawing tolerance is gone before the part leaves the machine.
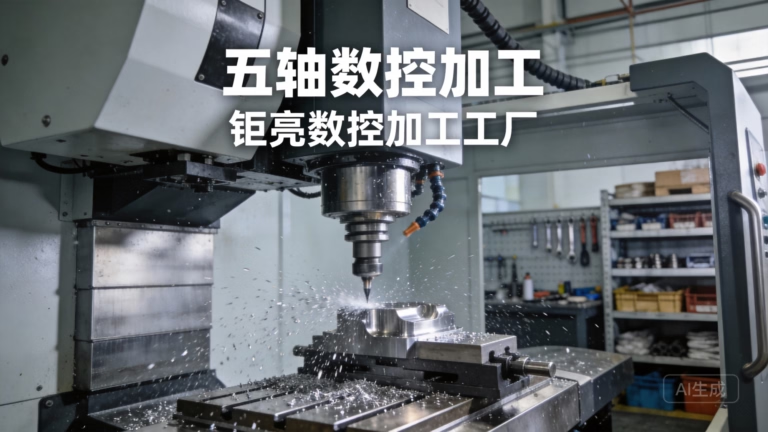
Simultaneous 5-axis work keeps the seating face, the wall and the lens bore in one coordinate system. The tool reaches the bore at an angle instead of on a long thin gauge length, so chatter drops and the bore comes out round. Our shop runs 16 simultaneous 5-axis centers with travels from 500 × 500 × 450 mm up to 4,000 × 400 × 150 mm, which covers most vision brackets and multi-camera bars in one piece.
Thin walls are the usual failure point. A 3 mm aluminum wall at 150 mm tall will deflect under cutting load and spring back when the vise opens. Rough it, let it rest, then take light finishing passes at 0.1–0.2 mm radial depth. The part moves, but it moves before the finish cut, not after.
When CNC milling is the wrong process
CNC milling loses on cost once the geometry stops changing and the volume climbs. A cast or die-cast housing with a couple of finished faces can cost less per unit above roughly 10,000 pieces, if the wall thickness and draft allow it. The trade is tooling lead time and a porosity risk you do not get from a billet.
It also loses when the mount has to absorb vibration. Metal transmits. If a camera sits on a press frame, no amount of ribbing replaces a elastomer isolation layer or a tuned mass. Machine the mount stiff, then isolate it. Stiffness and damping are different jobs.
And it loses when the required surface is optical. A machined Ra 0.2–0.8 μm finish is excellent for a sealing face, but it is not a mirror. Optical surfaces belong to grinding and polishing, or they get bought in as a finished window.
- 1Above ~10,000 partsCast or die-cast housing usually wins on unit cost.
- 2High vibrationAdd isolation; a stiffer bracket alone will not fix it.
- 3Optical surfacesGrind and polish, or buy the optic finished.
How to check a mount before it reaches the cell
A CMM report tells you the part matches the drawing. It does not tell you the camera will see straight. The useful test is a stack check: pin the mount on a granite plate, indicate the seating face, then sweep the lens bore with a dial test indicator. That gives the angular error the camera will actually inherit.
For repeatability, mount and remove the camera ten times and log the pixel position of a fixed target after each cycle. A well-designed kinematic interface should stay inside one pixel. If it drifts, the dowel pins are oversized, the contact faces are not flat, or someone is torquing the screws unevenly.
We inspect 100% of parts before shipment, covering incoming material, in-process checks and final inspection, with reports on request. That covers the geometry. The optical check belongs to you, on your bench, with your camera.
Machined monoblock vs bolted plate vs cast housing
Pick by what the application punishes most.
| Approach | Best for | Weak point | Typical lead time |
|---|---|---|---|
| Machined monoblock | Sub-pixel alignment, one-off to 10,000 parts | Cost per part at high volume | 3–5 days |
| Bolted plate assembly | Prototypes that will change next week | Setup shift at every re-clamp | 1–3 days |
| Cast then machined | Runs above 10,000 with stable geometry | Tooling cost, porosity risk | Weeks for tooling |
| Welded frame | Large gantries over 1 m | Distortion pulls the datum faces | Depends on weld schedule |
| Sheet metal bracket | Low-load 2D cameras, wide tolerance | Poor stiffness in the tilt axis | 1–2 days |
The trade-off in one line
If alignment holds the measurement, machine a monoblock in 6061-T6 and pin it. If volume is above 10,000 and the geometry is frozen, cast it and finish only the datum faces.
Questions engineers ask before ordering
What tolerance can camera mounts CNC milling actually hold?
We hold ±0.005 mm on critical features when the drawing calls it out and the feature is reachable in one setup. That is a real capability, not a default. Clearance holes and cosmetic edges stay at general tolerance.
If a feature needs a tighter band than that, the design usually needs a different approach: a lapped interface, an adjustable kinematic mount, or in-situ calibration after assembly.
Should the lens bore be threaded or use a retaining ring?
Threads are compact and let you focus by rotating the lens. They also carry run-out risk, and a thread cut on a long tool will not be concentric with the seating face.
A plain bore with a retaining ring is easier to hold concentric and easier to inspect. Use threads only when the lens has to move, and specify run-out under 5 µm on the thread.
How do dowel pins improve repeatability?
Two dowel pins in reamed holes remove rotation and translation, so a camera can come off for cleaning and go back to the same position. Positional tolerance of Ø0.01 mm MMC on the pin holes is typical.
Use hardened pins and ream the holes after anodizing if the coating is thick, otherwise the pin fit changes after finishing.
Does anodizing change the fit of a precision bore?
Yes. Type II anodizing grows the surface by roughly 5–25 µm depending on alloy and process. On a bore held to ±0.005 mm, that is the entire tolerance.
Mask the bore or machine it undersize to compensate. Hardcoat grows more and is more brittle at edges, so it is a poor choice for a bore that receives a lens.
What is the smallest quantity you will run?
There is no minimum order quantity. We machine from a single prototype up to runs of 10,000 or more.
A quotation and DFM analysis come back within 12 hours, and production can start within 24 hours after the drawing is released.
Can you machine a mount from our STEP file without a drawing?
Yes, but we will come back with questions. A STEP file carries geometry, not intent. We need to know which faces are datums, which bores receive a lens, and where the coating must be masked.
Uploads are confidential, and an NDA is available on request if the project needs one.
Send the model, get a manufacturability read
Upload a STEP file and we will flag datum chains, thin walls and coating conflicts before a chip is cut.
12-hour quote100% inspectionNo minimum order
More machining notes
We publish setup notes, tooling trials and inspection data from the factory floor.











