
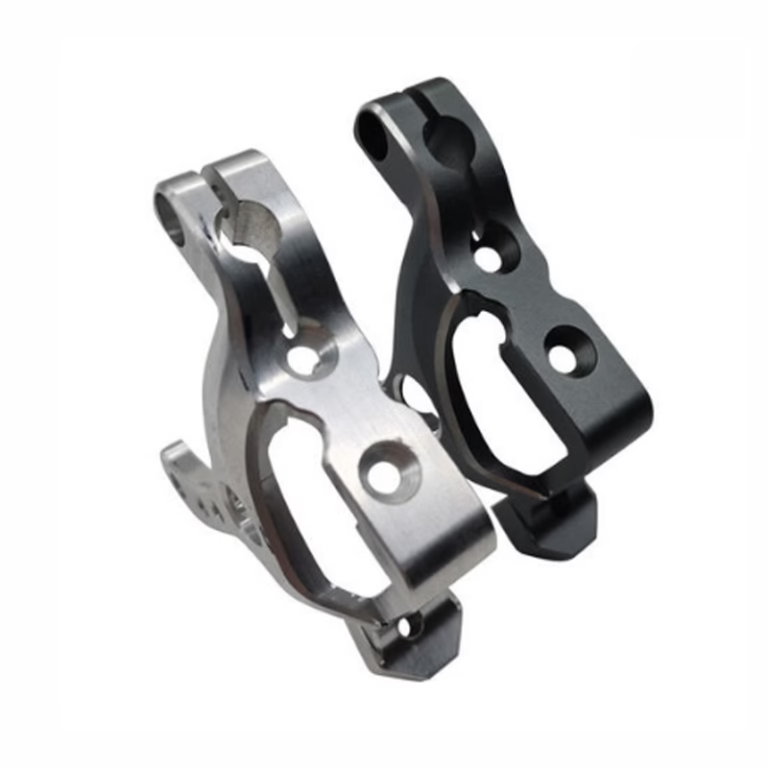
UAV Inspire Landing Gear Parts Machining
A working explanation of what makes these parts hard: thin walls, long slender legs, tight bores, and a fatigue budget that punishes every scratch. Written for design and manufacturing engineers who need to judge whether a geometry is machinable before the drawing is released.
In this article
- 1
- 2
- 3
- 4
- 5
- 6
Why UAV Inspire landing gear parts machining resists easy setups
A landing gear leg looks like a bent tube with two brackets. Look at the load path and the picture changes. It carries the full landing impulse, then has to stay straight enough that the airframe does not twist on touchdown. It also sits in the airstream, so every surface that is not faired adds drag.
Material removal is where the trouble starts. An Inspire-class leg is often milled from 7075-T6 or 7050-T7451 plate because the strength-to-weight ratio is good and the part count drops. That means starting with a solid block and cutting away 70 to 90 percent of it. The remaining walls can be 1.5 to 2.5 mm thick.
Thin walls and long slender sections move under cutting force. A 2 mm wall on a 180 mm leg will deflect if the tool pushes too hard, and the deflection shows up as wall thickness variation, not as a visible gouge. That variation is what fails the fit check later.
So the first engineering question is not tolerance. It is stiffness during the cut. If the part cannot hold its own shape while being machined, no inspection plan will save it.
Material choice sets the machining window
Most landing gear parts for this class of airframe come out of high-strength aluminum. 6061-T6 is the forgiving option: it machines cleanly, welds if needed, and anodizes predictably. It gives up roughly 30 percent of the yield strength of 7075, so brackets tend to grow thicker.
7075-T6 and 7050-T7451 buy back that strength, but they are less tolerant of a roughing pass that generates heat. Chips need to clear fast, and a stalled cut will work-harden the surface. Once that happens, the next pass cuts through hard and soft bands and the tool wears unevenly.
Ti-6Al-4V appears when the part is small and stiffness matters more than mass. Titanium has low thermal conductivity, so heat stays at the edge. Cutting speeds drop to roughly a third of what aluminum allows, and tool life becomes the cost driver, not machine time.
Carbon-fiber-reinforced nylon suits non-structural fairings and covers. It is dimensionally stable after molding but behaves differently under machining: fibers pull, edges fray, and wall thickness under 2 mm gets risky.
The rule we apply: pick the material from the load case, then check whether the geometry can survive that material's cutting behavior. Reversing the order causes most of the rework we see.
Where three-axis stops and five-axis takes over
A landing gear leg usually has three or more functional faces that are not parallel to each other. A three-axis machine can reach each one, but only by re-fixturing the part between operations. Every re-fixture resets the datum, and each reset adds error that stacks.
Five-axis machining keeps the part in one setup and rotates the tool instead. Datum shift between a mounting bore and an angled pad drops from a stack of three errors to one. That is the real gain, not the surface finish.
Five-axis also allows a shorter, stiffer tool. Instead of reaching a deep pocket with a long end mill that chatters, the table tilts and the tool approaches at an angle. Shorter tool, less deflection, better wall control.
The limit is reach, not axis count. A leg longer than the machine travel cannot be done in one setup, no matter how many axes are available. For long sections we use machines with travel up to 4,000 × 400 × 150 mm, and beyond that the part is split or the operation is sequenced around a rotary table.
Slender bores and bearing seats are the other boundary. A bore with a depth-to-diameter ratio above 5 to 1 needs a boring cycle rather than an interpolated helix, or the bore will bell out at both ends.
Surface integrity and the fatigue budget
Aluminum landing gear parts fail from fatigue far more often than from static overload. Fatigue cracks start at stress risers: a tool mark, a scratch, a sharp internal corner, a burr left on a bore edge.
This is why surface finish is a structural variable here, not a cosmetic one. A milled surface at Ra 1.6–3.2 μm is acceptable on non-critical faces. Bores, fillets, and anything in the load path usually need Ra 0.8–1.6 μm, and sometimes Ra 0.2–0.8 μm after polishing.
Machining strategy matters as much as the finish number. Climb milling leaves a different residual stress pattern than conventional milling. A light finishing pass after roughing removes the damaged layer left by the heavy cut.
Sharp internal corners are the quiet killer. If a fillet radius is smaller than the tool nose radius in the drawing, the shop will either violate the fillet or leave a step. Both create a stress riser. Keep internal fillets at least as large as the largest tool that can reach the corner.
Bead blasting and tumbling help by rounding micro-edges, but they cannot fix a crack that has already started. Surface treatment goes before inspection, not after.
Fixtures and workholding decide the real tolerance
A drawing that says ±0.005 mm is a request. The achievable number depends on how the part is held. A thin-wall leg clamped in a vise will spring when released, and the measured dimension after unclamping can move by 0.05 mm or more.
The usual fix is a soft jaw machined to the part profile, plus support under the thin sections. For long legs we use a fixture plate with multiple support points and light clamping force rather than one hard clamp.
Stress relief between roughing and finishing is the second lever. Rough the part, let it sit, then finish. The internal stresses from the plate release, and the finishing pass cuts the geometry that actually ships.
Inspection has to mirror the same condition. Measuring a part while it is still clamped tells you about the fixture, not the part. Final inspection happens free-state, with a report available on request.
None of this is exotic. It is just the difference between a shop that owns five-axis machines and a shop that knows when not to use a hard clamp.
Which process fits which landing gear feature
Use this to pick the operation before quoting.
| Feature | Typical process | Why |
|---|---|---|
| Main leg, 3 angled faces | 5-axis, one setup | Datum stack stays at one error |
| Flat mounting bracket | 3-axis, two setups | Simple geometry, cheaper cycle |
| Bearing bore, D/d > 5 | Boring cycle on mill-turn | Interpolated helix bells the bore |
| Long leg over 1,000 mm | Split or rotary table | Machine travel becomes the limit |
| Thin fairing cover | 3-axis plus soft jaws | Light clamp force, no spring-back |
| Titanium clevis | 5-axis, low speed | Heat stays at the edge, tool life rules |
| Bore edge after machining | Deburr, then bead blast | Removes the stress riser first |
The takeaway
If the leg has multiple angled faces and a fatigue-critical bore, buy one five-axis setup even at a higher hourly rate. If it is a flat bracket with parallel faces, three-axis in two setups is the cheaper and equally accurate choice.
Questions engineers ask next
What wall thickness is too thin for machining?
Below about 1.5 mm in aluminum, deflection during the cut starts to dominate the tolerance budget. The number is not fixed; it depends on unsupported length and how the part is fixtured.
A 1.5 mm wall over 40 mm of support is workable. The same wall over 200 mm unsupported will move. Add ribs or reduce the unsupported span before tightening the tolerance.
Should the landing gear be one machined part or an assembly?
One part removes joints and fasteners, which removes stress risers and weight. It also raises the material buy-to-fly ratio and the machining time.
A single part makes sense when the load path is continuous and the geometry fits one machine setup. An assembly makes sense when the leg length exceeds machine travel or when different sections need different materials.
How does anodizing change the dimensions?
Type II clear anodizing builds roughly 5 to 10 μm per surface. Hardcoat builds more, and the growth is not perfectly uniform on edges and in bores.
For a bore with a tight fit, mask it or allow for the coating in the pre-plate dimension. Tell the shop which surfaces are functional before the finish is applied, not after.
What inspection data should come with the parts?
At minimum, a dimensional report covering the functional features and the material certificate. For fatigue-critical parts, add a surface finish measurement on the load-path fillets.
We inspect 100 percent of parts before shipment and can supply reports on request. If you need first-article data in a specific format, say so at quote time.
Can a prototype and a production run use the same process?
They should use the same process family, or the prototype teaches you the wrong lesson. If the prototype is machined from plate and production is die cast, the fatigue behavior and the surface finish will not match.
For low-volume airframe parts, staying with machined plate from prototype through a 10,000-part run is normal and keeps the geometry stable.
How do you handle confidentiality on a drone airframe design?
Uploads are handled as confidential and an NDA is available on request. We can restrict which engineers see the files and return or destroy tooling and fixtures at the end of the program.
If the design is export-controlled, tell us before files are shared so the handling path is set up correctly from the first exchange.
Send the drawing, get a machinability answer
Upload the leg or bracket model and we will return a quotation with a free DFM analysis within 12 hours, flagging thin walls, deep bores, and fillets that will not cut.
12-hour quote100% inspectionNDA on request
More from the shop floor
We publish setup notes, tooling trials and inspection data from the factory floor.











