
Milling and Drilling: How Each Cut Removes Metal
These two operations remove most of the metal in a machined part, and they fail in different ways. This guide covers the mechanics, the setup order, and the tolerance each process can hold. Read it before you release a drawing that mixes holes, pockets, and profiles.
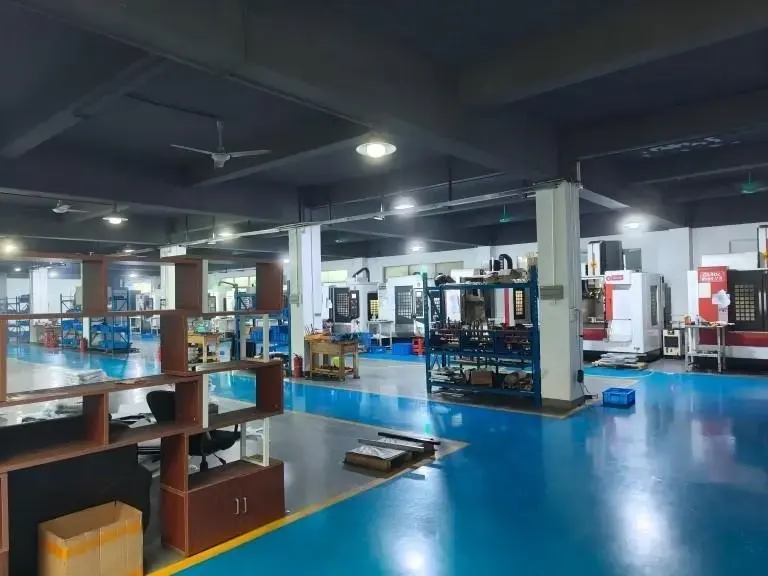
What separates milling and drilling
Both operations cut metal with a rotating tool. The difference is how the cutting edge meets the workpiece. A drill feeds along its own axis, so the flutes cut at the tip and along the margin. A milling cutter feeds sideways, so the teeth on the periphery shear material as the tool travels across the surface.
That single difference explains almost every rule that follows. A drill is efficient at making a round hole of fixed diameter and depth. It is poor at controlling wall position, because the drill can wander as it enters. A milling cutter is slower at clearing a deep hole's volume, but it places a feature within ±0.005 mm without a second setup.
Think of milling as a positioning process and drilling as a volume process. Milling holds XY location and wall straightness, and it can interpolate a bore to size. Drilling removes material fast along Z, and the resulting hole is only as straight as the drill's rigidity and the starting spot allow on that machine.
The practical split shows up in cycle time and in scrap. A part with forty M6 holes is drilled, not milled, or the spindle spends ten times longer on each feature. A part with a deep rectangular pocket is milled, because no drill can produce a square corner.
How the cutting edge sets your parameters
Every cut is a wedge pushing into metal until the material shears away. The tool needs enough feed per tooth to bite, or it rubs and work-hardens the surface. This is why a feed rate that is too low wears a carbide end mill faster than one that is slightly too high.
Surface speed depends on the material, not on the machine. Aluminium 6061 runs happily at 300–500 m/min with uncoated carbide. Stainless 316 and 17-4PH generate heat at the edge and want 80–150 m/min with a coated tool and flood coolant. Titanium TC4 (Ti-6Al-4V) sits near 40–60 m/min, and the tool must stay in cut to avoid rubbing.
Chip thinning changes the arithmetic. When a cutter engages less than half its diameter in a radial cut, the chip is thinner than the programmed feed per tooth. Feed per tooth must be raised to keep the real chip load in range, usually 0.05–0.15 mm per tooth for a 10 mm end mill in steel.
Heat is the limit, not force. Most tools are rigid enough for the cut; the failure mode is edge temperature. Coolant, air blast, or a high-pressure through-spindle supply decides how long the edge lasts on a given job.
When to drill first and when to mill the hole
Start holes with a spot drill or a stub drill, not a long jobber drill. A spot 3–5 mm deep and slightly larger than the following drill diameter gives the point something to follow and stops the walk that shows up as a 0.1 mm position error on the finished part.
A drilled hole is a roughing operation. Standard twist drills produce a hole 0.05–0.15 mm over nominal on the diameter, with a wall that follows the drill's drift. If the drawing calls for H7, drill 0.3–0.5 mm undersize and either ream or helical-mill the bore to final size.
Reaming suits a straight, round, fixed-diameter hole in a part that is already rigid. Helical milling suits a hole that needs a precise position, a controlled finish, or a diameter that changes between part numbers, because the same end mill can produce many sizes.
Depth changes the choice. Beyond four times the diameter, chip evacuation and drill drift dominate, and pecking cycles with full retract become necessary. Beyond eight times the diameter, a gundrill or a milled bore is usually the cheaper route than fighting a twist drill.
Setup order that keeps the part accurate
Sequence matters more than any single parameter. Each operation moves the part slightly, whether through clamp pressure, heat, or the residual stress released when a skin of material is removed. Operations that demand the tightest tolerance should run after the roughing that disturbs the part most.
Face and rough the stock first, then take the finishing passes on the datum faces. Drill all holes that share a pattern in one setup with one tool change order, so the position error is common to the whole pattern rather than accumulating hole by hole.
Pocket and profile milling usually comes after drilling, because the interrupted cut of a cross-hole wrecks a finishing pass on a wall. If a hole intersects a milled wall, drill first, then mill. If a milled wall is the datum, mill first, then drill into it.
On a 5-axis machine, tilt the part so the tool engages the surface at the intended angle. Cutting a floor with a ball nose at zero tilt leaves a step at the tool center. A 15–30° tilt moves the contact point off the center and improves the finish without changing the program geometry.
Where each process stops working
Aspect ratio is the first wall. Milling cutters deflect with length. A 6 mm end mill hanging 60 mm out of the holder will chatter long before it reaches the programmed depth. Reduce the axial depth of cut, use a shrink-fit holder, or switch to a smaller stepover with a shorter tool.
Thin walls are the second. When the wall is less than about 1 mm, the cutting force bends it away from the tool. The tool then cuts less than programmed and the wall springs back oversize. Light finishing passes with a sharp, positive-rake cutter and a supporting fixture are the usual answer.
Deep holes hit a third limit. Chip packing raises torque until the drill breaks. Peck cycles, through-coolant drills, and a drill with a polished flute help, but the honest limit for a twist drill in steel is around 10× diameter under good conditions.
Hardness sets the last boundary. Above roughly 45 HRC, carbide end mills with a suitable coating and reduced feed per tooth are needed. Above 60 HRC, milling turns into grinding territory and the cost curve bends sharply.
Choosing between drilling and milling a feature
Use this when a drawing has a round feature and no process is specified.
| Feature | Best process | Why | Watch for |
|---|---|---|---|
| Through hole, D < 10×D, H7 not required | Drill | Fastest metal removal along Z | Position error from drill walk |
| Hole needing ±0.005 mm position | Spot drill + drill + ream | Two tools share one setup datum | Reamer follows existing hole |
| Bore with changing diameters | Helical milling | One tool covers many sizes | Longer cycle than reaming |
| Square or keyed pocket | Mill | No drill produces a square corner | Tool radius left in corners |
| Deep hole, D > 10×D | Gundrill or milled bore | Chips clear, straightness holds | Cost per hole rises fast |
| Hole intersecting a milled wall | Drill first, then mill | Stops interrupted cuts on the finish pass | Order fixed in the program |
The short version
If the feature is a round hole inside normal depth and tolerance, drill it and ream only when the drawing demands it. If the feature carries a position tolerance, a non-round shape, or a diameter that will change, mill it and accept the longer cycle.
Questions engineers ask
Why does my drilled hole come out oversize?
Most twist drills cut 0.05–0.15 mm over nominal because the point geometry and the margin push outward. A drill that has been sharpened off-center will cut even larger and on a wandering axis.
If the drawing needs a tight diameter, drill undersize and finish with a reamer or a helical milling pass. Measuring the drill itself is worth doing before blaming the machine.
Can I mill a hole instead of drilling it?
Yes, and for a hole that needs precise position or a controlled finish it is often the better route. Helical interpolation with an end mill produces a round bore to size without a reamer, and the same tool can cover several diameters.
The cycle is longer than drilling because the tool orbits rather than plunges. For forty small holes in a plate, drilling still wins on time.
What tolerance can milling hold on a wall?
On a rigid setup with a sharp cutter, ±0.005 mm is achievable on a critical wall, and that is the tolerance we quote on production work. The limit is usually deflection and heat, not the control system.
A tall thin wall or a long reach tool will move that number. Shorten the tool, reduce the axial depth, and take a light finishing pass with a positive-rake cutter.
Does drilling need coolant?
In aluminium, air blast or mist is often enough and keeps the chips clear. In stainless, titanium, and hardened steel, flood coolant or through-tool coolant is standard practice because the edge temperature decides tool life.
Through-coolant drills help most past three times the diameter, where chips stop clearing on their own.
How does material choice change the parameters?
Surface speed changes by a factor of five or more between aluminium and titanium. Aluminium 6061 runs at 300–500 m/min, stainless 316 at 80–150 m/min, and TC4 titanium at 40–60 m/min.
Feed per tooth matters just as much. Too light a chip load rubs the surface and work-hardens stainless, which then destroys the next pass.
When should the part move to a 5-axis machine?
When a feature sits on a face the 3-axis setup cannot reach without a second fixture, or when one setup must produce the position tolerance across several faces. Tilting the part also lets a ball nose cutter engage off-center and improve the floor finish.
If the part is a plate with holes on one face, 3-axis work is faster and cheaper.
Send the drawing, get a process plan
Upload your file and we return a quotation with a DFM analysis within 12 hours. We machine from one prototype to 10,000+ part runs, with 100% inspection before shipment.
12-hour quote100% inspectionNDA on request
More from GreatLight
We publish setup notes, tooling trials and inspection data from the factory floor.











