
Complete Material Surface Treatment Process for CNC Parts
This is a working sequence for choosing and running a complete material surface treatment process on machined metal and plastic parts. It is written for design engineers and sourcing engineers who need to pick a finish, set the right callouts, and avoid rework. After reading it you can judge which treatment fits a part, which one does not, and what to inspect on arrival.
In this article
- 1
- 2
- 3
- 4
- 5
- 6
- 7
- 8
- 9
Key takeaways
What the complete material surface treatment process actually covers
Surface treatment is any controlled layer built on top of a base material so the part behaves differently at the skin than it does in the core. The base metal carries load. The surface carries corrosion, wear, friction, electrical contact and appearance. Treat them as two separate design problems, because they are solved with different parameters.
A complete material surface treatment process has four stages you cannot skip: substrate preparation, the treatment itself, post-treatment sealing or curing, and inspection. Plating shops that fail usually fail at stage one or stage four. A zinc layer over a smeared edge will blister in a salt spray cabinet. A hardcoat over trapped coolant residue will show white spots after sealing.
For machined parts the treatment choice is constrained by geometry long before it is constrained by chemistry. Deep pockets, blind holes, Ø1 mm cross-holes and 0.5 mm wall sections all behave badly in anodize baths and powder lines. If a part needs a Class A finish, design the drainage path and the racking point at the CAD stage.
The table below is the decision shortcut we use in quoting. It maps the failure mode you care about to the treatment that solves it, and flags the tolerance cost.
- 1Corrosion onlyBlack oxide with oil, zinc plating, or clear anodize on aluminium.
- 2Wear and abrasionHardcoat anodize, electroless nickel, or a hardened stainless substrate instead.
- 3Conductivity that must surviveConductive anodize or masked hardcoat, never standard anodize.
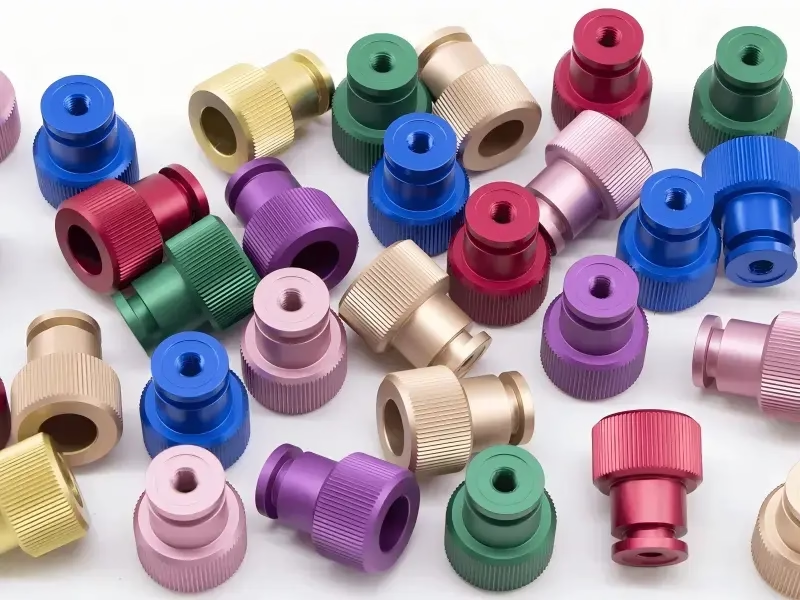
- 4Cosmetic class ABead blast plus anodize, or polish plus clear coat. Both need a coupon.
Matching the treatment to aluminium, steel, stainless and titanium
Aluminium is the easiest substrate to treat and the easiest to ruin. Alloy selection drives the color. 6061 and 6082 anodize to a clean silver-grey. 7075 and 2024 contain copper and go dark or muddy in clear anodize, and they pit badly if the bath is out of balance. If the customer expects a bright uniform finish across a mixed alloy assembly, specify one alloy for all visible parts.
Cast aluminium such as ADC12 has porosity and silicon that show through anodize as blotches. For die-cast housings, powder coating or painting hides porosity far better than anodize. If anodize is mandatory, expect a matte or textured look and approve a sample from the actual casting process, not from bar stock.
Carbon steel takes zinc, black oxide, phosphate or paint. 1018 and 1045 respond predictably to black oxide with a light oil. 4140 and 4340 are usually plated or coated instead, because black oxide on them offers little corrosion protection. Hydrogen embrittlement is a real risk on high-strength steels above roughly 32 HRC, so a bake step after plating is not optional.
Stainless is normally passivated rather than coated. 303 passivates less uniformly because of its sulfur content, and free-machining grades may show a slight dulling. 304, 316 and 17-4PH passivate cleanly. Titanium is different again: anodize on Ti-6Al-4V gives color and some wear resistance but is thinner and more process-sensitive than aluminium anodize. For titanium wear, specify a nitriding or PVD route and check the geometry first.
- 1One alloy per visible assemblyMixed 6061 and 7075 parts will not match after clear anodize.
- 2Bake high-strength steelAsk for a post-plate bake on parts above 32 HRC.
- 3Passivate, do not coat, stainlessCoating stainless usually hides a machining defect.
Surface preparation before any coating or plating
Preparation is where a finish is won or lost. Start at the machine. A 0.2 mm edge break on every external edge stops coating from pulling back at sharp corners. Burrs left in a Ø3 mm cross-hole will trap plating solution and bleed out later as a stain or a corrosion seed.
Degreasing is the next gate. Machined aluminium carries cutting fluid in every scratch and pore. Alkaline cleaning at 55–65 °C for 5–10 minutes, followed by two rinse stages, is a normal baseline. Hand-wiping with solvent is not a substitute. If a part is handled with bare hands after cleaning, skin oils will cause spotty anodize.
Mechanical prep sets the cosmetic baseline. Bead blasting with 120–180 grit glass beads produces a fine matte that hides light tool marks and gives a consistent anodize appearance. Tumbling rounds edges and polishes small parts in bulk. Brushing leaves directional lines that show under gloss coatings, so only use it when the design calls for a brushed look.
For stainless and titanium, remove the heat tint and the disturbed layer from machining before passivation. A light acid pickle or electropolish removes free iron and embedded tool material. Skipping this step leaves a surface that looks clean but rusts at the weld or the machined corner weeks later.
- 1Edge break0.2 mm nominal chamfer or radius on all external edges.
- 2Bead blast120–180 grit glass bead for a uniform matte at Ra 1.6–3.2 μm.
- 3No bare-hand handlingGloves after cleaning, or expect fingerprints in the finish.
Running the treatment: anodize, plating and coating parameters
Type II sulfuric anodize on aluminium typically runs at 15–20 °C with a current density around 1.5 A/dm² for 20–40 minutes, producing 5–25 μm. Type III hardcoat runs colder, near 0–5 °C, at higher current density, and takes longer. Cold bath temperature is what makes the layer dense and hard. A warm bath gives a soft, chalky coating that fails abrasion tests.
Electroless nickel is a chemical reduction, not an electrolytic one, so the layer thickness is nearly uniform on complex geometry. Mid-phosphorus baths deposit 10–25 μm in 60–90 minutes at 85–90 °C. This uniformity is why electroless nickel is the usual choice for valve bodies, manifolds and parts with blind features where throwing power matters.
Zinc plating on steel is usually 8–12 μm with a trivalent passivate. Trivalent systems are the current default because hexavalent chromium is restricted. A top seal adds corrosion resistance without adding much thickness. For threaded steel fasteners, watch the pitch diameter: 10 μm of zinc per side is enough to bind a tight Class 3 thread.
Powder coating is applied electrostatically and cured at 180–200 °C for 10–20 minutes. That cure temperature will anneal some aluminium tempers and distort thin sheet, so check the alloy and temper before specifying powder on a structural part. Liquid paint cures lower and is a better fit for heat-sensitive assemblies.
- 1Cold anodize bath0–5 °C for Type III. Warm baths give soft coatings.
- 2Electroless nickel throwing powerBest option for blind holes and internal channels.
- 3Thread allowanceSpecify 6g or larger on plated external threads.
Where the process goes wrong and how to catch it early
Color drift is the most common complaint and it is rarely the plater's fault alone. Bath age, alloy lot and blast media all shift the shade. The fix is procedural: keep a signed coupon from the first article, store it in a dark drawer, and compare every run against it under the same light. If you compare parts from two different alloys, you will chase a problem that does not exist.
Pitting and white spots on anodized aluminium almost always trace back to trapped solution or contamination. Blind holes without a drain path hold acid. A part racked in a position that traps air gets an unanodized patch. Add a 0.5 mm drain hole, or specify a racking orientation, and the defect disappears.
Coating thickness versus tolerance is the third recurring issue. A ±0.005 mm bore cannot accept 25 μm of hardcoat per side. The standard fix is to coat the part oversize and then ream or grind the bore back to size. Tell the shop which features must be cut after coating, and mark them clearly.
Adhesion failure on powder and paint shows up as flaking at edges and around holes. It usually means insufficient cleaning, a phosphate step that was skipped, or too thick a film. Keep powder at 60–100 μm, keep the pretreatment line in spec, and test with a cross-hatch or impact method on the first article.
- 1Keep a couponSigned first article, same light, every run.
- 2Add drain holes0.5 mm minimum in blind pockets that enter a bath.
- 3Coat oversize, then cutThe standard answer for tight bores under hardcoat.
Laser marking, engraving and masking in the same run
Laser marking is normally done after the coating, not before. On anodized aluminium, a fiber laser burns through the oxide layer and leaves a light or dark mark depending on the parameters. Character height below 1.5 mm gets inconsistent on a textured surface, so keep part numbers and traceability codes at 1.5 mm or larger.
If the mark must survive abrasion, mark after coating and verify it on the coupon. Marking before anodize buries the mark under the oxide and it fades. Marking before powder coating hides it completely. Sequence matters more than laser power.
Masking is a design decision, not a shop-floor afterthought. Threads, connector pins, grounding pads and bearing seats should be called out on the drawing with a mask note. Masking costs time, and unmasked threads will need chasing after plating. Both are cheaper than a rejected assembly.
For parts that combine a cosmetic surface with a functional one, split the drawing into zones. Zone A is decorative and gets the full finish. Zone B is functional and gets masked or machined after coating. This removes ambiguity at the shop and prevents arguments at incoming inspection.
- 1Mark after coating1.5 mm minimum character height for reliable contrast.
- 2Call out mask zonesThreads, pads, bearing seats, seal faces.
- 3Zone the drawingOne finish callout per zone, not one per part.
Step by step: running the complete material surface treatment process
Follow this order. Changing the sequence is the most common cause of adhesion failure and color mismatch.
- 11. Freeze the design and the alloyLock the alloy, temper and finish callout before quoting. Mixed alloys in one visible assembly will not match after anodize. Write the standard on the drawing, for example Type II clear anodize, 10 μm, Ra 1.6 μm max.
- 22. Machine with finish allowanceLeave 0.05–0.10 mm on any surface that will be ground or polished after coating. Break all edges at 0.2 mm. Do not leave heavy burrs in cross-holes.
- 33. Clean and degreaseAlkaline clean at 55–65 °C for 5–10 minutes, two rinses, then dry. Move parts with gloves. Any residual cutting fluid shows up as a blotch after anodize.
- 44. Prepare the surface textureBead blast with 120–180 grit glass bead for a uniform matte, or tumble and polish for a bright finish. Record the blast pressure and distance; they change the gloss.
- 55. Mask functional areasMask threads, grounding pads, press fits and seal faces. Use silicone plugs for holes and tape for pads. Confirm the masking plan on the drawing before the run starts.
- 66. Run the treatment to the parameter windowAnodize at 15–20 °C for Type II, 0–5 °C for Type III. Electroless nickel at 85–90 °C. Zinc at 8–12 μm with trivalent passivate. Log bath temperature, time and current density.
- 77. Seal, cure or bakeHot deionized water seal for anodize at 95–100 °C. Powder cure at 180–200 °C for 10–20 minutes. Post-plate bake on high-strength steel to reduce hydrogen embrittlement risk.
- 88. Inspect against the approved couponCheck thickness, color, Ra and coating adhesion. Compare side by side with the signed first-article coupon. Reject on color drift, pitting, orange peel or bare edges.
Treatment choice by failure mode and tolerance cost
Use this before you send an RFQ. If two rows apply, pick the one that protects the tightest feature.
| Failure mode | Recommended treatment | Typical layer | Tolerance impact |
|---|---|---|---|
| Atmospheric corrosion | Clear or black anodize on aluminium | 5–25 μm | Low, plan for 10 μm per side |
| Salt spray, steel parts | Zinc plating with trivalent passivate | 8–12 μm | Low on external threads |
| Sliding wear, aluminium | Hardcoat anodize, Type III | 25–50 μm | High, re-cut bores after coating |
| Wear plus tight tolerance | Electroless nickel, mid-phosphorus | 10–25 μm | Medium, uniform on complex shapes |
| Outdoor frames and covers | Powder coating, polyester | 60–100 μm | High, mask all mating faces |
| RF and grounding contact | Conductive anodize or masked hardcoat | 5–15 μm | Medium, verify contact resistance |
| Medical and food contact | Passivation plus electropolish, stainless | 1–5 μm removal | Low, improves Ra |
| Cosmetic, low volume | Bead blast plus clear anodize | 5–15 μm | Low, hides tool marks well |
Pick the treatment from the failure mode, then check the tolerance
Choose the finish that solves the failure you actually have, then verify it fits inside your tightest tolerance. If a coating cannot fit, coat oversize and cut the critical feature back.
Frequently asked questions
How much thickness does hardcoat anodize add per side?
Type III hardcoat typically builds 25–50 μm per side, and the layer grows about half into the substrate and half outward.
On a ±0.005 mm bore this is far more than the tolerance, so coat oversize and ream or grind the bore back after coating. Tell the shop which features to cut after coating.
Can I anodize a part that has both 6061 and 7075 sections?
You can, but the two alloys will not match in clear anodize. 7075 contains copper and goes dark or olive.
If the assembly is visible, use one alloy, or accept a two-tone look and approve a coupon before the run starts.
When should I choose electroless nickel over hardcoat?
Choose electroless nickel when the part has blind holes, internal channels or complex geometry that needs uniform thickness.
Choose hardcoat when the substrate is aluminium and you want maximum surface hardness with a lower weight penalty. Nickel adds density and cost.
How do I keep threads usable after zinc plating?
Specify a larger thread class such as 6g on external threads, or mask the threads entirely.
Zinc at 8–12 μm per side is enough to bind a tight Class 3 thread. Masking plus a light chase after plating is the safer route on small fasteners.
What surface finish should I call out before anodize?
Most cosmetic anodized parts sit at Ra 1.6–3.2 μm after bead blasting. That hides light tool marks and gives a uniform matte.
If you need Ra 0.8–1.6 μm or finer, polish before coating and expect a higher gloss, which makes small scratches more visible.
Is bead blasting enough preparation for stainless passivation?
No. Bead blasting can embed iron and media fragments in the surface, which then rust.
Use a light acid pickle or electropolish after blasting to remove free iron, then passivate. This matters most at welds and machined corners.
Send your drawing and finish callout
We review the drawing, flag any finish that conflicts with your tolerance, and return a quotation with a free DFM analysis within 12 hours.
12-hour quote100% inspection before shipmentNo minimum order quantityNDA on request
More from the shop floor
We publish setup notes, tooling trials and inspection data from the factory floor.











