This article, Mohou.comWillLearn with everyoneSeveral types of generalsThreadHow to transfer to a new reeland learnA fewThreadStorage Tips and Tricks
Notice:

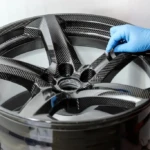
Rewinding may cause the entireThreadCracks appear (Source:helpilj via Reddit)
Start rewindingThreadBefore you do this, you should know that there are risks.
The manufacturer reports that inThreadFound on“Thousands of cracks”, especially around the center of the original source coil. However, cracks are not always immediately visible and some manufacturers have discovered problems during the printing process, asThreadBroken.
The root of the problem comes fromThreadThe manufacturing method has a lot to do with it. As part of the extrusion process, filament is typically wound directly onto a spool.3D Printing Solutions explains rewindingThreadwill changeThreadcurvature, thus introducing an additional constraint. Although very stiff materials are more likely to break during repackaging, they caution that the variety of polymer grades and formulations used to make the filaments makes it difficult to predict how the material will respond to repackaging.
All this means is that rewindingThreadThe decision should not be taken lightly. While some users swear by it and report no issues, others have experienced disaster.
A,ad hoc

You can use a drill or use your hands toThreadSpin from one reel to another (Source:Mashup Makers via YouTube)
So you’ve weighed the pros and cons and decided to try printing again. There are many ways to do this, including specialized machines, hand cranks, and other methods. If you prefer to choose the path that requires the least time and effort, this method only requires one exercise, one3D Printed Drill Attachment, One WhiteThreadcoils as well as for fixed sourcesThreadReel stuff. That’s it!
Once you have printed your drill accessory, you can continue:
1、Take the free end of the source coil and attach it to the empty coil.
2、Place the inner hole of the source coil on a round object so that it can spin without rolling.
3、Attach the accessory to the drill bit and insert it into the empty spool.
4、Start training slowly and gradually increase your speed.
5、Continue to spin in a controlled manner and move the empty spool back and forth to ensure the filament covers the entire width of the spool.
6、Once you have reached the last section of the old coilThreadcut it (from the old spool).
7、Place the new spoolThreadPull to tighten it.
8、Secure it so it doesn’t fall apart.
9、Let the newly wound spool sit for a few hours to allowThreadBend into place. This will ensure it doesn’t stretch out when you release the end!
two,manual

almost completely3D printed rewinding solution! (Source: Piitaya via Printables)
Compared to previous methods, thisThreadThe bobbin winder is a project in itself. This winding machine consists of two main components– one for the sourceThreadspool holder and a main drive holder for winding the spool–This winder offers enhanced features for a cleaner rewinding process.
The main drive frame has a reciprocating guide frame to ensure uniform distribution of filaments during the rewinding process. This produces a smoother, more consistent reel for your nextPrepare for your 3D printing project. Whether you prefer the convenience of a drill motor or the simplicity of a hand crank, this reel design accommodates both options.
The project is mainly composed ofBuilt from 3D printed parts, only a few additional components are required, namely a few 608 bearings, PTFE tubing and some optional Allen screws. Detailed documentation, instructions, and troubleshooting tips are available on the design’s Printables page.
how to use it

Well, cheaters can use a drill (source:Kiszely Miklós, from YouTube)
Here is a step-by-step guide on how to use this reprint program effectively:
1、Use double-sided tape to attach the drive carrier and secondary carrier to a flat surface for a temporary installation, or use screws to attach them to a flat surface for a more permanent installation.
2、sourceThreadSpools and empty spools are loaded onto their respective holders.
3、Place the source coilThreadto crossPTFE tube and attach it to the bottom of the drive spool.
4、Use a drilling motor orA 3D printed crank starts the winding process. If you choose the former, be sure to use a drill adapter.
5、Maintain a constant speed to ensure even distribution of filament on the spool.
6、Once arrived at the old coilThreadend, please cut it cleanly.
7、Place the new spoolThreadPull firmly to hold it securely.
8、WillThreadThe ends are tightened onto the drive spool to complete the winding process.
9、WithdrawThreadreel, and you are ready for your next reel.
three,automatic

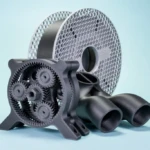
For those who want to take a break while rewinding the filament (source:CaptainSandwi via Printables)
This oneDIY Spinner is a project designed for experienced creators that offers a fully automated click and play experience once loaded. Equipped with an LCD screen, various parameters are easily accessible. Simply select the desired mode, leave for a few minutes, then come back to discoverThreadWas carefully repackaged.
The winder also has a guide frame to evenly distribute the thread during winding. The guide carriage is powered by its own stepper motor, making it more efficient and reliable than the carriage of a manual winder (which is the same as the carriage of the input drive).3D printed parts mechanically connected).
The project is mainly composed of3D printed components also require a series of electronic equipment, including stepper motors, LCD displays, Arduino Mega 2560 and RAMPS 1.4, etc. Additionally, you will need bolts for assembly and a wooden base to mount everything securely. Detailed documentation, instructions and videos can be found on its printed page.
how to use it

Let the stepper motors do all the work (Source:Doug Meek via YouTube)
Here is a summary of the steps to complete this reprinting procedure after assembly:
1、OpenTurn on the Respooler device and press the selection button once to enter the menu. Go to and select “Rewinder”.
2、according to“Check spool size” and follow the on-screen instructions to load filament onto the rewinder. Once loaded, press the button again and the rewinder will automatically calibrate the spool size.
3、Then select from the menu“Tension coil”. Here you will find three options for tensioning the spool: low speed 1.5 turns, normal speed 5 turns and high speed 2 turns. Start with the normal speed option, but feel free to try the other two options if necessary. Additionally, you can adjust the winding speed and release the spool from this menu.
4、Once you are happy with the speed, select the top arrow button to access the main menu.
5、choose“Trial Wind 3 ROWS” to run the winding test process. This allows you to identify any potential problems with the reprint procedure before doing a full rewind.
6、Finally, select“Start Full Wind” and let the repooler work its magic. Sit back and relax while the winder completes the winding process.
7、When the old spool is almost used up, cleanly cut off the restThread。
8、Place the new spoolThreadPull firmly to ensure the wrap is tight and secure.
9、WillThreadThe ends are tightened onto the drive spool to complete the winding process.
Four,hint

There are many different rewinding equipment available, including high-quality automated options (source:IC3D printers via X)
Whichever method you use to rewindThreadbe sure to handle it correctlyThreadand don’t pull hard. This is especially true when working with flexible filaments, but it’s worth remembering for all filaments: too much tension will cause the filament to stretch. this can changeThreaddiameter, causing printing problems, including paper jams.
Also, before printing with a new spool, remember that you just hitThreadand possibly rewind it in the open room. This means that yourThreadMost likely exposed to some moisture, so you will need to dry before printingThread-Particularly highly hygroscopic materials.
Daguang focuses on providing solutions such as precision CNC machining services (3-axis, 4-axis, 5-axis machining), CNC milling, 3D printing and rapid prototyping services.