The process of curing 3D printing resin involves exposing a liquid solution to UV light to activate a chemical reaction that causes it to harden. This process occurs layer by layer during the printing process to create a 3D structure. But after you have successfully printed your model and washed off the excess resin, you will need to do another round of curing the print to make it a strong and durable final product, as the printer will only partially cure the model.
Post-print curing is a necessary step in resin printing, as is removing supports and leveling the bed. If this step is omitted, the printed product will be weak and unsatisfactory. To get the most out of a high-resolution resin printer, you need to get used to curing your prints.
In this article, Mohou.com will learn with you the different curing time variables and different curing methods in order to achieve the perfect curing effect of 3D printing resin.
Things to note
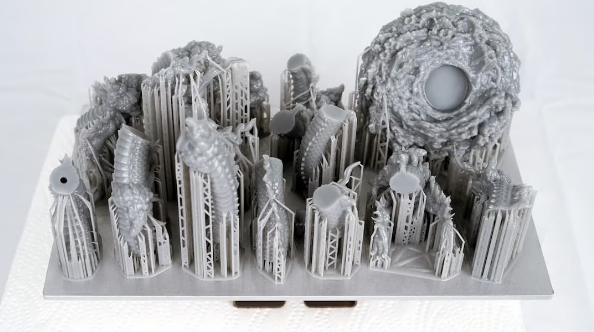
Same model, different curing times (Source: All3DP)
When trying to determine how long a model should be cured, there are four important factors to consider.
Resin type
There are many brands of resin on the market, each with its own characteristics. Taking Anycubic Resin as an example, the exposure time of Standard Resin+ is 1.5-9 seconds, while that of UV Tough Resin requires 1.5-10 seconds. A longer exposure time may indicate that the resin requires more energy to cure, which means you may also need a longer cure time.
Heavy-duty, high-performance resins generally require longer cure times than standard mixes, but the optimal settings are slightly different for each bottle of resin. Your best bet is to check the resin supplier’s website for the recommended exposure and cure times for the resin being used.
Resin color
It is also important to consider the color of the resin as it will affect the curing time and exposure time. Generally speaking, light colored resins cure faster than dark colored resins. The darker the resin, the greater the pigment’s ability to absorb UV rays, rather than the resin itself. Therefore, we should always check the manufacturer’s website for the recommended exposure and curing times for each bottle of resin.
Model size
Small to large resin prints (Source: Peopoly via Facebook)
Bigger is not always better, and the same goes for curing 3D resin printed products. The curing time of medium to large models can be up to 10 times longer than regular miniatures because the UV light affects a much larger area.
Hollow models also cure much faster than 50% filled models. Models with wall thicknesses greater than 2mm may experience insufficient internal curing, causing the resin to remain liquid and eventually leak from the model in liquid form. It is therefore important to use drainage holes correctly when slicing.
Curing method
Different resin curing methods have advantages and disadvantages. Depending on the method chosen, the time required for the model to harden can vary from a few minutes to a few hours.
What is a good curing method for one model may not be suitable for another model. For example, a model with many cavities and details may require longer cure times than a simple, flat model. It’s important to consider your options based on each printing situation.
1. Solar UV curing
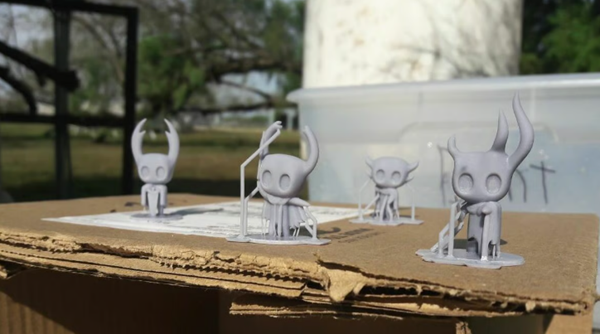
The resin print is left in the sun to harden (Credit: Opie Cain via All3DP)
Since UV rays can activate the resin as it cures, you may be wondering if this includes UV rays from the sun. This assumption is correct. If you have no other options, you can use sunlight as a “free” method of curing your resin prints.
The downside is that the yield is not very high. Leaving resin prints in the sun will eventually cure them, but the question is: how long will it take? You will find that you may need to leave the model out for about two hours before it is completely cured. This only applies to the side of the model exposed to the sun. To harden the other half, you need to turn the model over and let it sit for another two hours.
However, these figures are based on ideal sunlight conditions, which are unfortunately less reliable. So far, we’ve assumed that you can tolerate direct sunlight for up to four hours. When considering solar curing times, you need to consider weather, clouds, and even your geographic location. You may also want to find a location where the model will not be blown away by wind and dust during the curing process.
advantage
Free: Sunshine does not charge for services.
No space limitations: you can process as many models as you have window space.
Avoid over-curing: You have a long window before you risk over-curing.
default
Ineffective: Models take several hours to cure properly.
Unreliable: Weather and clouds can disappoint you.
To check: you should remember to rotate the model frequently to take care of all sides.
2. DIY curing box

One of the other common methods is to make your own curing box. All you need is a box or jar with a lid, some foil, and a UV lamp (the same wavelength as the resin you’re using). Some kits also include a solar-powered turntable, which will significantly reduce the time and effort needed to cure your prints.
With a curing box, you can do most of the curing in 6-10 minutes, with smaller models completed in 3 minutes and larger models taking around 12 minutes. During this time, you should make sure to flip the print once to ensure even curing on the top and bottom surfaces.
advantage
Affordable price: the price is relatively inexpensive and the kit can be selected individually
Scalable: DIY means you can adjust the size of your curing station to suit your needs.
Proper Curing Time: Ranges from 3 to 8 minutes, depending on your setup.
default
Tedious Build: You can expect it to take around 20-40 minutes to create the simplest project.
Results may vary: Your cure time will vary depending on the type of film you use, the size of your box, and the quality of your UV lamp.
Troubleshooting: When you encounter a problem, whether it’s technical issues or cracked models, you’ll be on your own to fix it.
3. Curing station
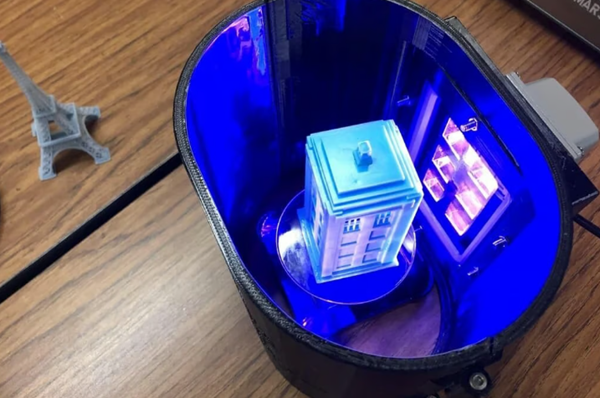
Convenient curing station (Source: Melisa via Amazon)
Nothing beats a dedicated curing station. The time savings and convenient options offered by a curing station more than justify its price, especially if you plan to print with resin on a continuous basis.
The key here is consistency. When using a dedicated curing station, you can expect consistent results, with similarly sized models requiring the same curing time. Many modern curing stations choose to install UV lamps on the top, sides and bottom of the cavity to completely cover the model, eliminating the hassle of flipping and turning during the curing process.
Most curing stations, like Anycubic Wash & Cure Plus, have additional features such as a timer that automatically turns off the UV lamp once curing is complete. No need to mess with the curing station to avoid over-curing!
A good curing station can fully cure a miniature model in about 2 minutes, larger models will take 5-10 minutes, depending on the size of the model. Speaking of which, think carefully about the size of the model you want to print in order to get the right size curing table.
advantage
Consistency: The curing station consistently produces the same results.
CONVENIENCE: Timers and additional light strips make all the difference.
Build quality: These machines last much longer than cardboard ones.
default
Cost: relatively high cost
Space: Some machines have larger footprints. We have to make room for them.
Size: Unlike DIY, you cannot change the available curing space once you purchase the machine, so consider the size of the machine carefully.
How do I know if the resin print has been cured?
Uncured prints appear glossy rather than matte (Source: All3DP)
Now that we’ve learned about the different curing methods and (hopefully) chosen the one, the next step is to determine when our print will actually be cured.
It is essential that resin prints are fully cured, as resin is a toxic material and should never be handled without proper protective equipment. This carries many health risks, not the least of which is skin irritation. The hardened resin parts allow you to handle them safely, just like other plastic objects.
Not completely healed
Prints that are not fully cured have a glossy appearance, rough texture, and resinous odor. If you can scratch or damage the surface of the model with your fingernail, this is a clear sign that the model is not completely cured. Simply apply the UV light for a few more minutes.
Perfect healing
A perfectly cured print will have a matte finish and become harder. It may still be slightly stretchy, but there shouldn’t be much warping. For smaller models, a good indicator is to drop it on a hard surface. They should make the sound of dice clinking. If it makes a softer knocking noise, it may need more curing time.
Too healed
It’s worth noting that you can also over-cure your prints. This will cause the print to be brittle and crack on the exterior surface. In this case, there is not much you can do. It is therefore important to find the right curing time for printing.
Daguang focuses on providing solutions such as precision CNC machining services (3-axis, 4-axis, 5-axis machining), CNC milling, 3D printing and rapid prototyping services.

